Vure System Overview

At it's heart, Vure consists of various modules, which are specifically designed to help streamline your viticultural workflows. These modules include:

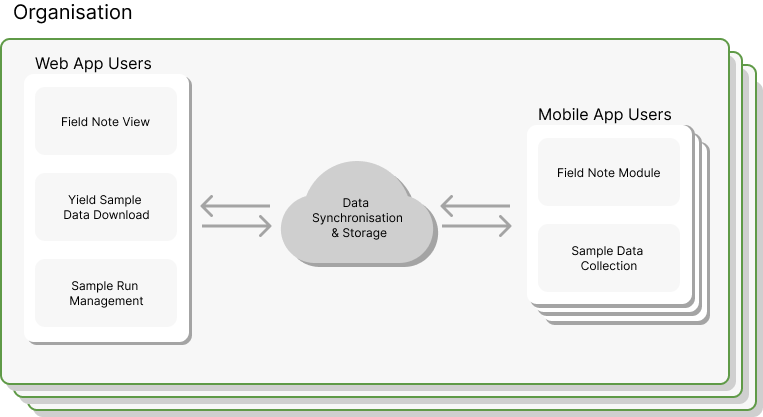
System functionality is spread across a mobile app (iOS, Android) and a web app. These systems are tied together through the internet, which allows them to synchronise data seamlessly.

User Permissions

User permissions are split into two roles: Administrators, and Samplers. Each user type has access to different parts of the web and mobile apps:
User permissions / roles can be set by Administrators, and is accessible via (Your User Name) -> Organisation Menu.

Data Synchronisation

Pushing Data from Devices

Data from both the web app and mobile apps are always synced with one another when an internet connection is available. Data from the web app - such as new sample regime definitions* - will be pushed to mobile devices, and sample runs or in-field notes will be pushed to other devices in an organisation.

*sample regime settings are set at the time of adding a sample run, and then preserved. Any consequent changes in regime will only register for subsequent sample runs

Mobile App Sync on Login

On first login, the system will do a 'full sync' for your organisation, getting all notes, blocks and sample runs, which depending on the speed of your internet connection, may take several minutes.

Multi-User Synchronisation

Vure has been designed to allow multiple users to collect data together at the same time - such as collecting yield sample data in the same block, at the same time. Vure will automatically merge and synchronise any collected data once an internet connection is available for all users.

Yield Data Collection - Getting Started

At the core of collection your yield data are a few concepts that are worth getting acquainted with:

We'll cover each point in more detail in the following section.

Setting Up Sample Regimes

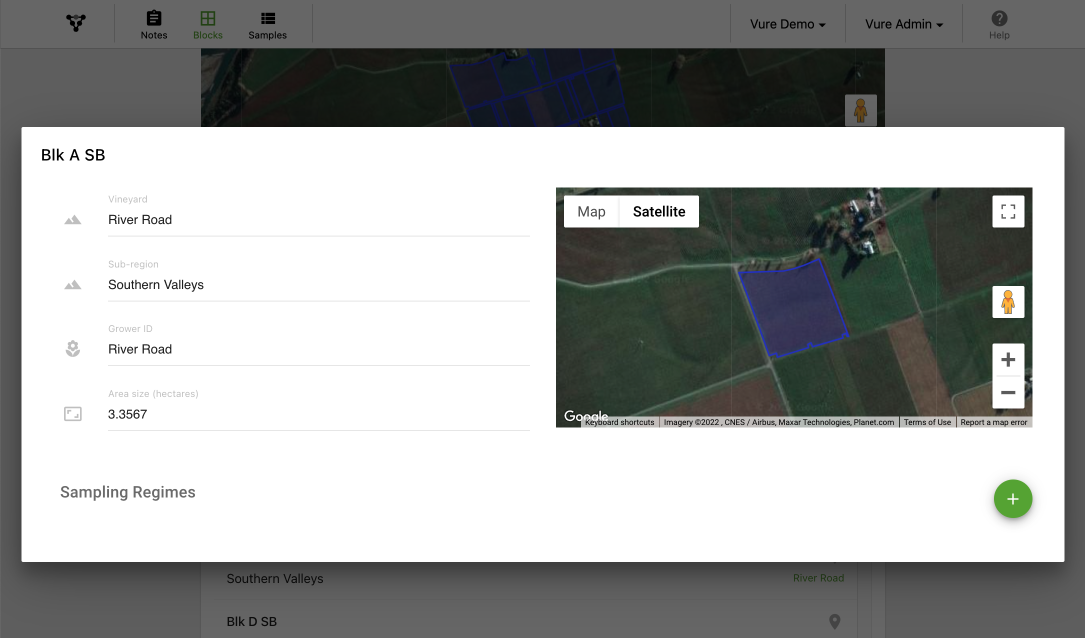
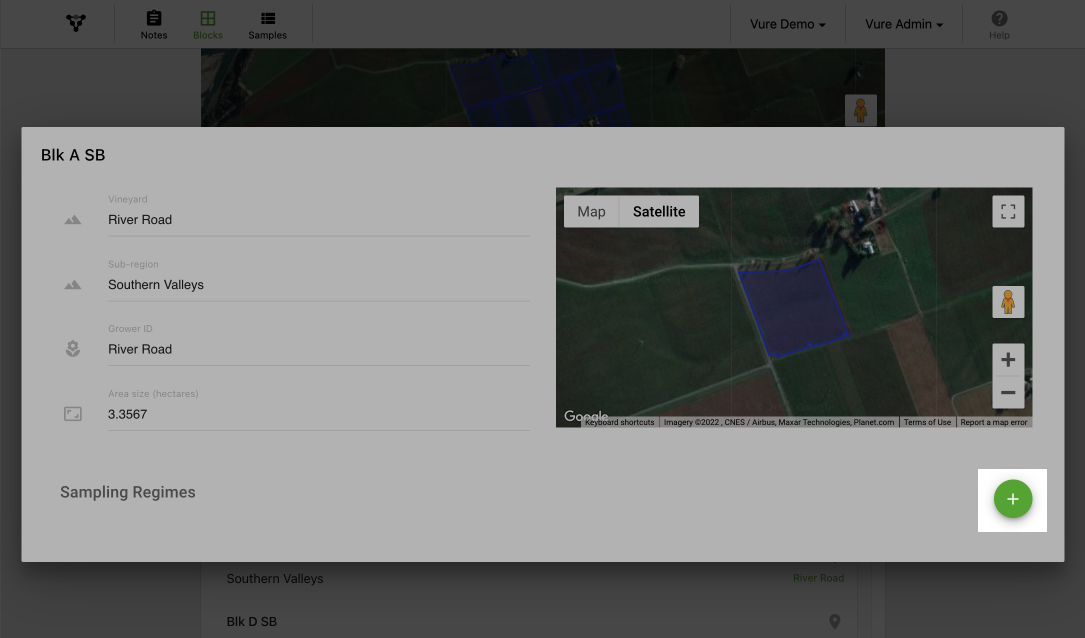
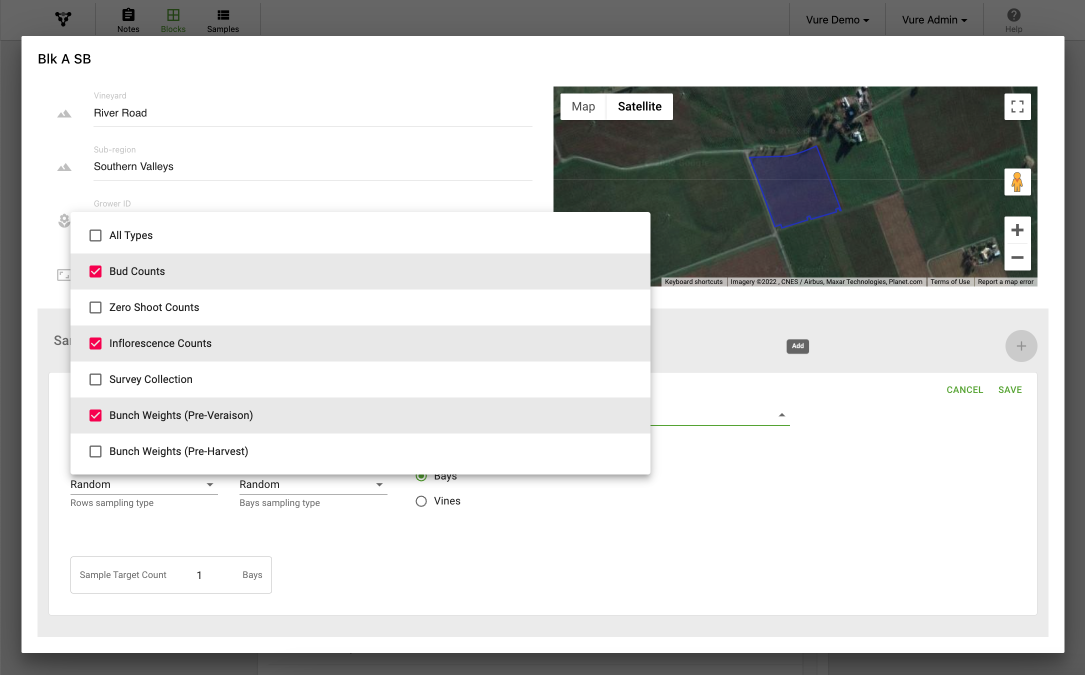
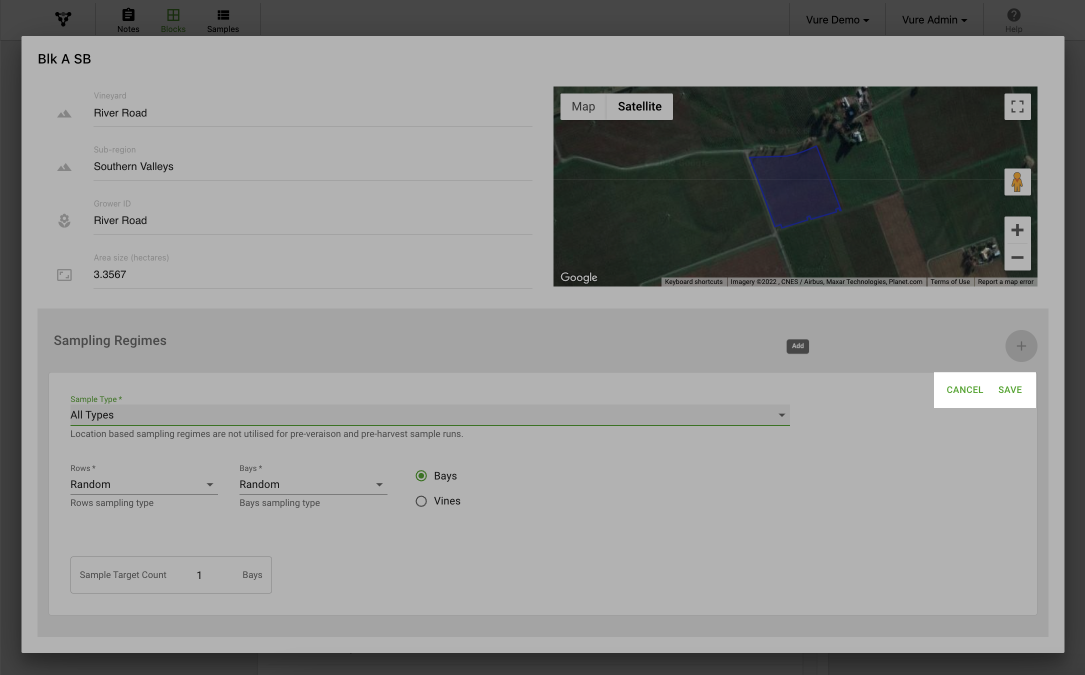
Sample regimes apply to individual blocks for which you want to collect data for (sample points or block based). Sample Regimes come in a variety of different forms, to help you collect data how you want, while adding row bay/vine as well as GPS geolocation data to each point.

Here's how to create a new Sample Regime for a block:

Log into the Vure web app

Choose the organisation that has the block of interest in it.

Click on Blocks in the top menu.

A list of available blocks for your organisation will appear

Click on the block you'd like to create regimes for. A window will pop up.

Click on the green (+) button

In the "Sample Type" drop down, select for which sample type you want.

If you want the same Sample Regime to apply to all sample run types, then you can select All Types.

Sample regimes define where you go to collect data, and this in turn is broken down into rows and bays/vines

Types of Sample Regimes

The above regime types can be used in combination with one another, as follows:
For the Prescribed Rows - Prescribed Bays/Vines item above, it's important to note that you can also specify the direction which people enter the row from  (North, North East, East, South East, etc), to make it easier to count bays / vines.

Default Sample Regimes

If you don't want to create a custom regime, then it will default to a freeform data collection methodology, that doesn't restrict how you can enter data in any way.

Click Save

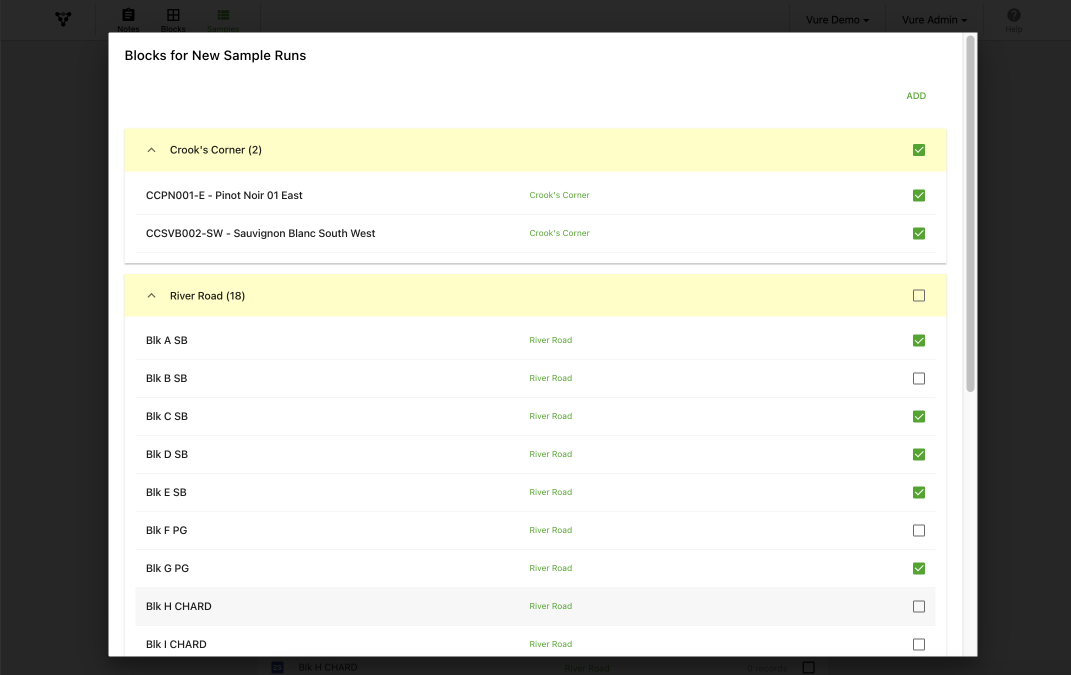
You're now ready to create sample runs using your newly created sample regimes.

Yield Sample Data Collection - Creating Sample Runs

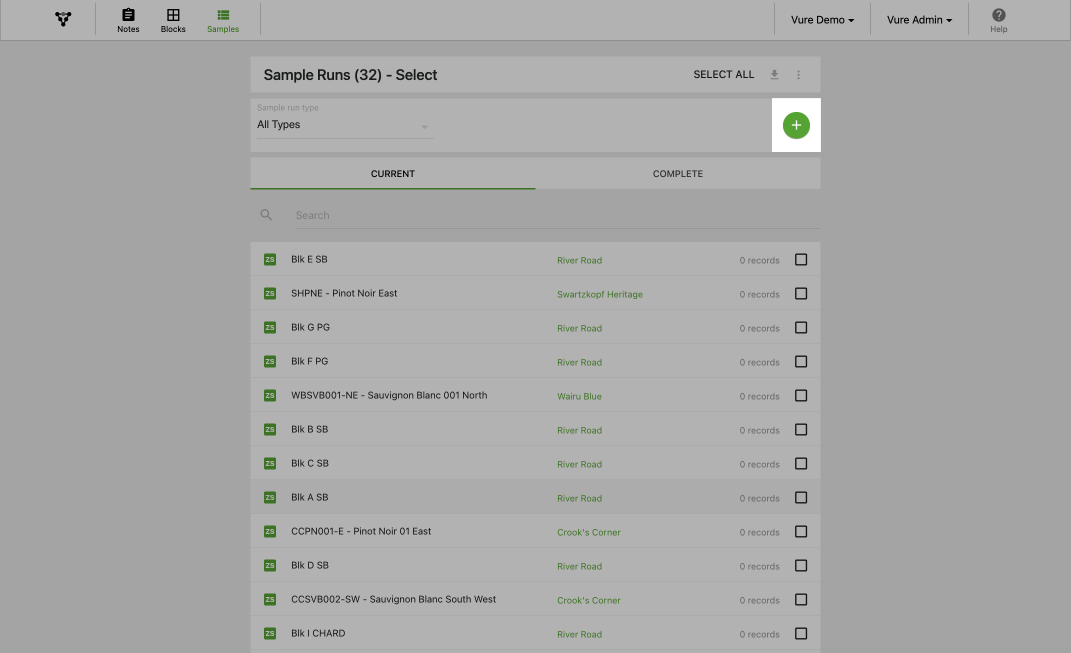
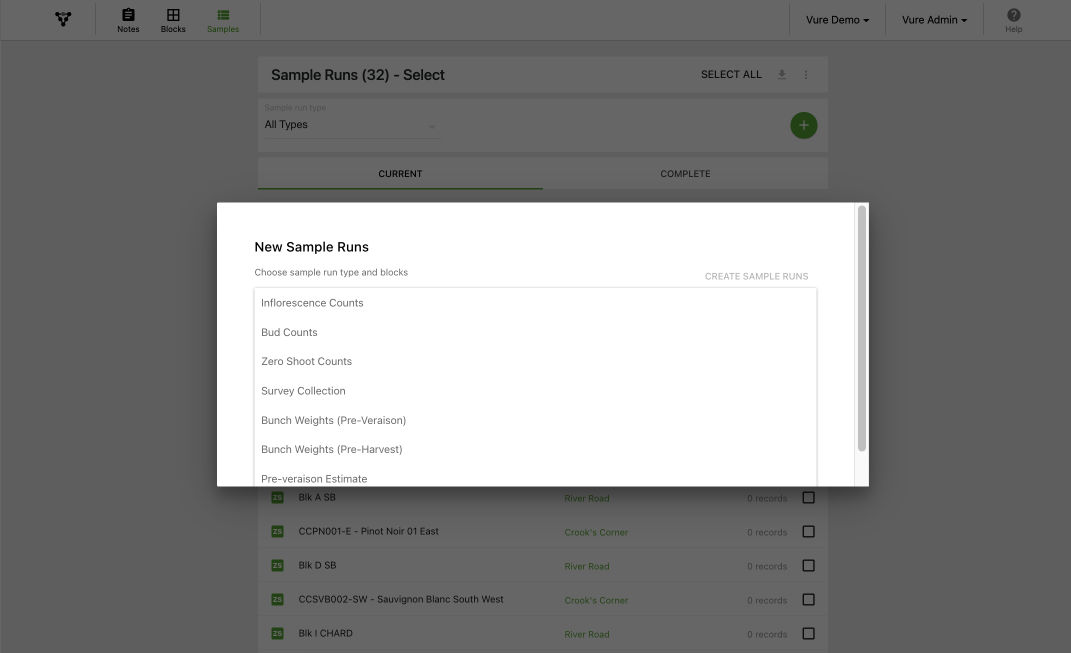
Now that you've created sample regimes definition where to collect sample data from, you're ready to create Sample Runs.

Sample runs can be created in-field via the mobile apps, or from the office via the web app.

Lets look at how to do this both ways.

Web App Sample Run Creation

Click on Samples in the top menu.

A list of Current & Completed sample runs will appear

Click on the green (+) button

Choose the sample run type to create

Click on Blocks and choose the blocks to create sample runs for, then click 'Add'

You can tick the box next to the vineyard name to select or deselect all blocks in that vineyard.

Review and click 'CREATE SAMPLE RUNS'

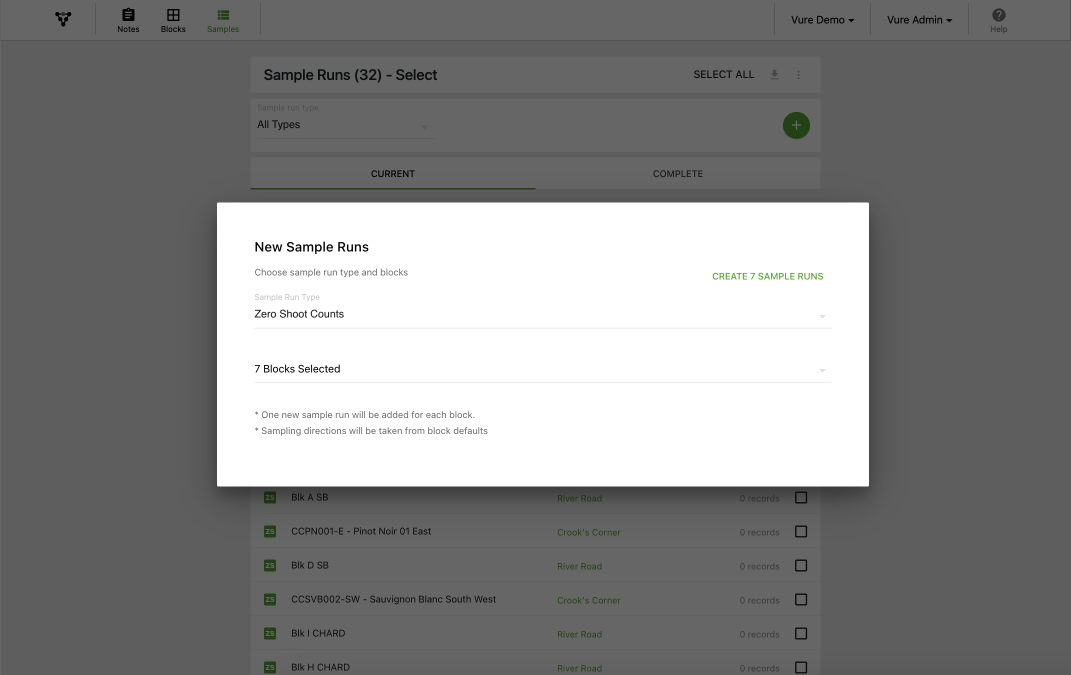
The newly created sample runs will sync to all organisation devices when they are connected to the internet.

Mobile App Sample Run Creation

In this example we'll look at creating sample runs via the Android mobile app - however the process is exactly the same for iOS devices.

Log into the mobile app

Click on the hamburger menu icon

Select Sample runs from the menu

Tap on the green (+) sign

Tap on 'Sample Run Type' and select an option

Tap on 'Select Blocks' and choose the blocks you want

Tap on the 'Add' button

Newly created sample runs will sync to all organisation devices

Sample Data Collection with Vure Mobile Apps

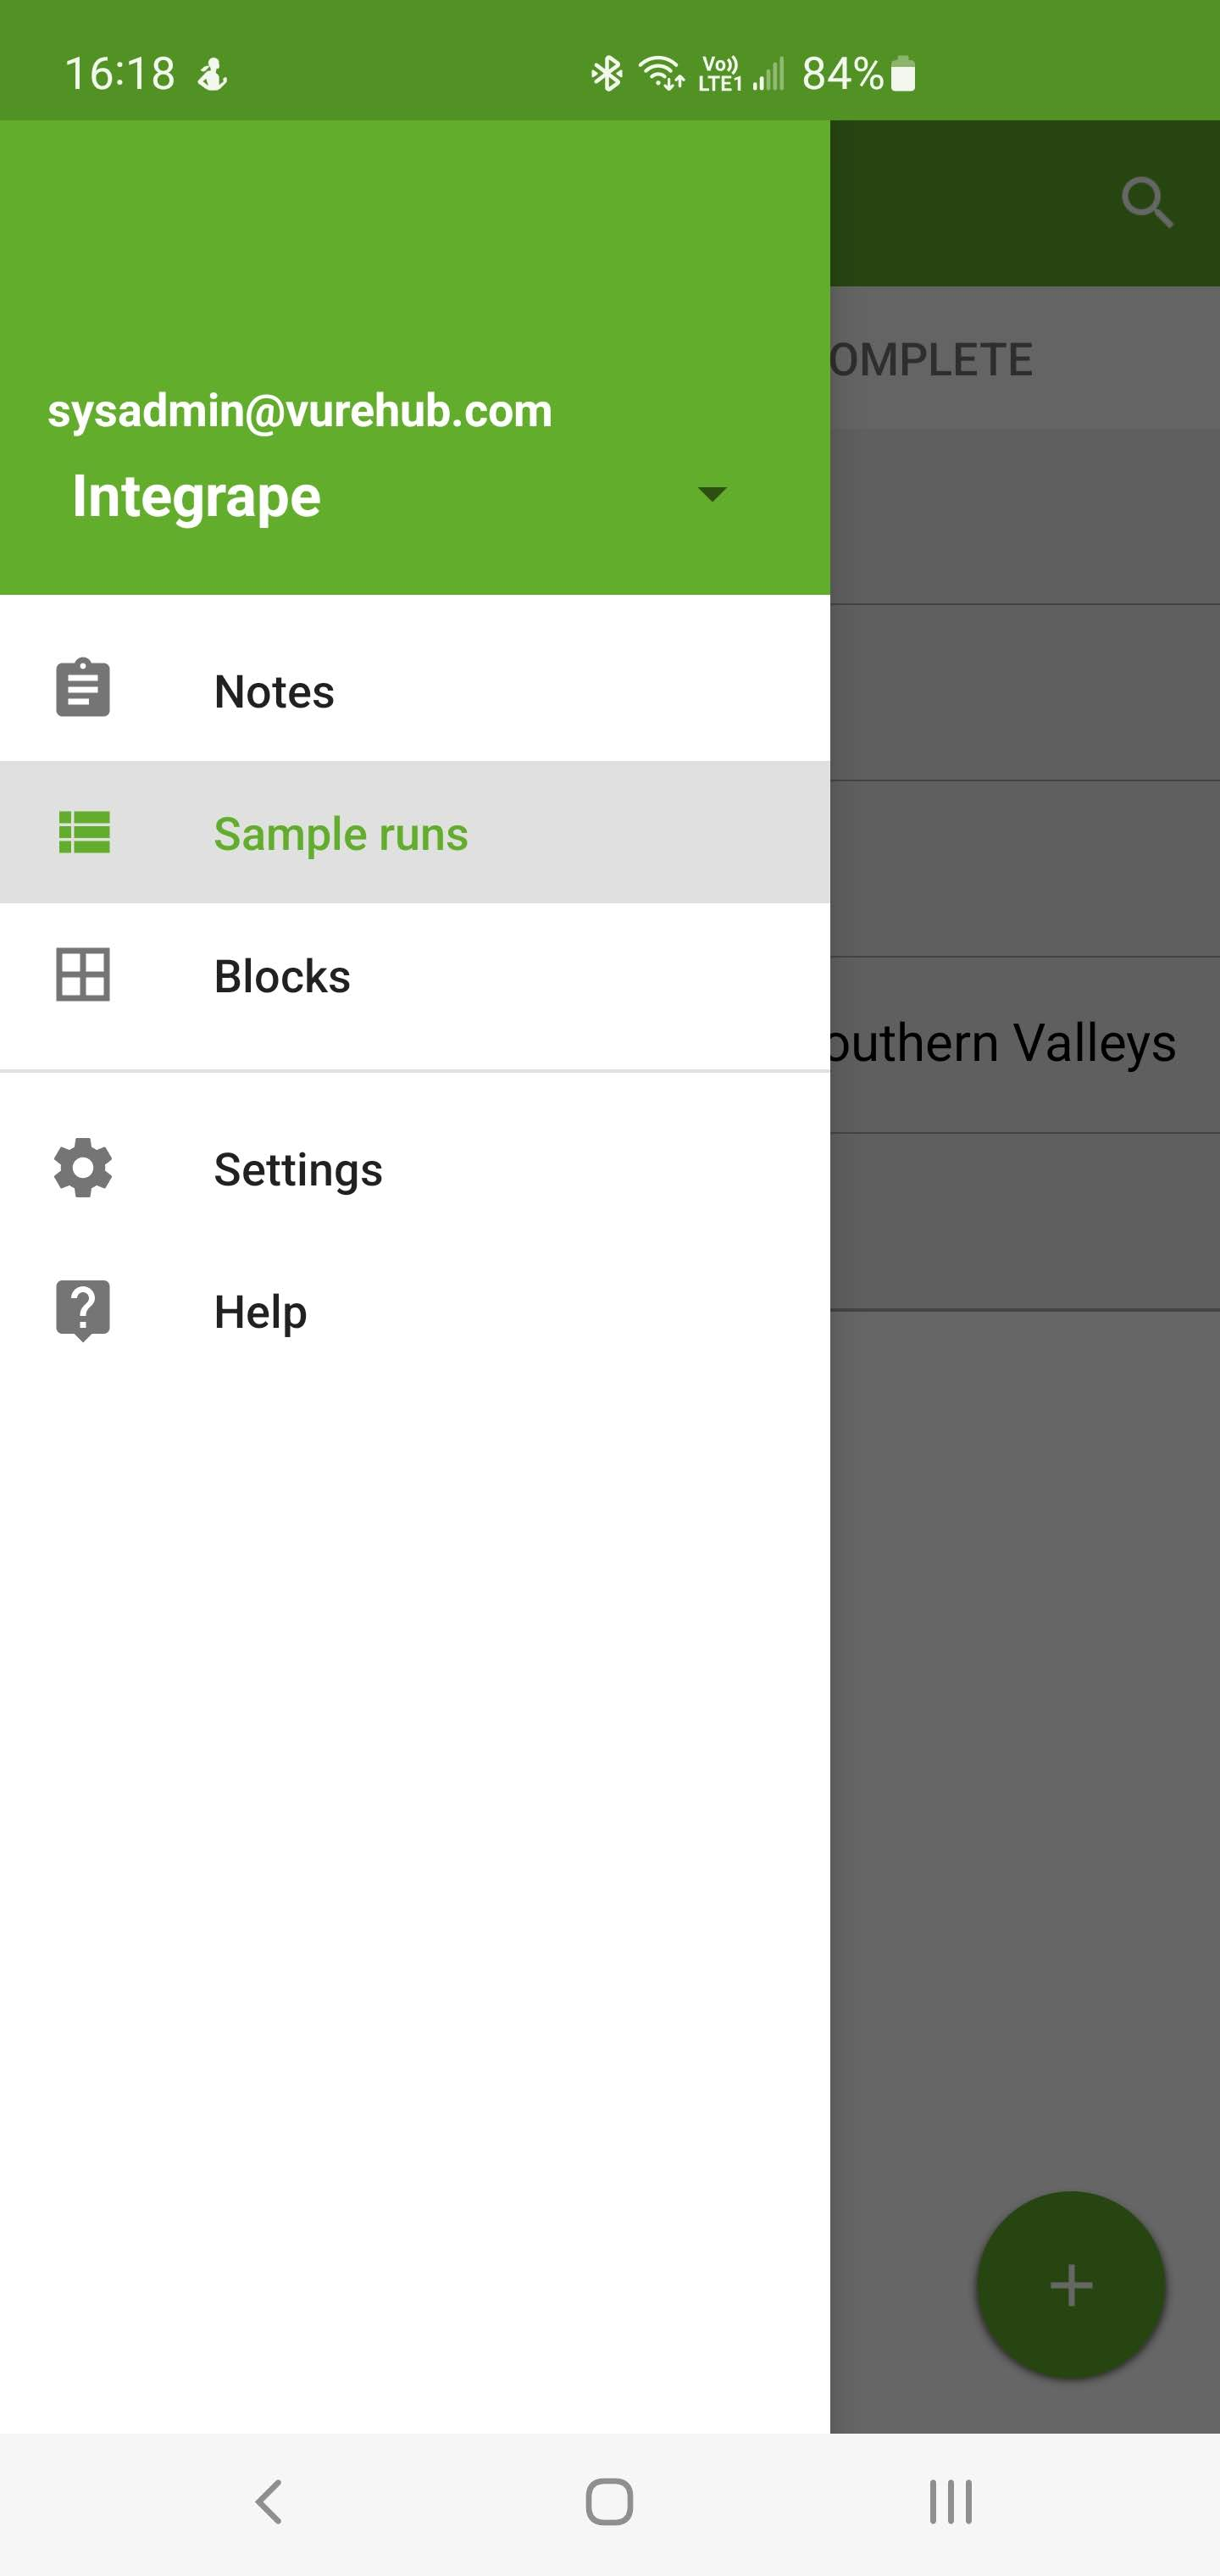
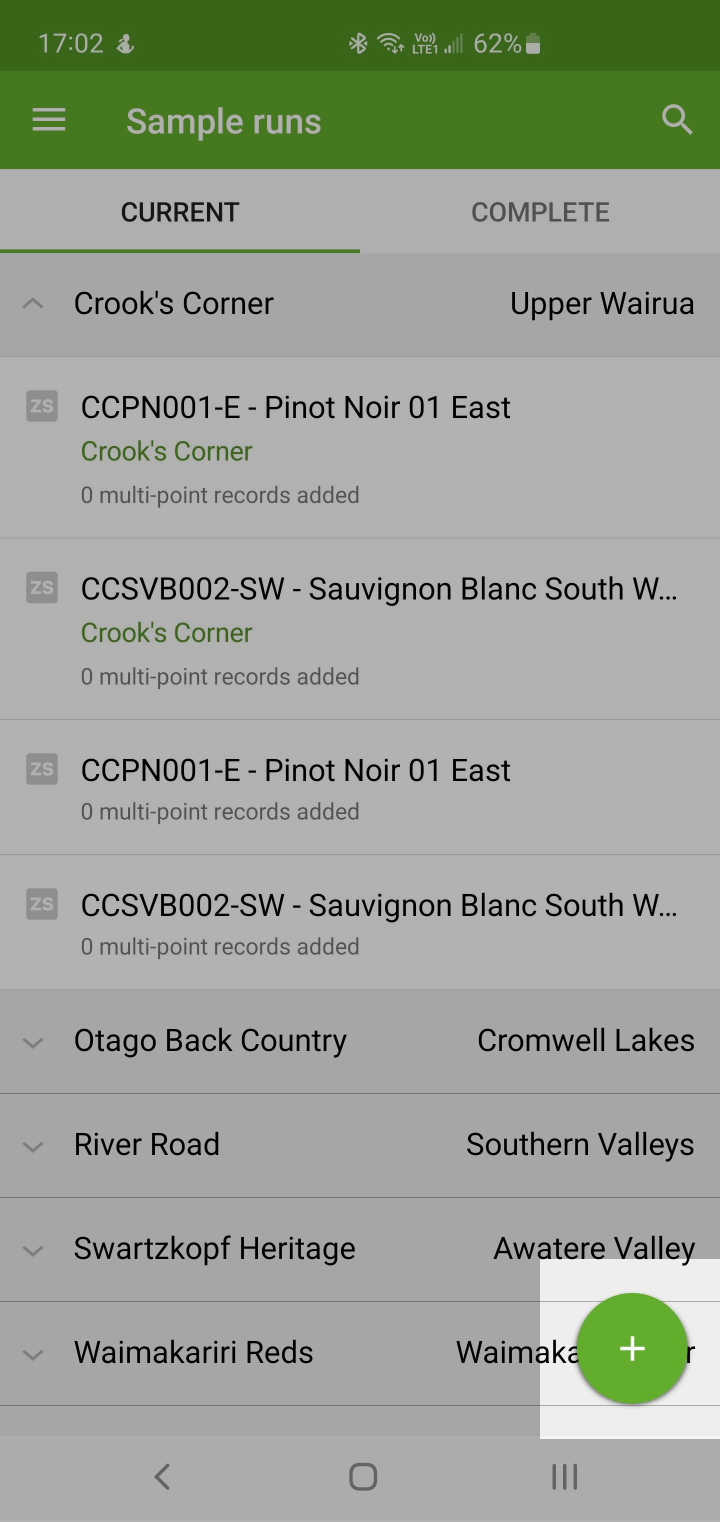
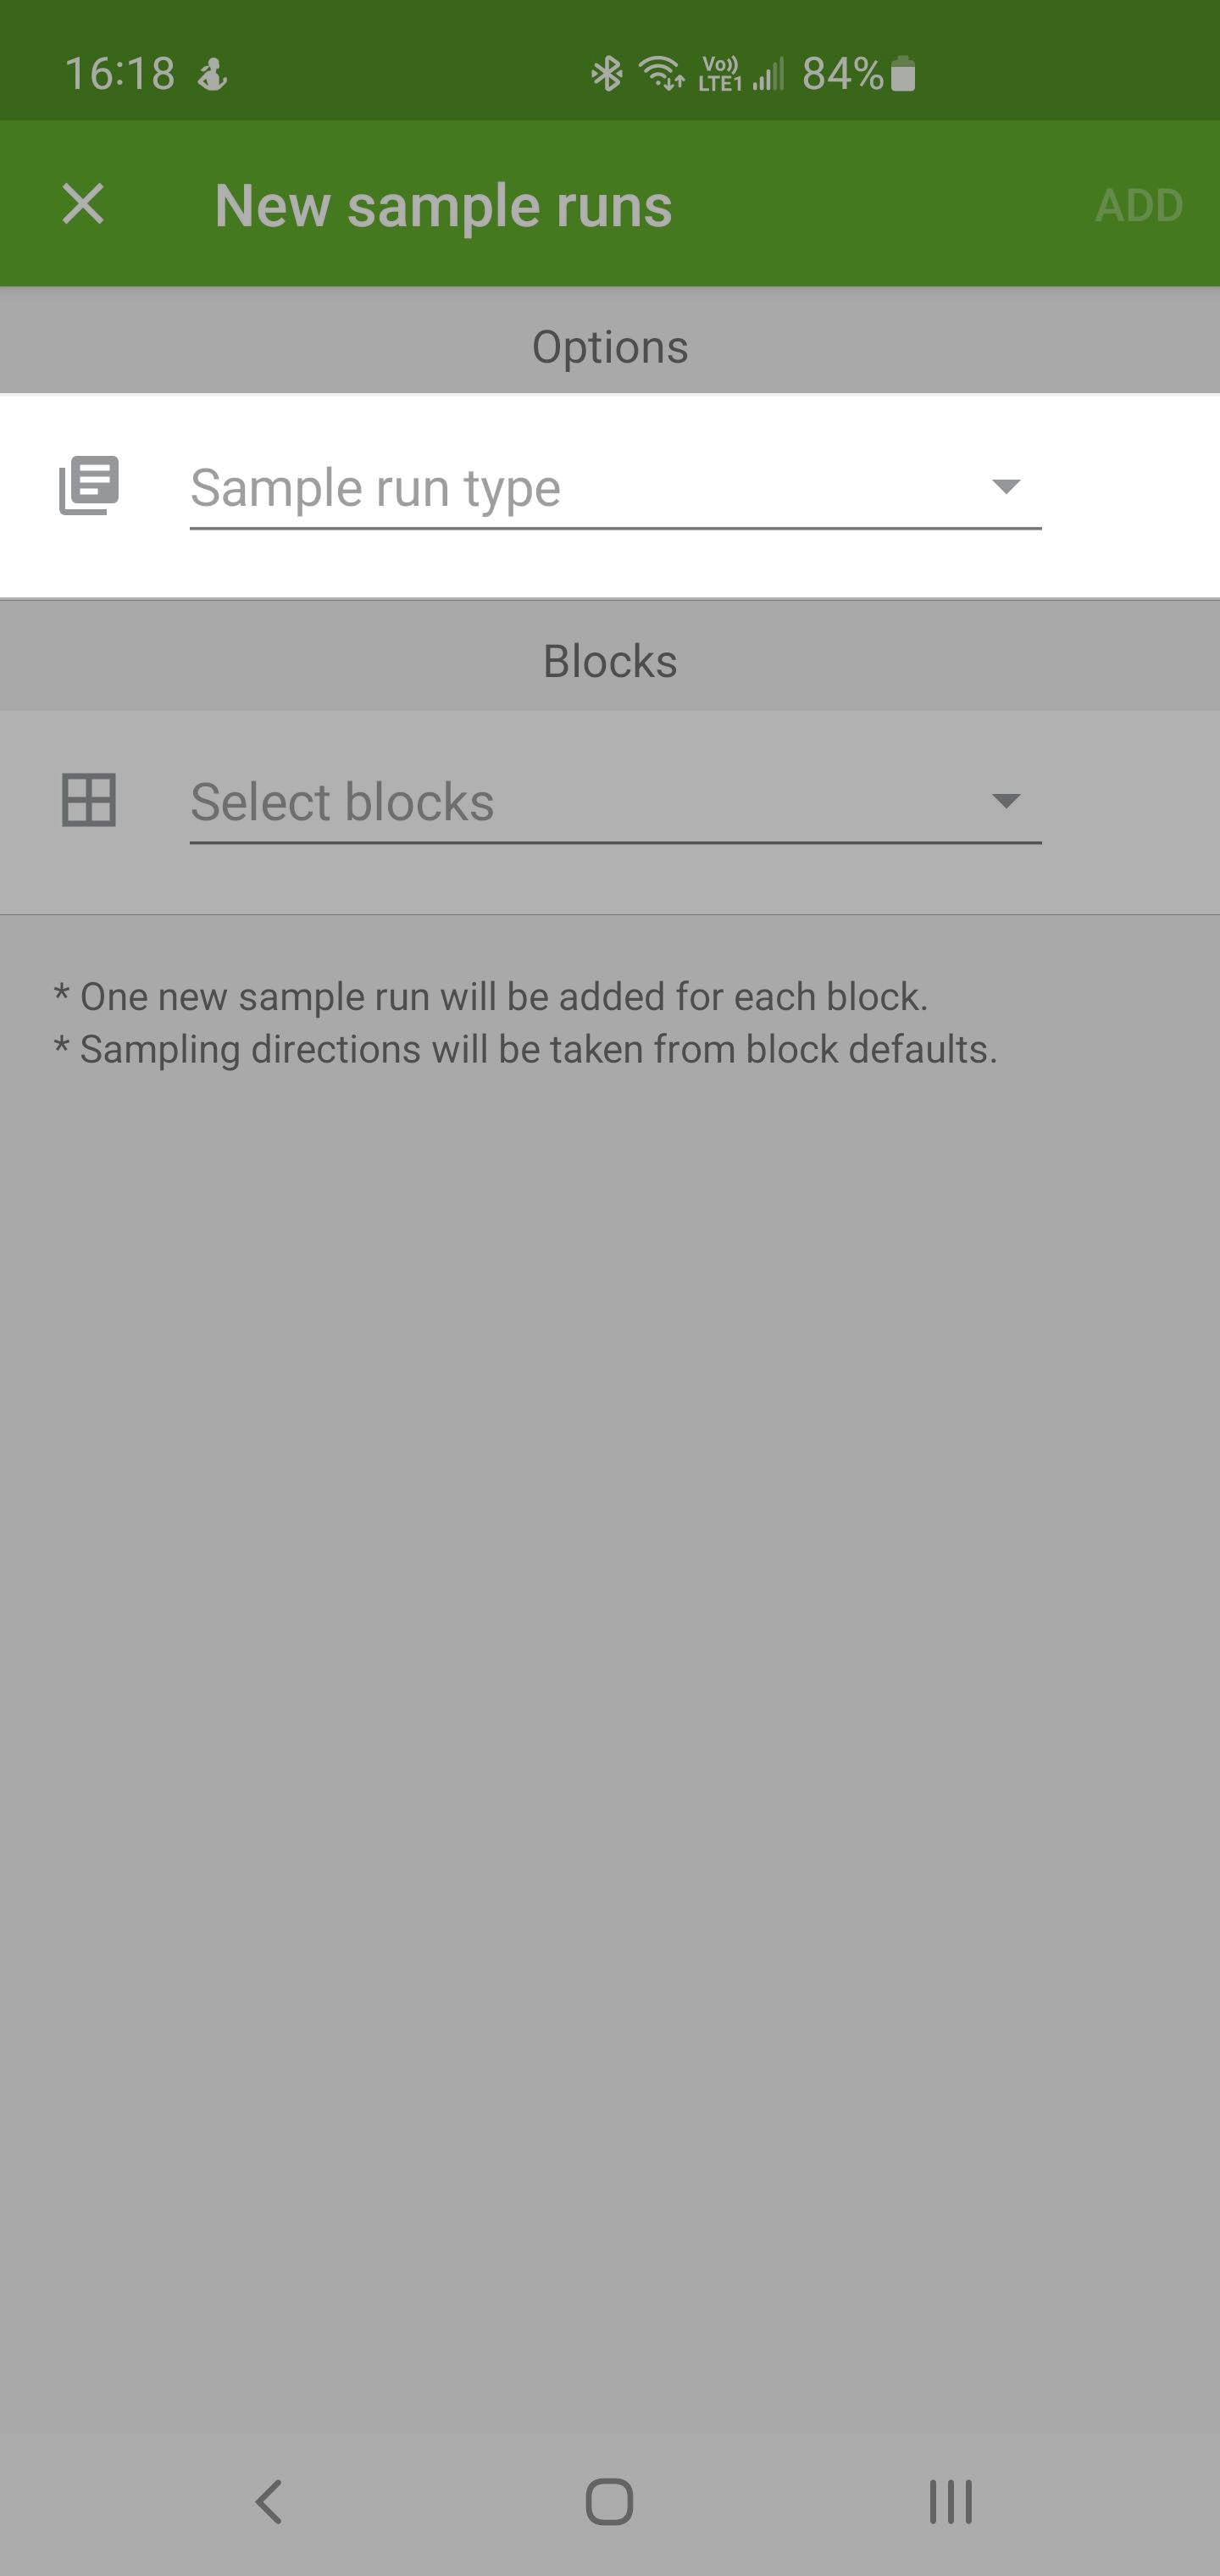
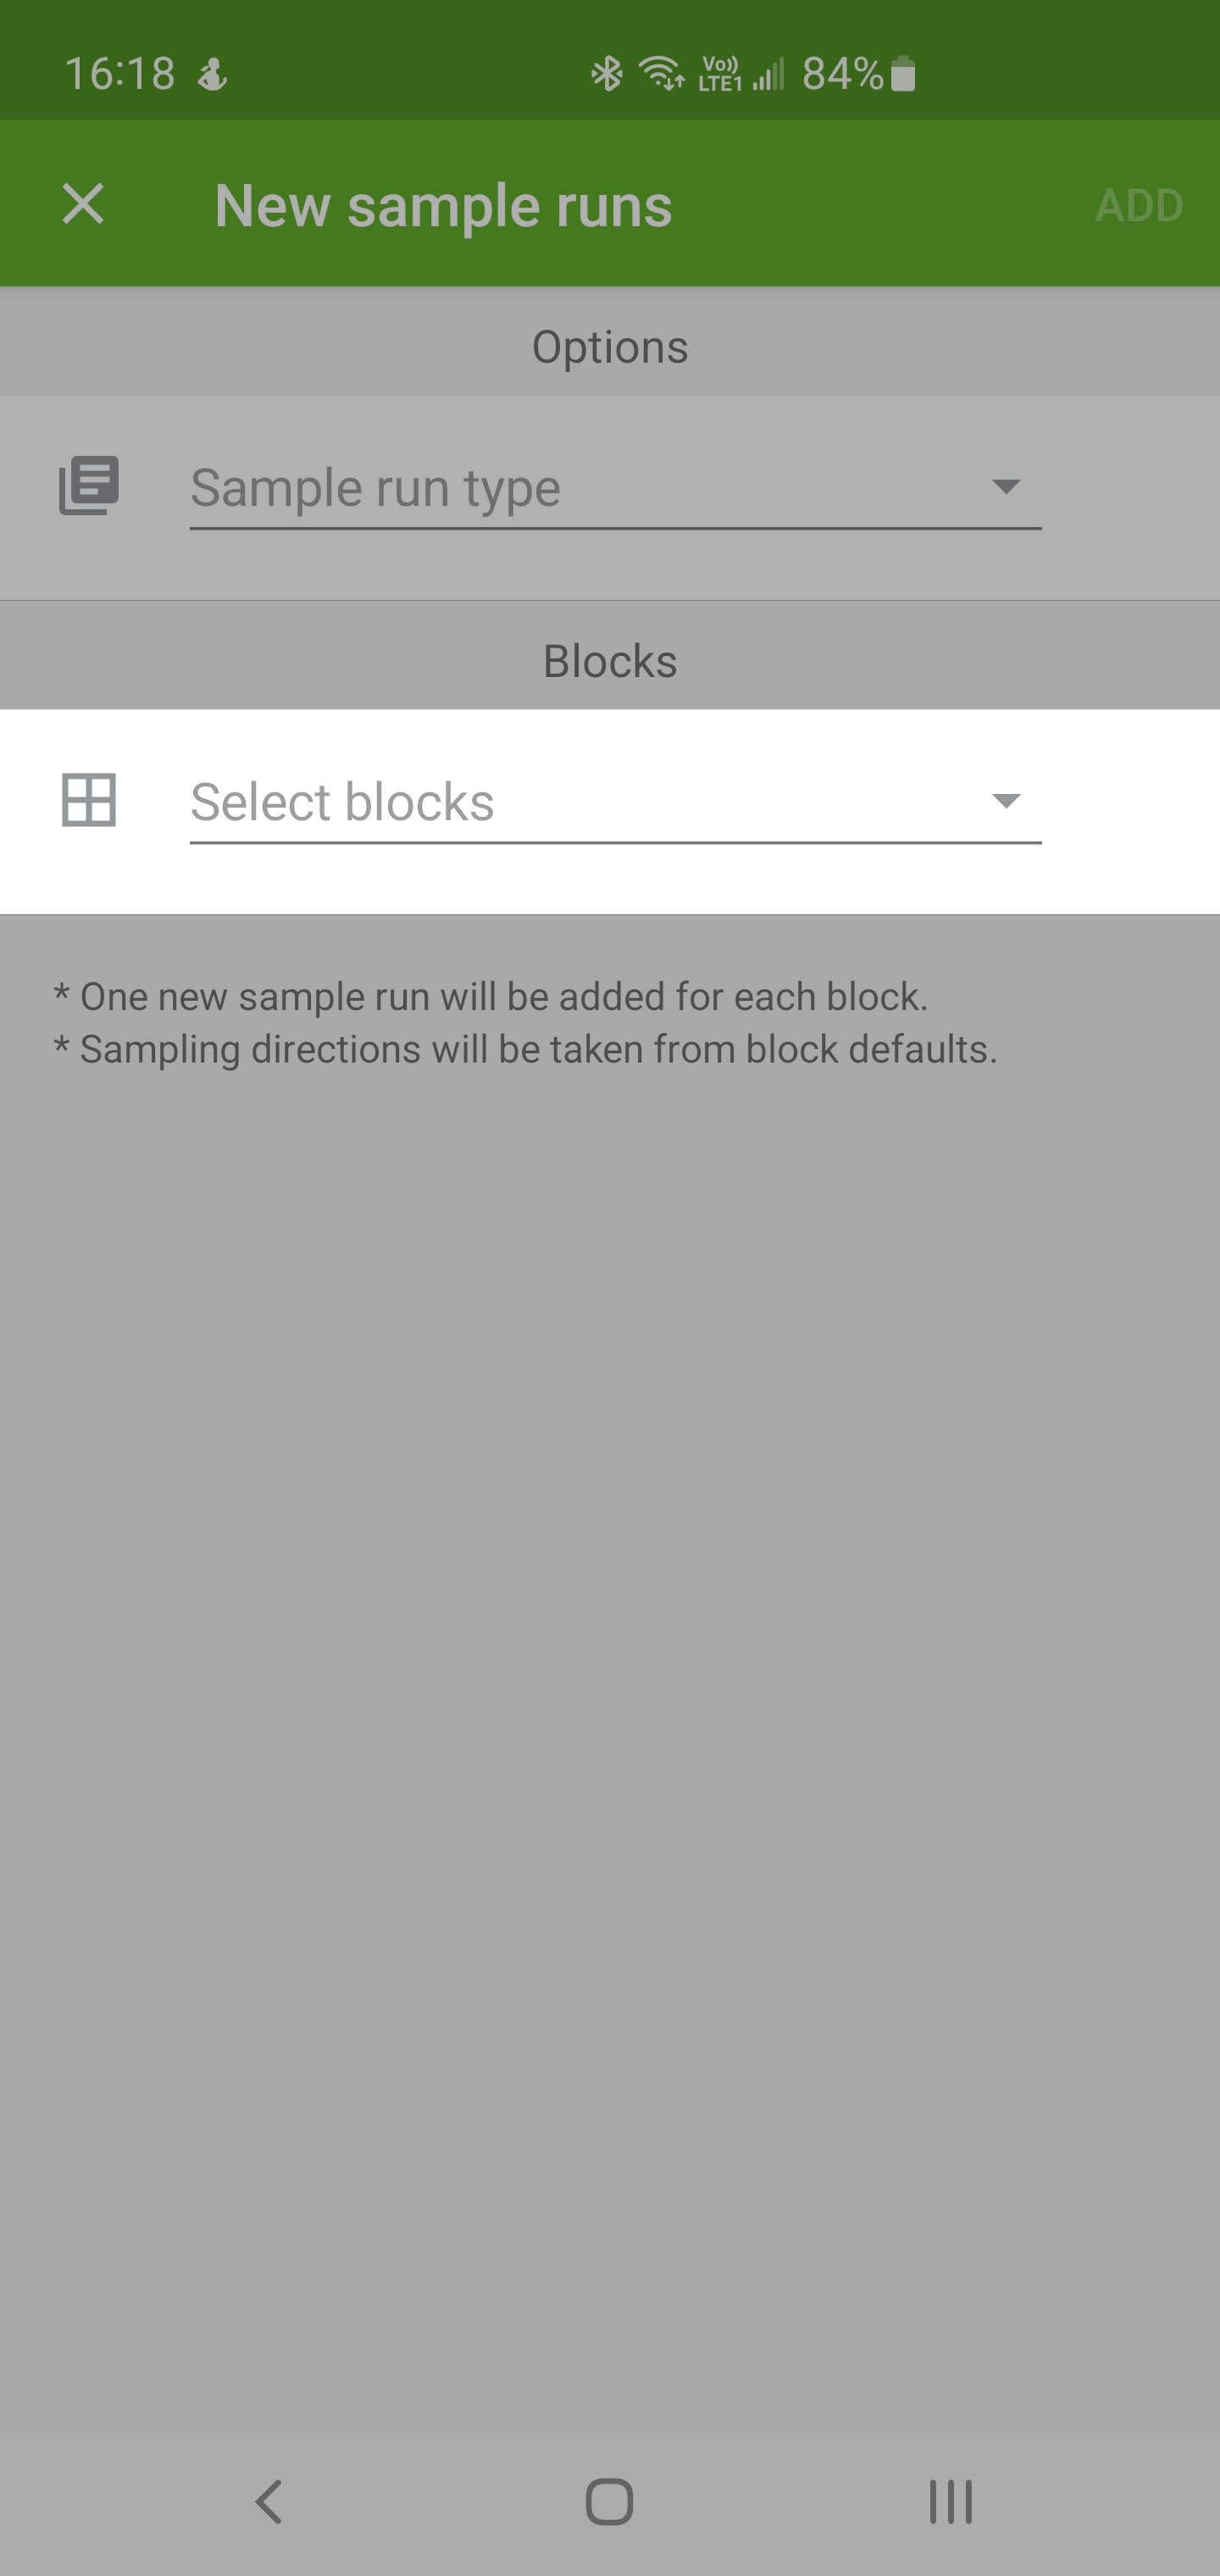
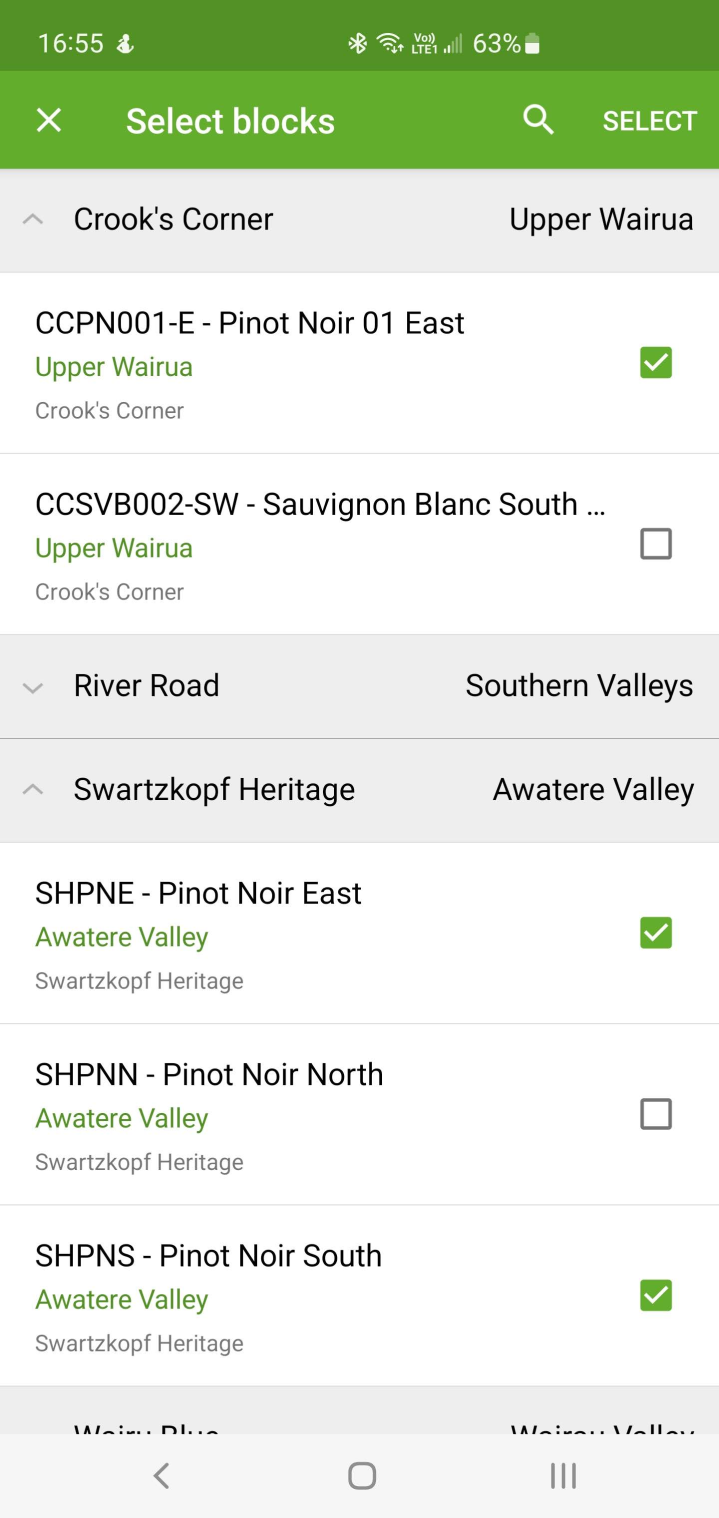
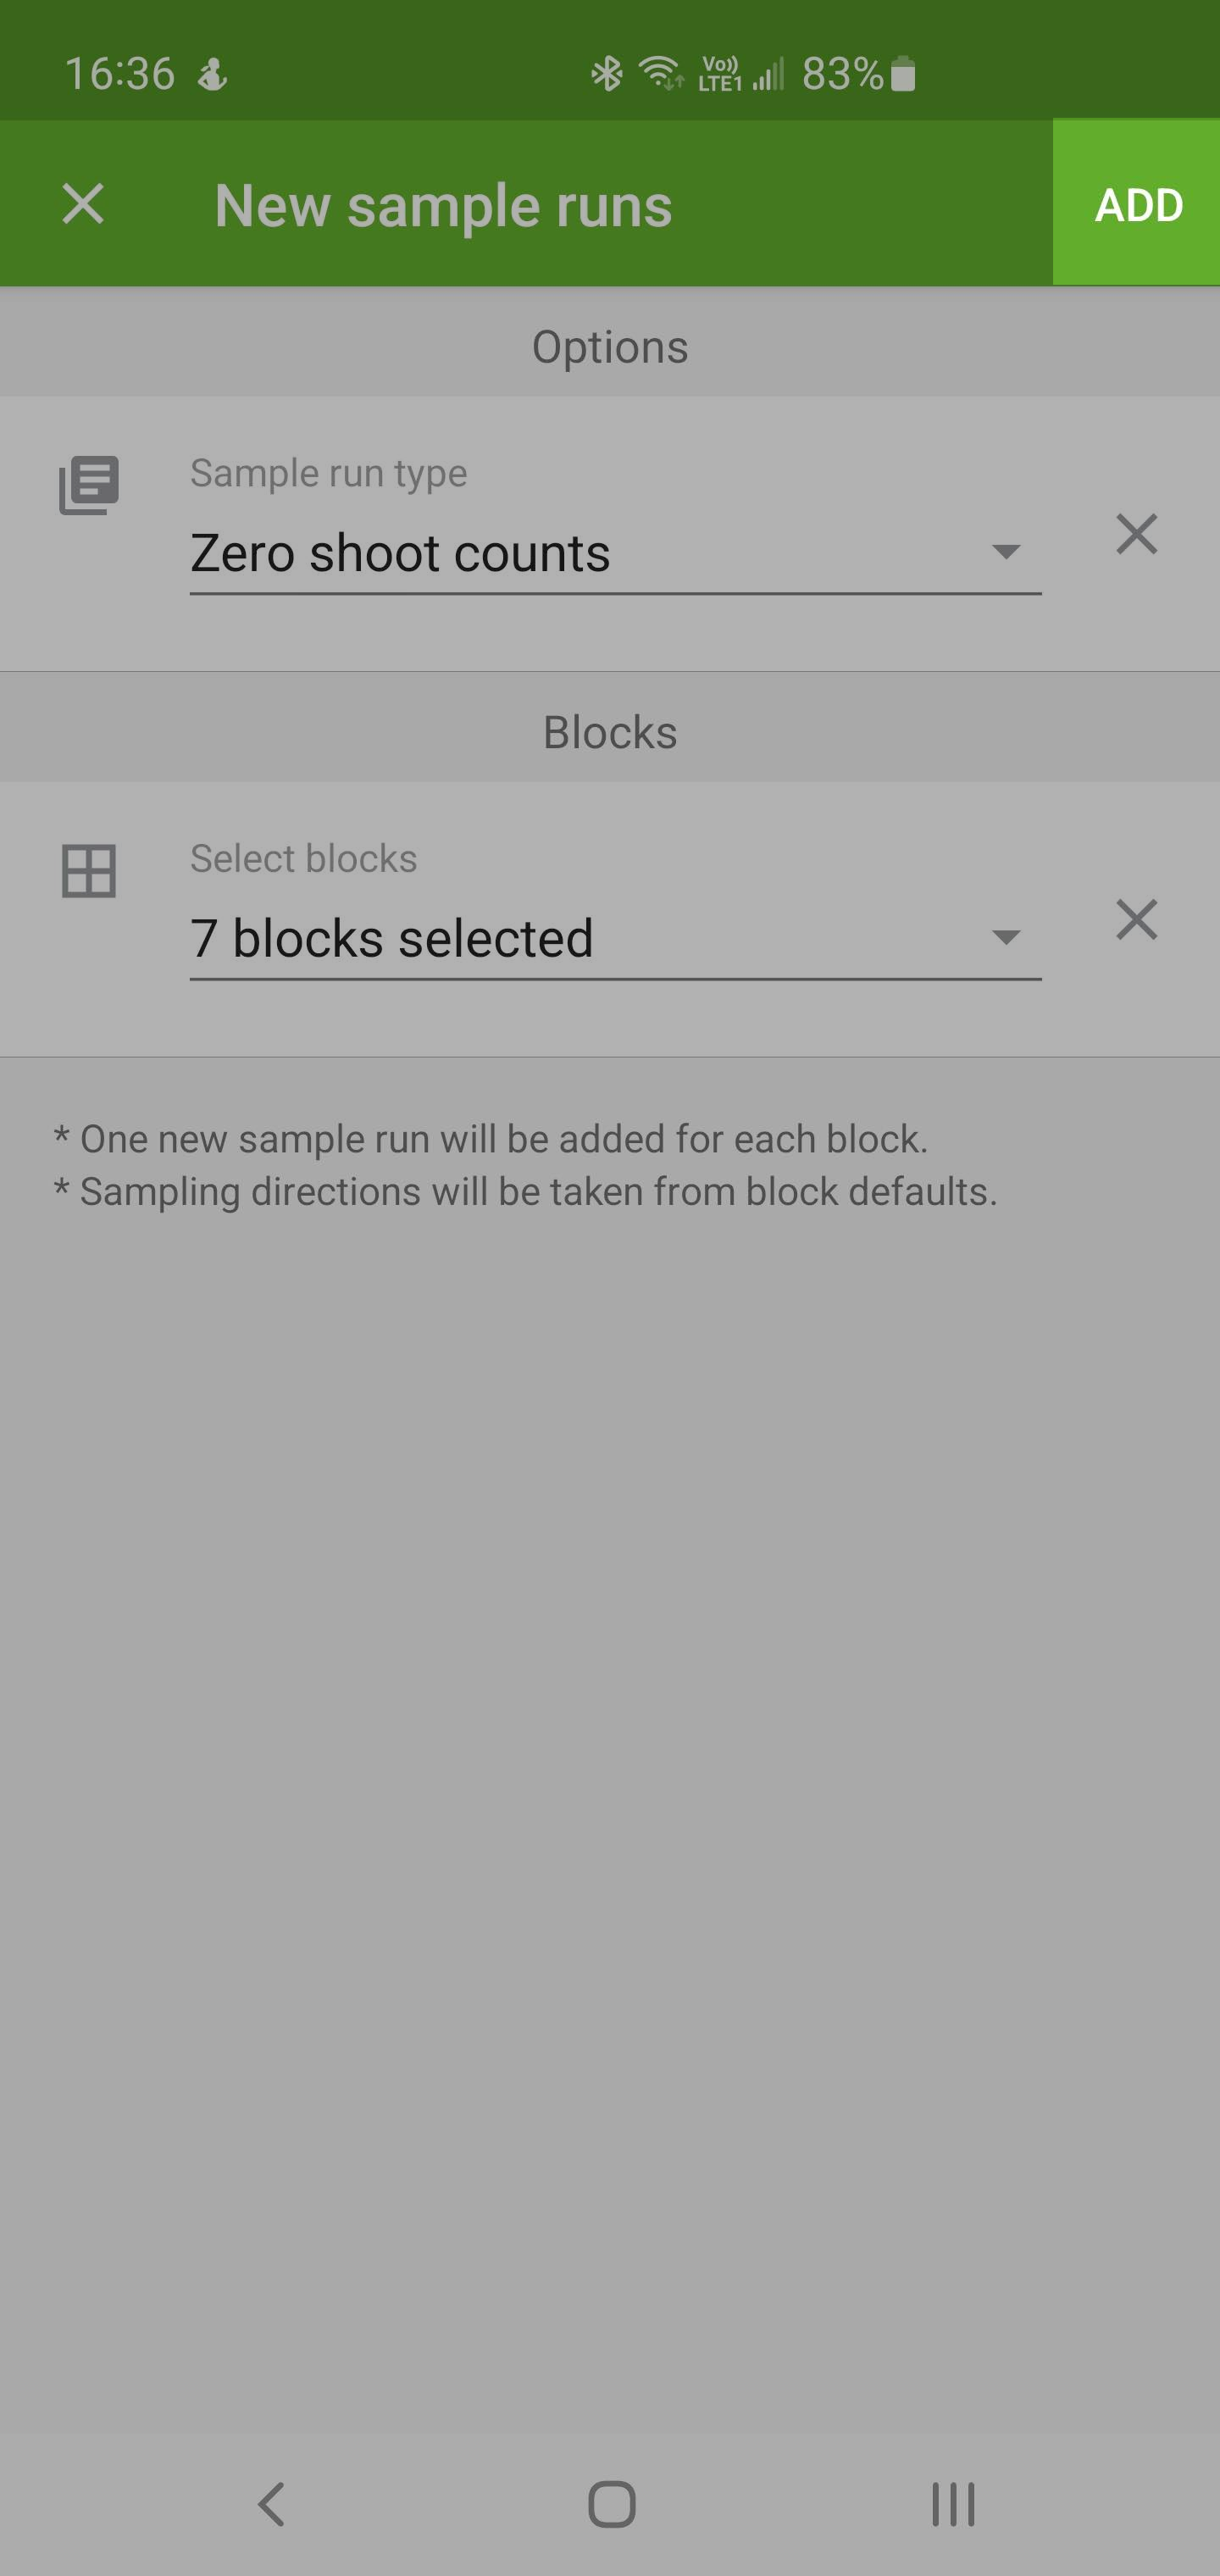
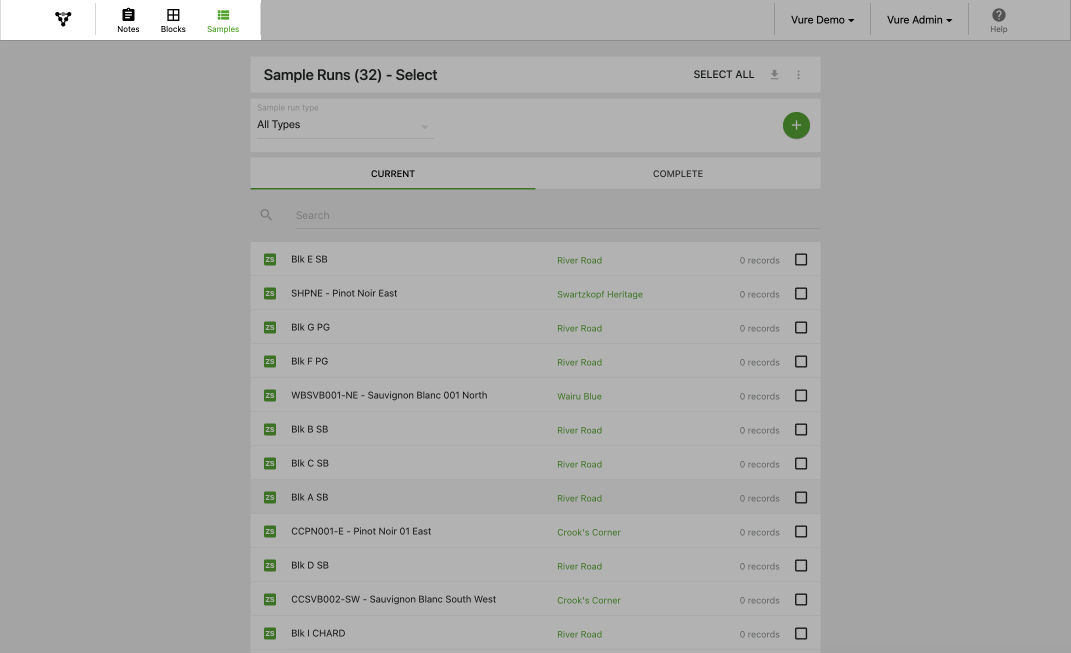
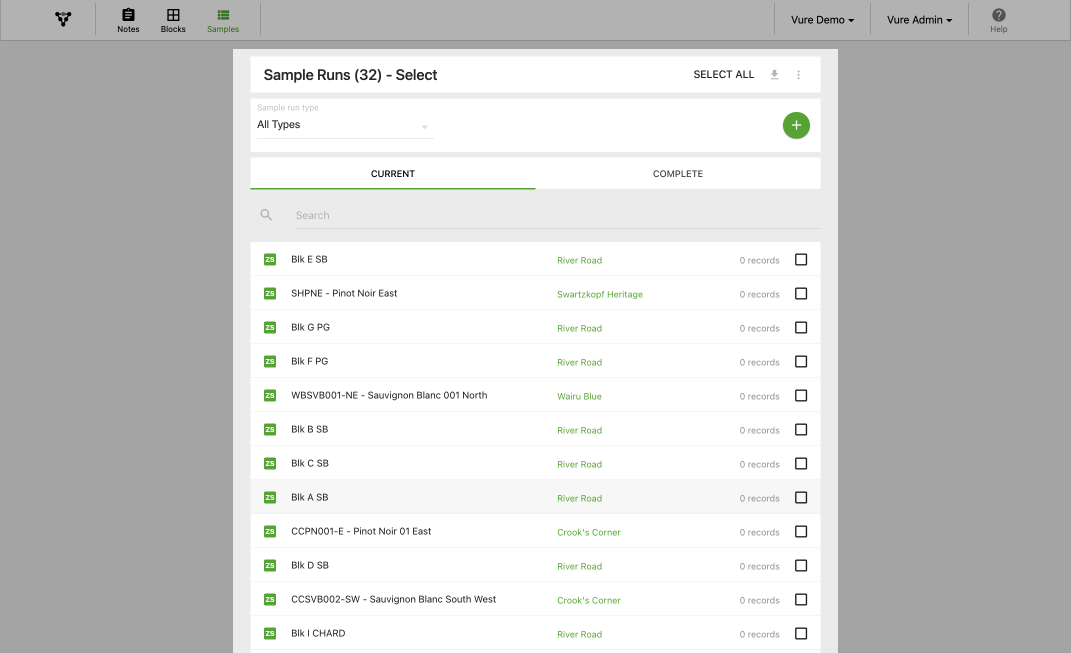
In this section we'll walk through the mobile app interface for various sample run types. If you don't have any sample runs active, you can create some test sample runes and delete them when you're finished experimenting.

Go to the Sample Runs page and tap on 'CURRENT'

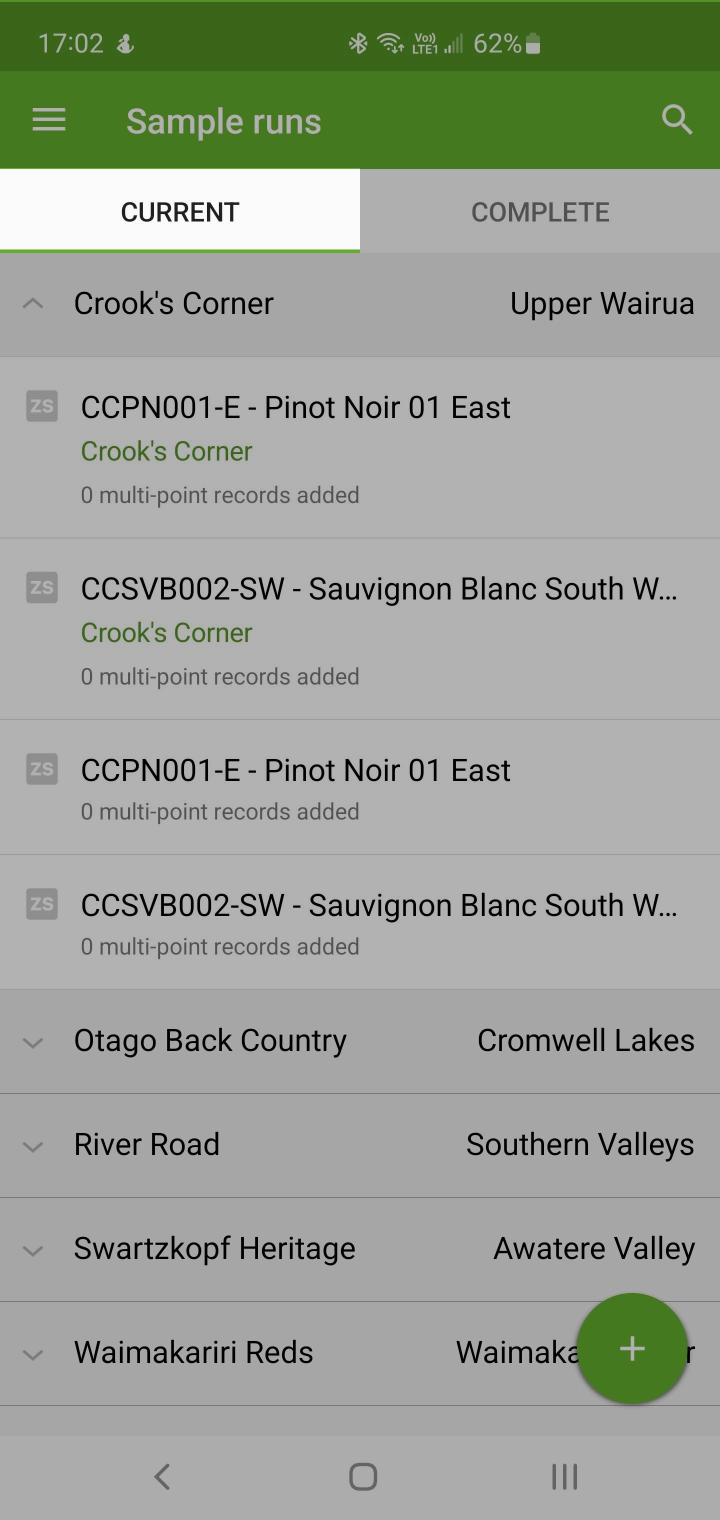
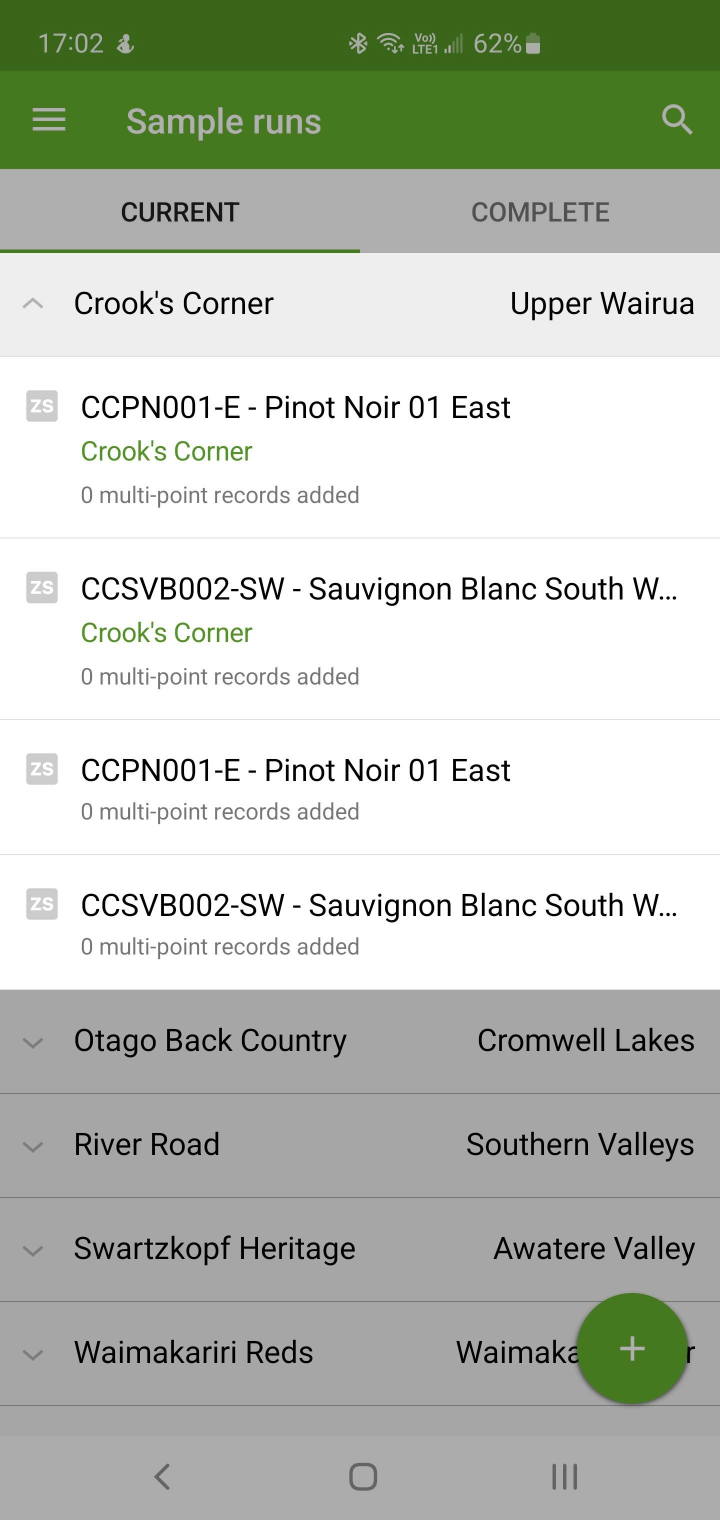
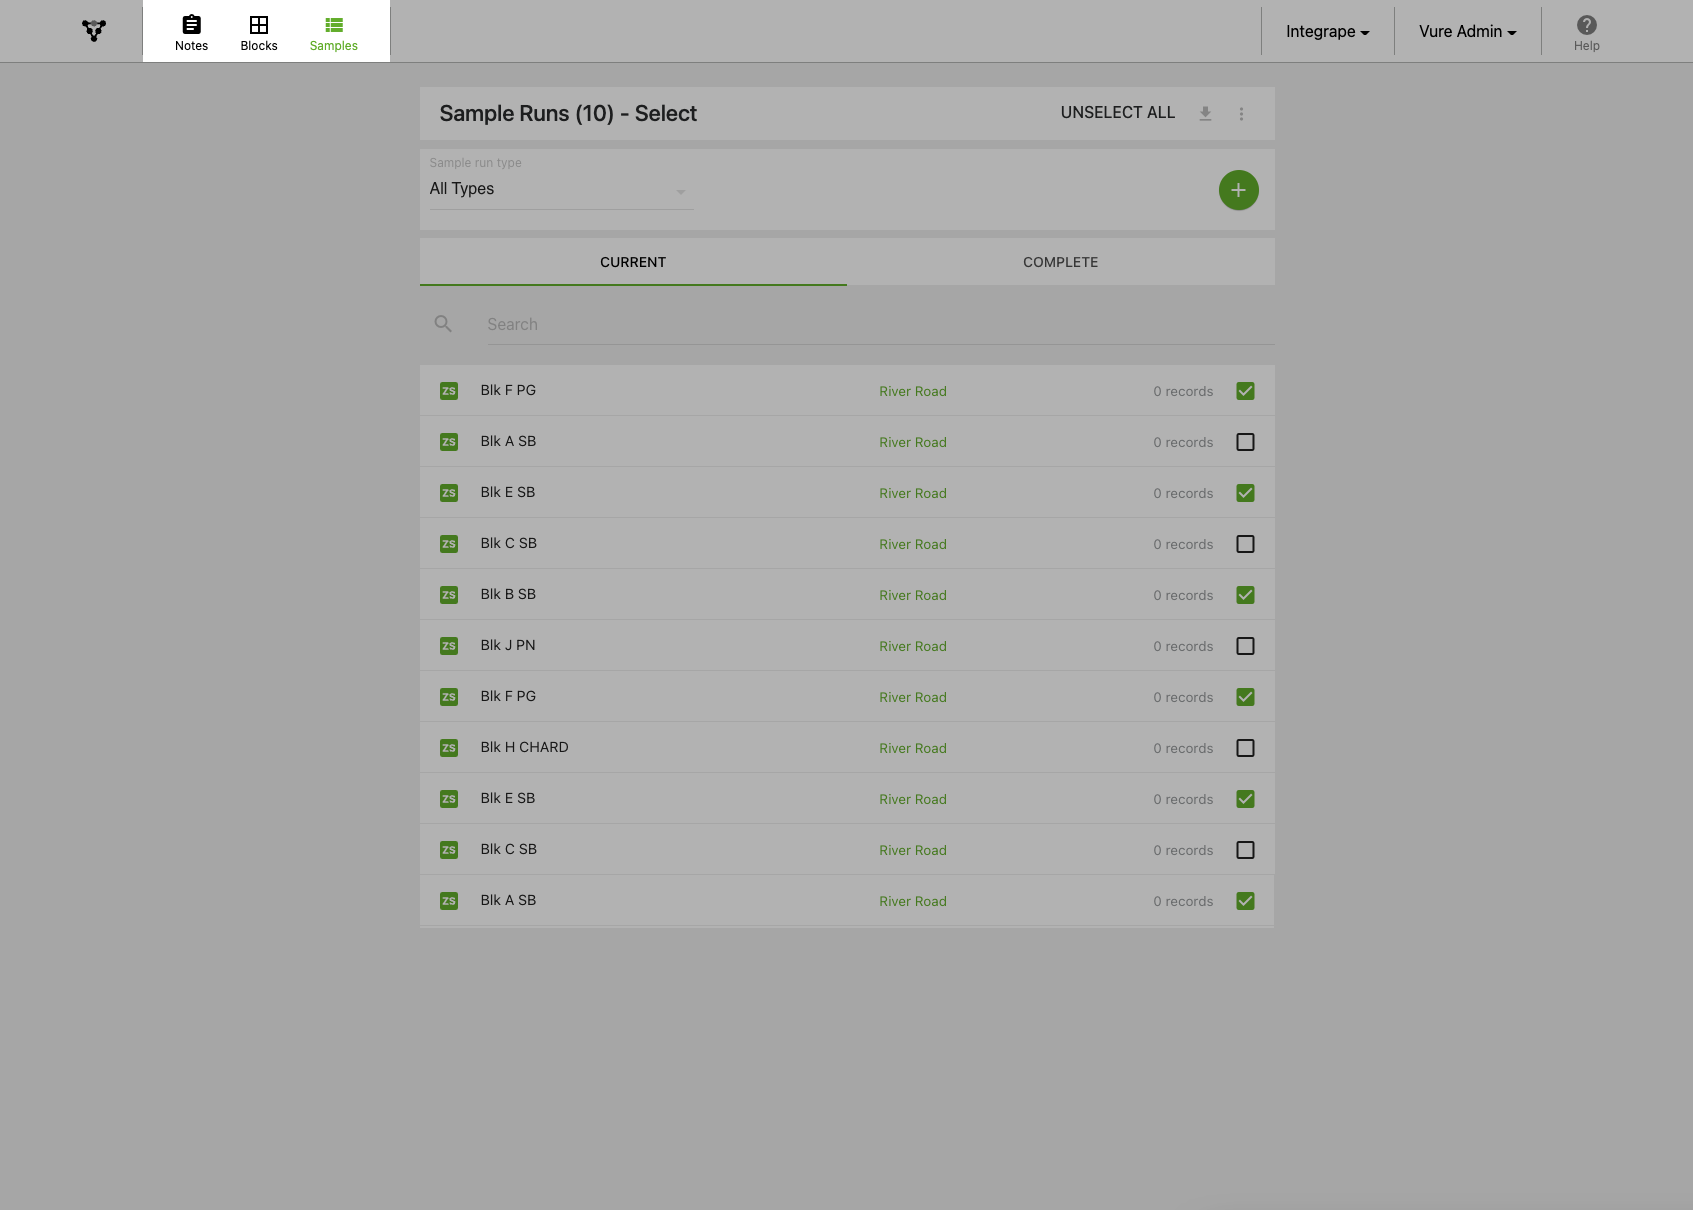
Here you can find the 'CURRENT' sample runs for which data is still being (or to be) collected for. Sample runs are grouped together based on their parent vineyard. In the 'COMPLETE' table you can see sample runs which have been completed and 'locked' to prevent accidental data changes.

To open a sample run, tap on its name

Top level sample run interfaces examples

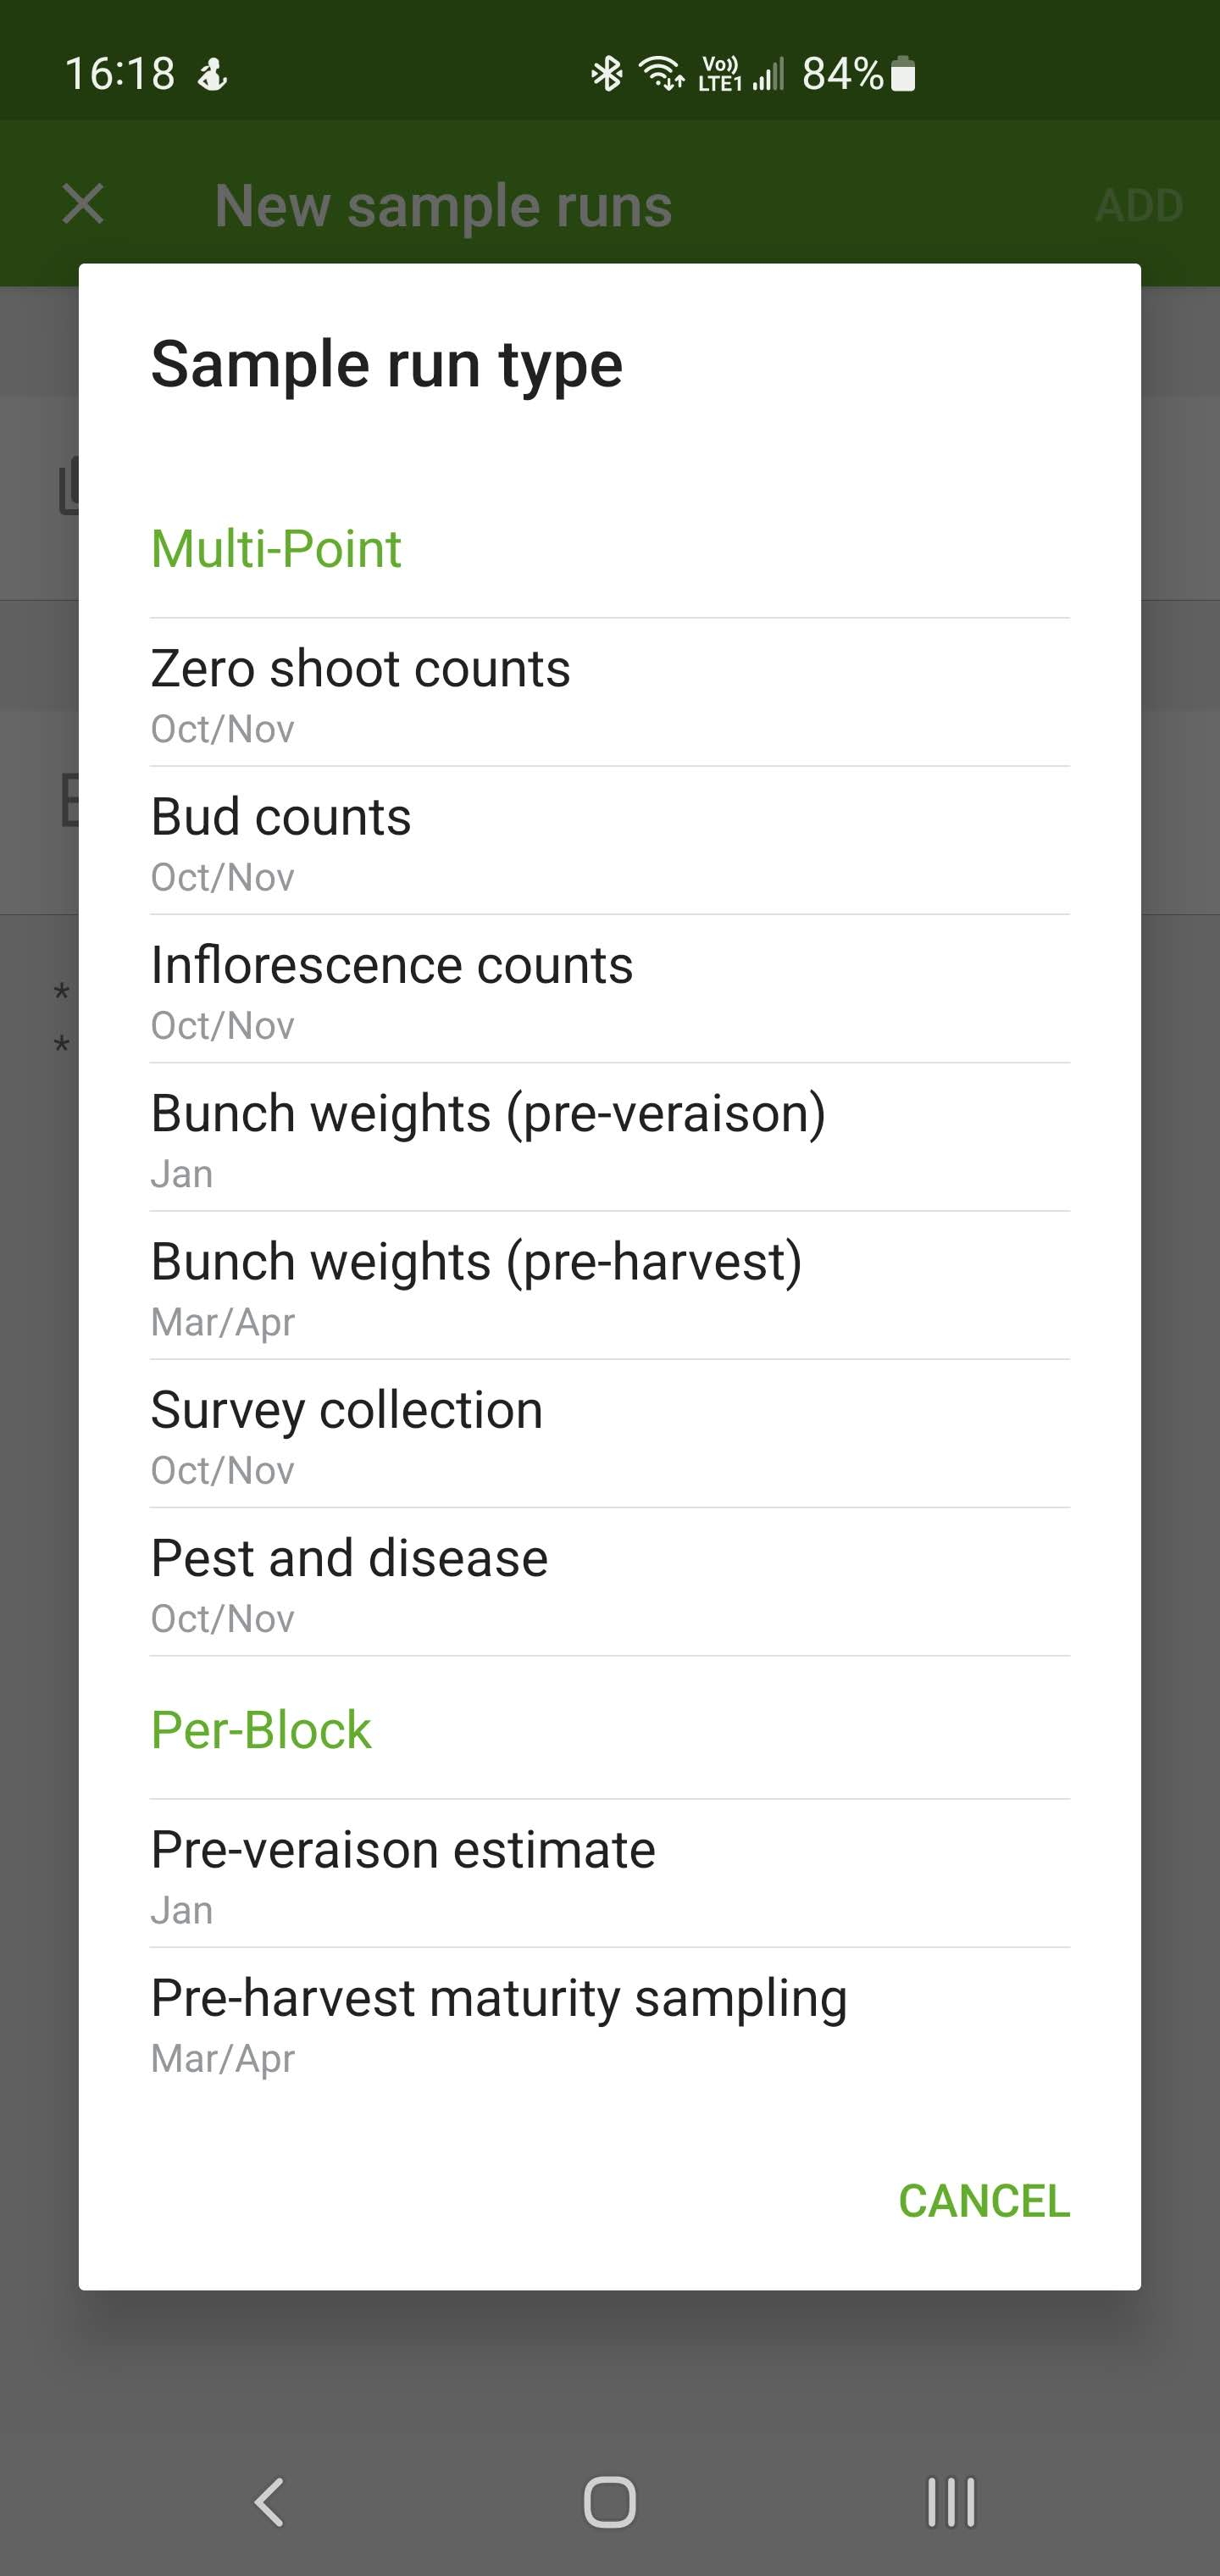
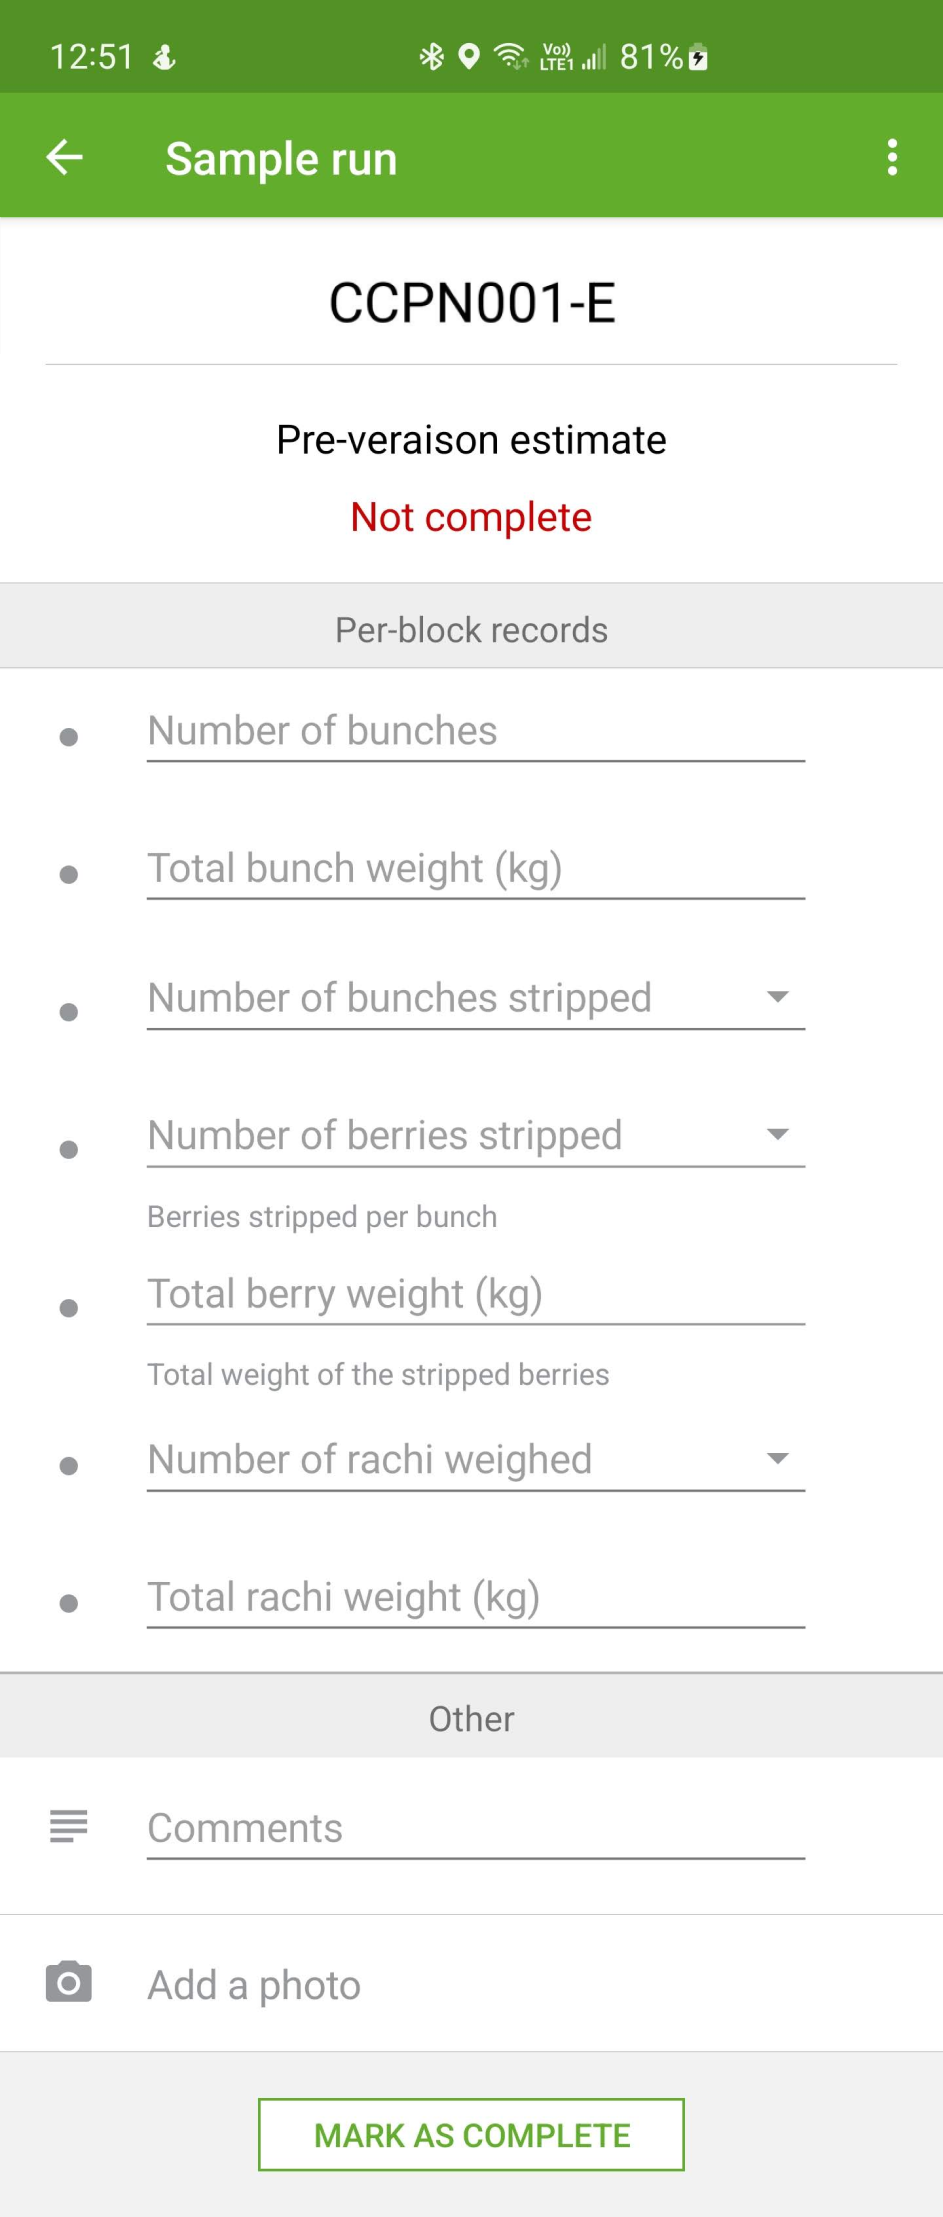
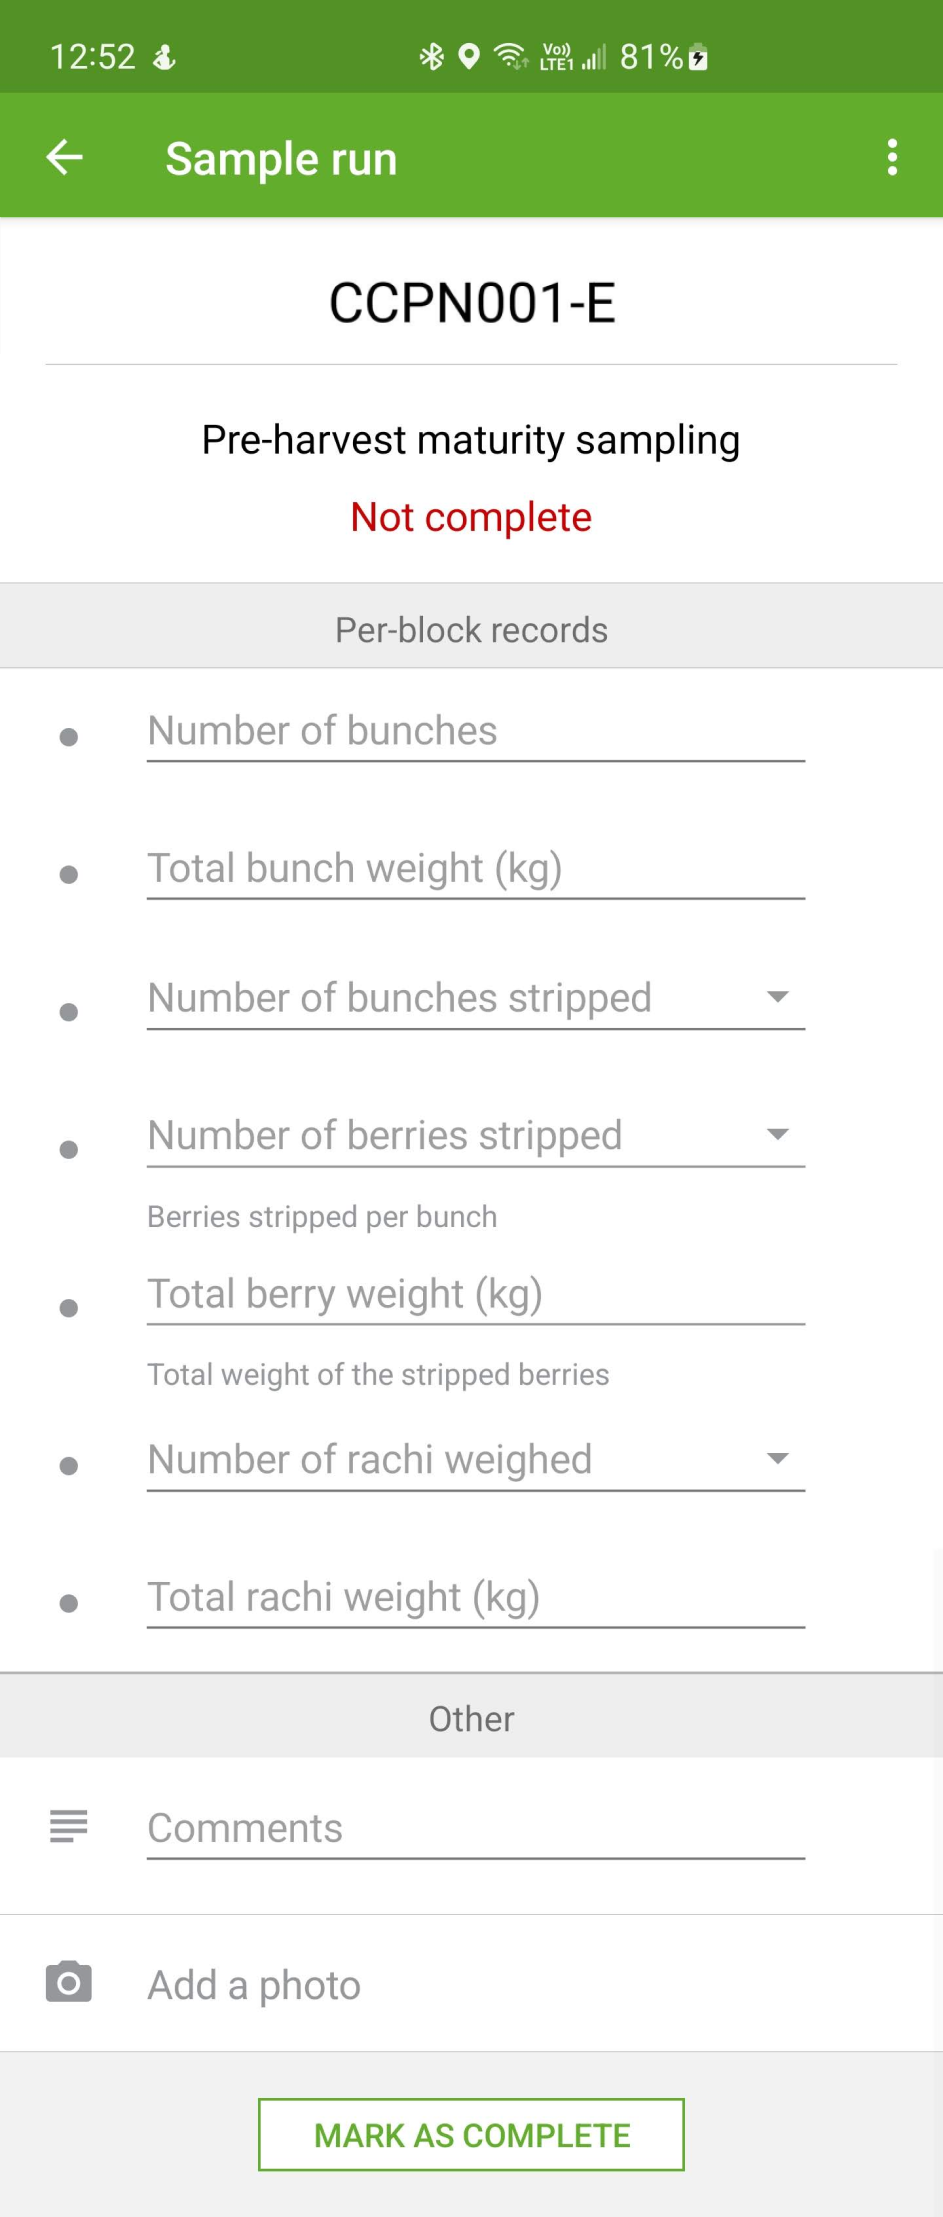
After selecting a sample run to start collecting data for, you will see one of the following (or similar) interfaces depending on the sample regime which has been enabled:

Random x Random

Pattern x Pattern

Prescribed x Prescribed

Sample run type specific interfaces - Geolocation enabled

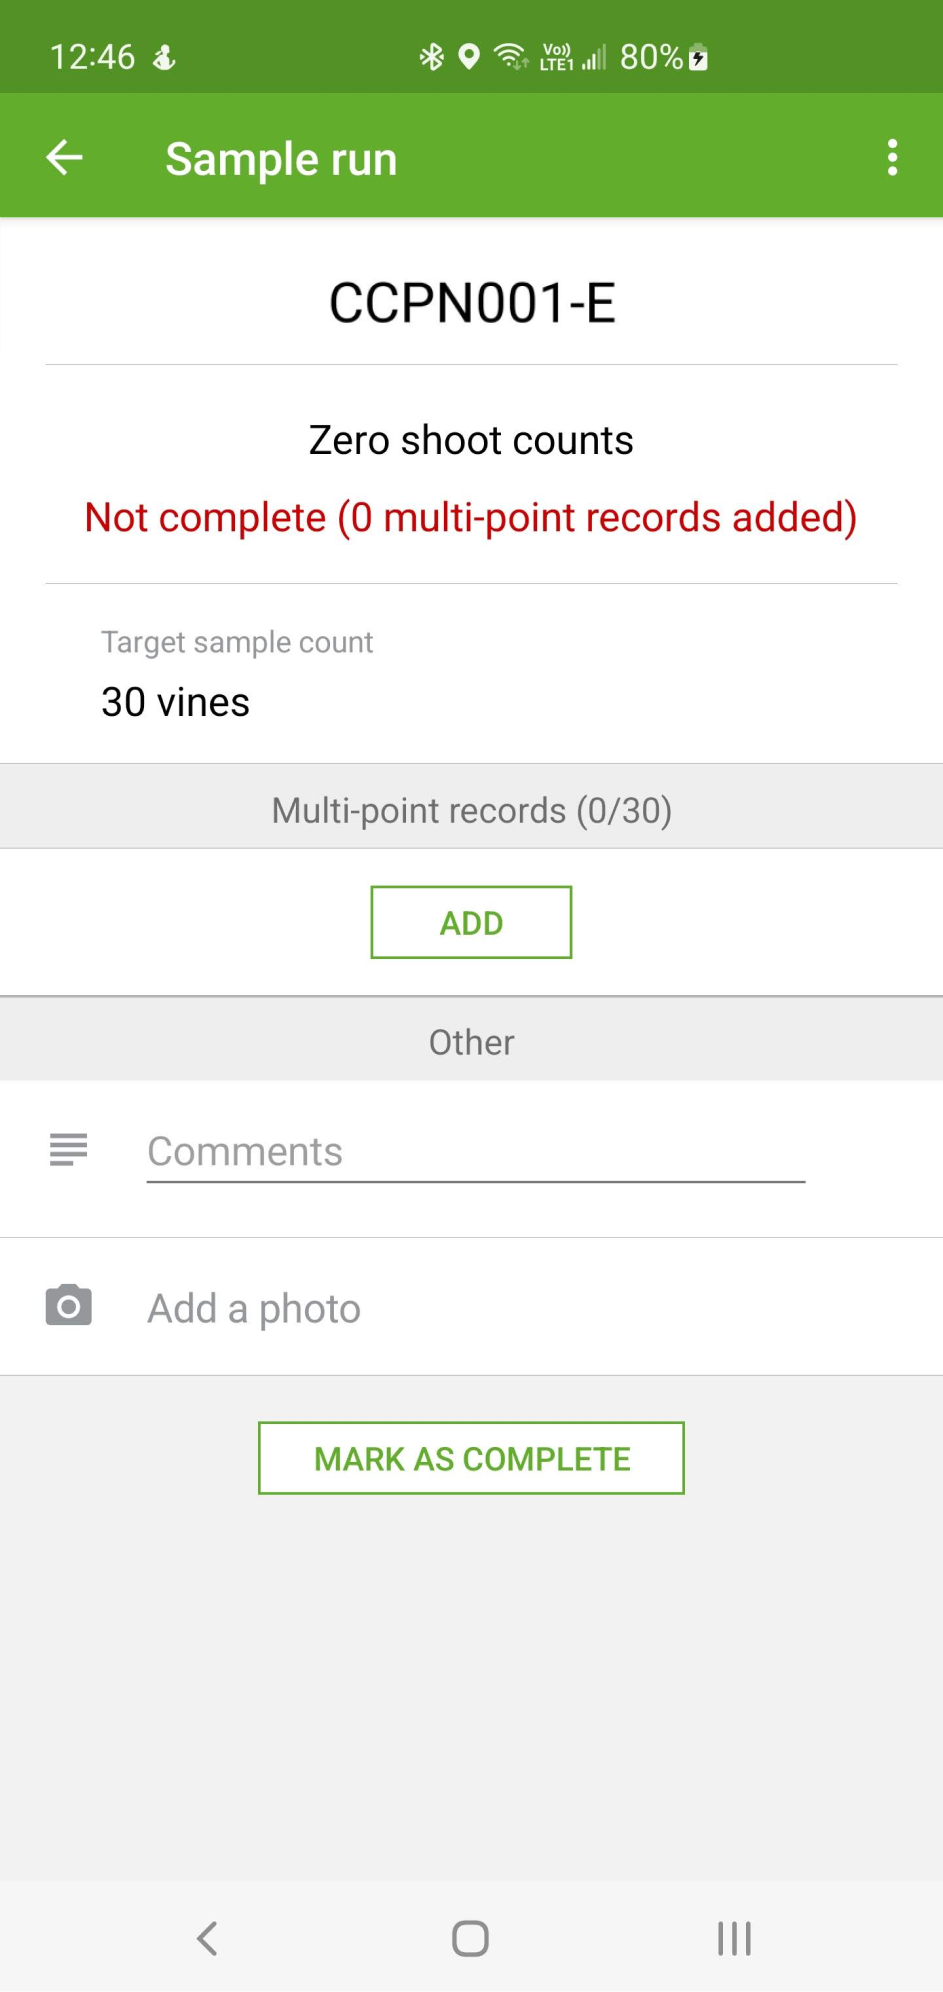
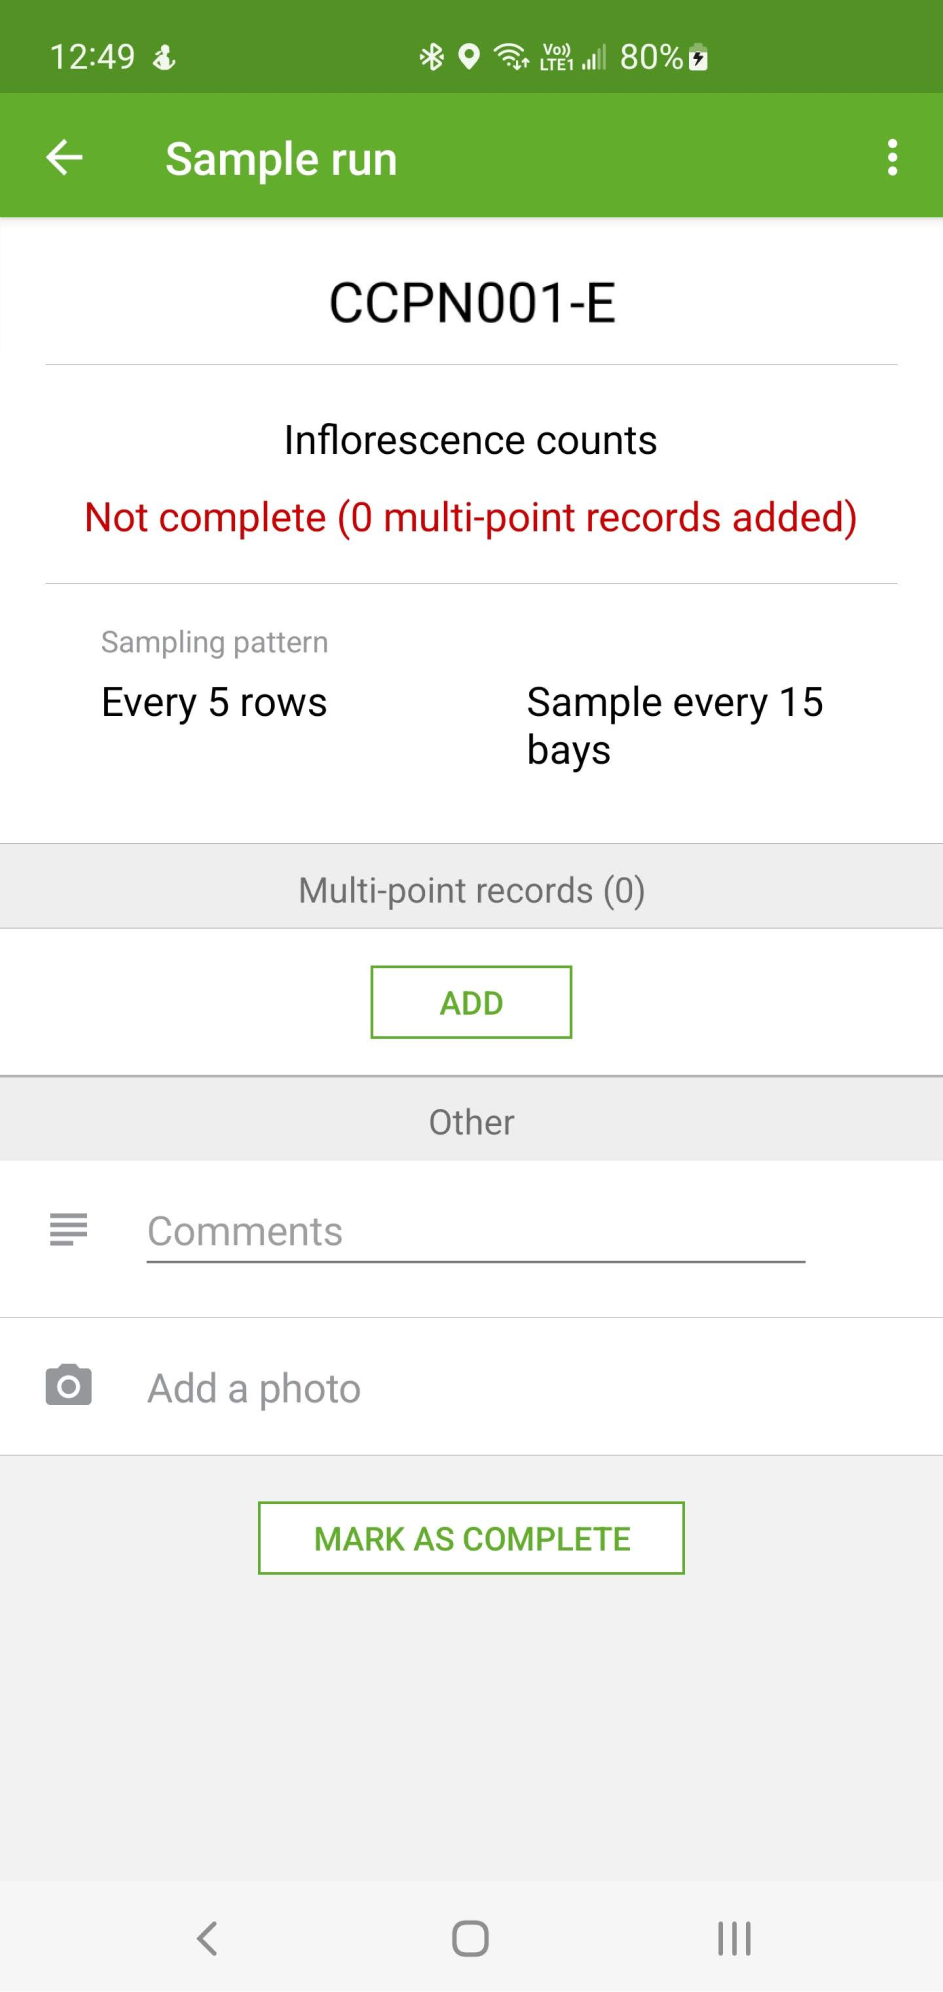
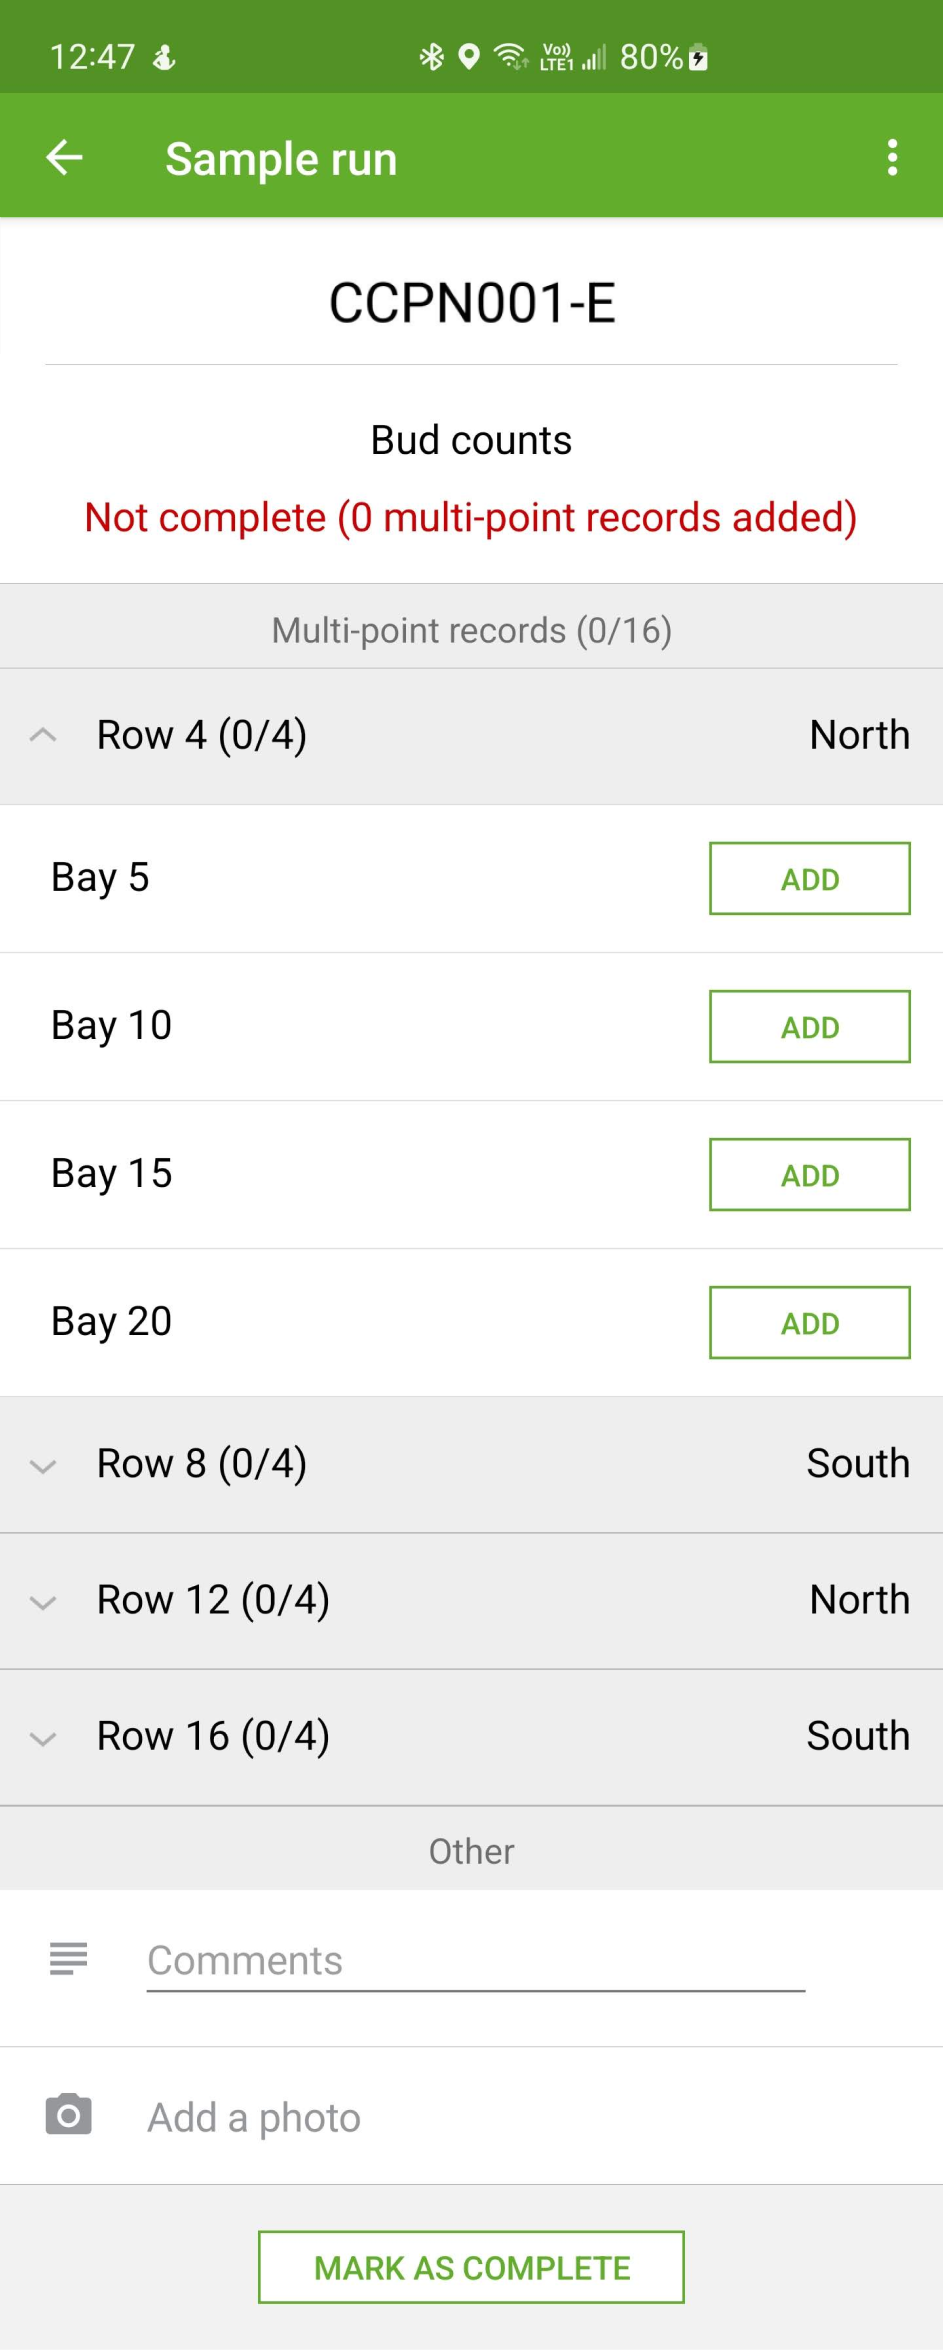
For each of the following sample run types, it's possible to collect more precision sample location data via

Zero Shoot Counts

Inflorescence Counts

Bunch Weights (Pre-veraison)

Bud Counts

Pest & Disease

Sample run type specific interfaces - Block based

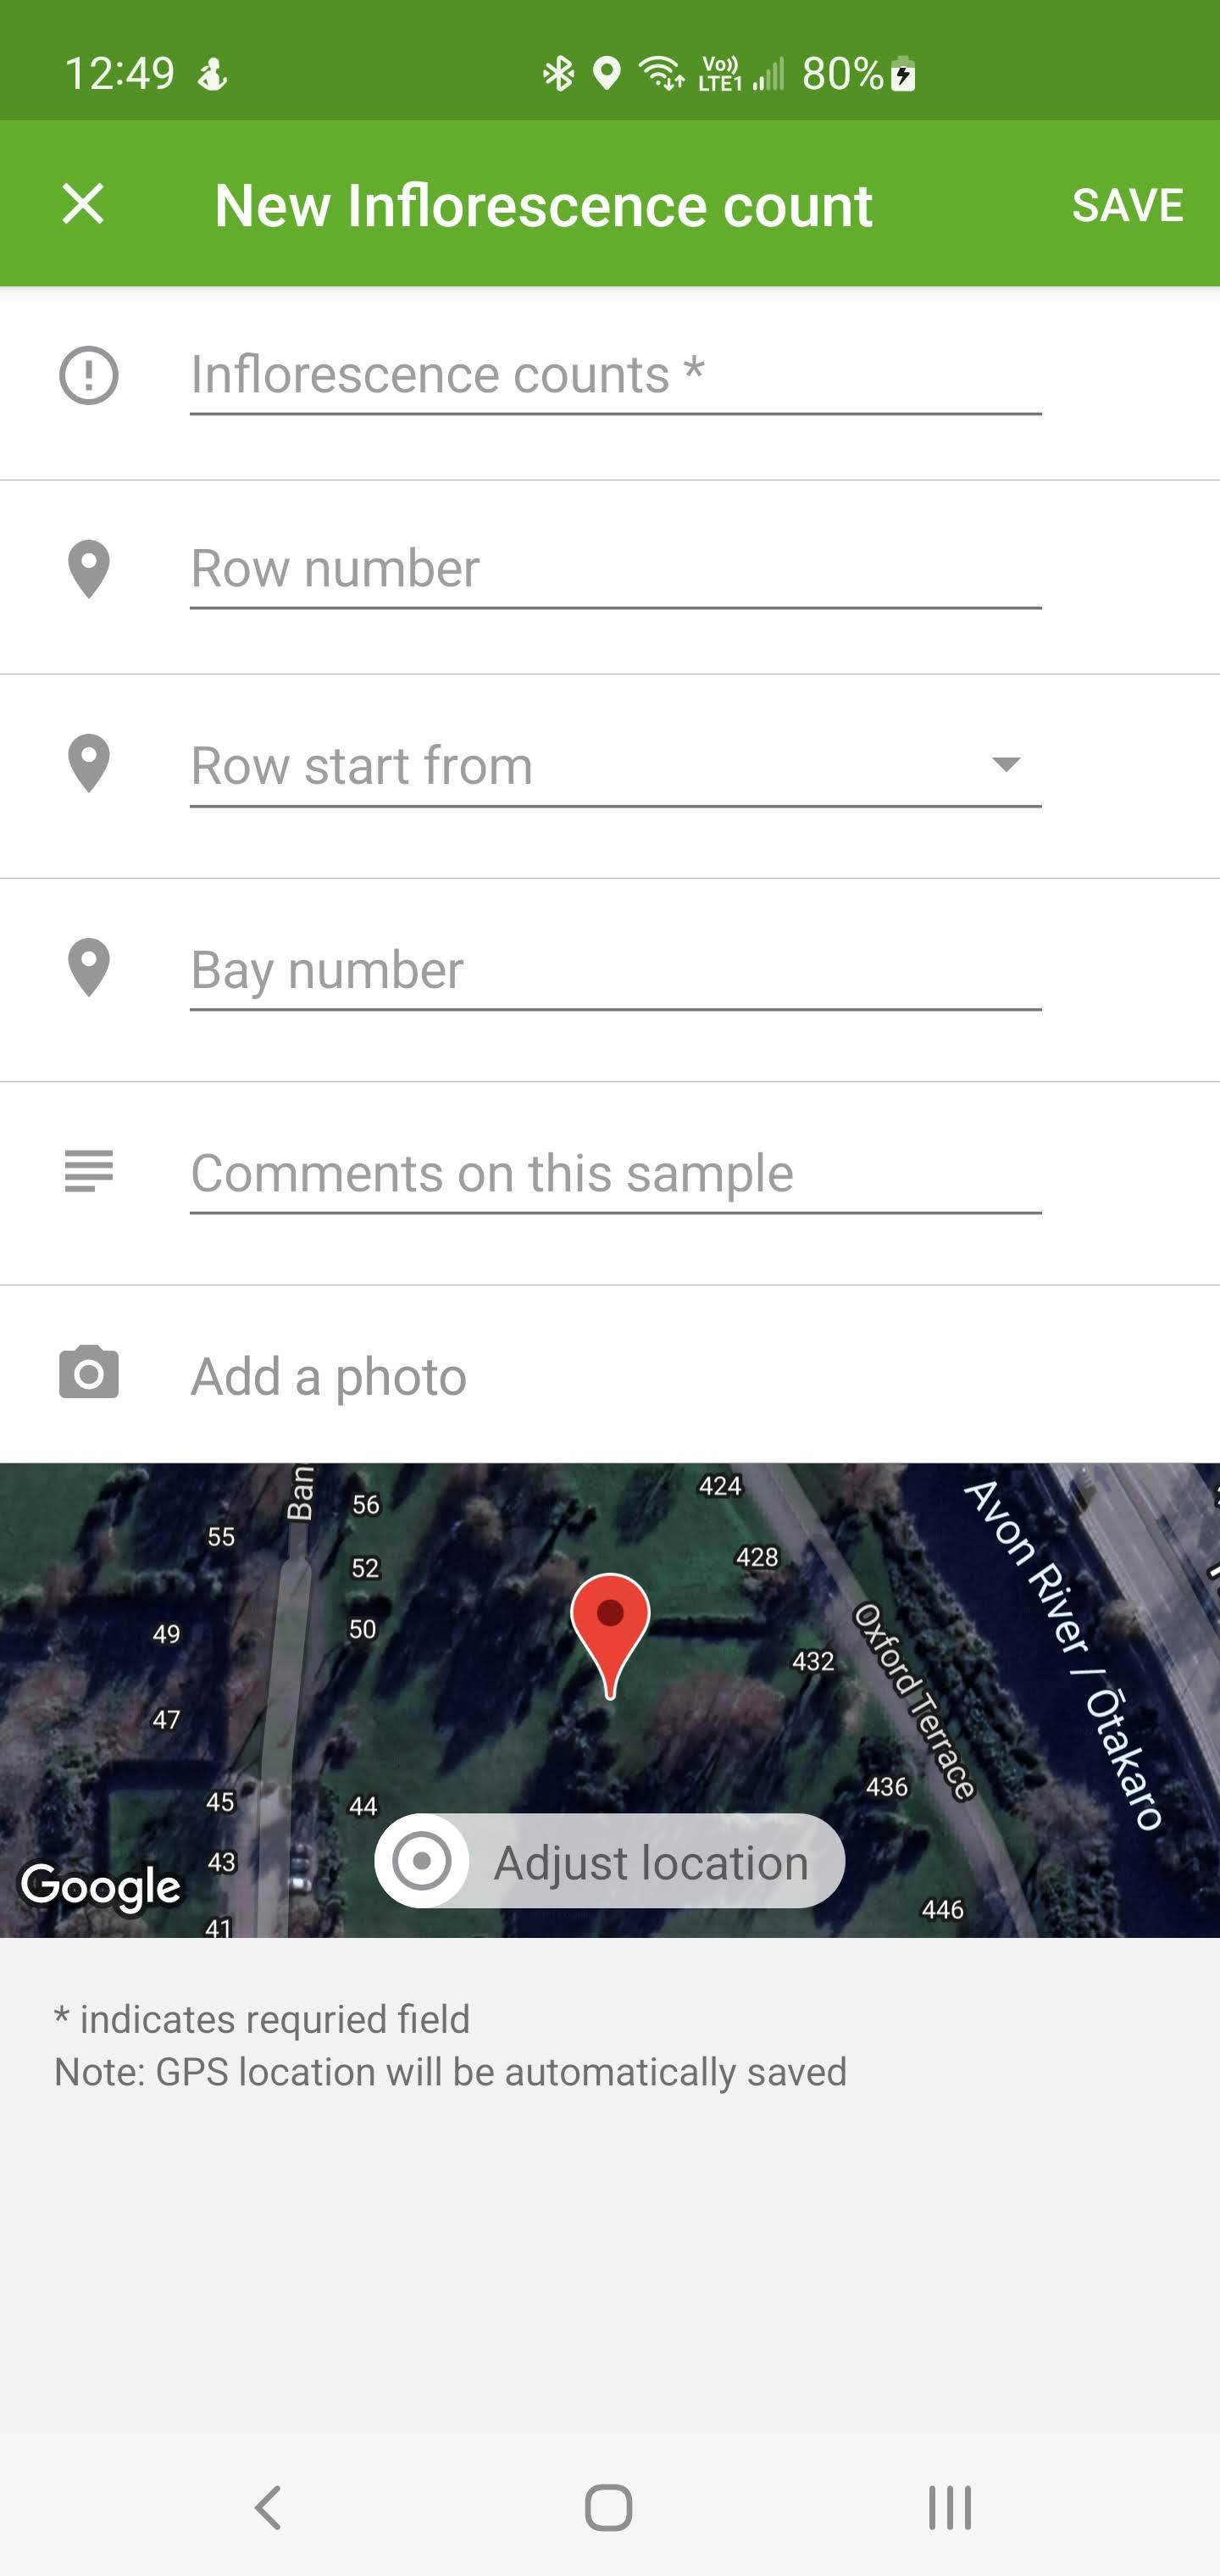
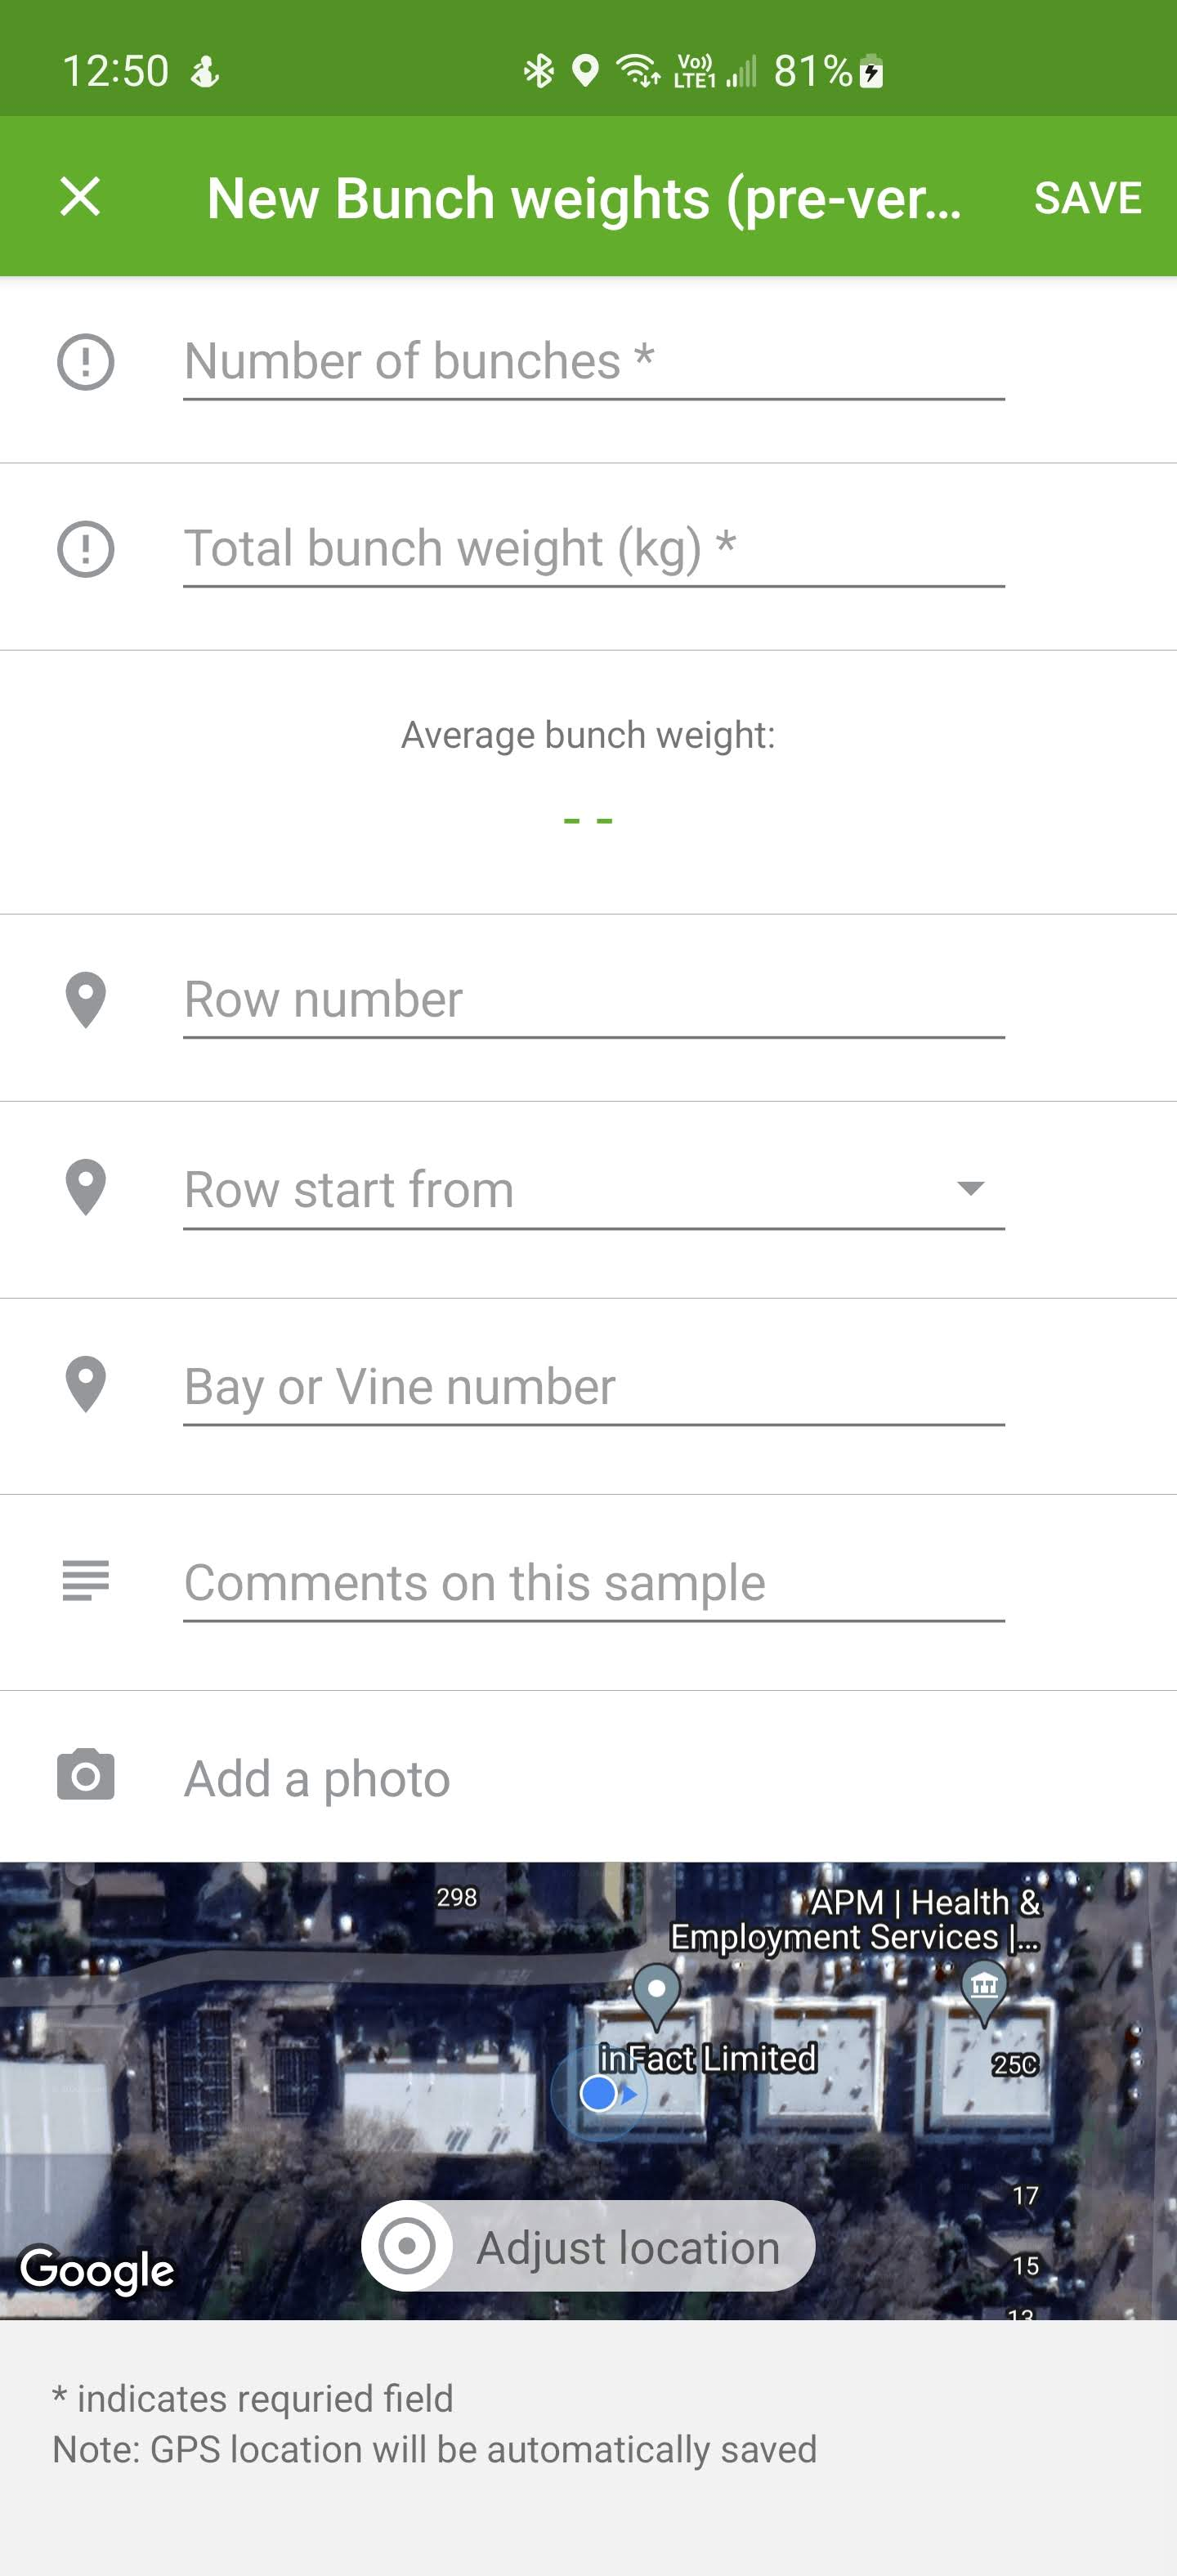
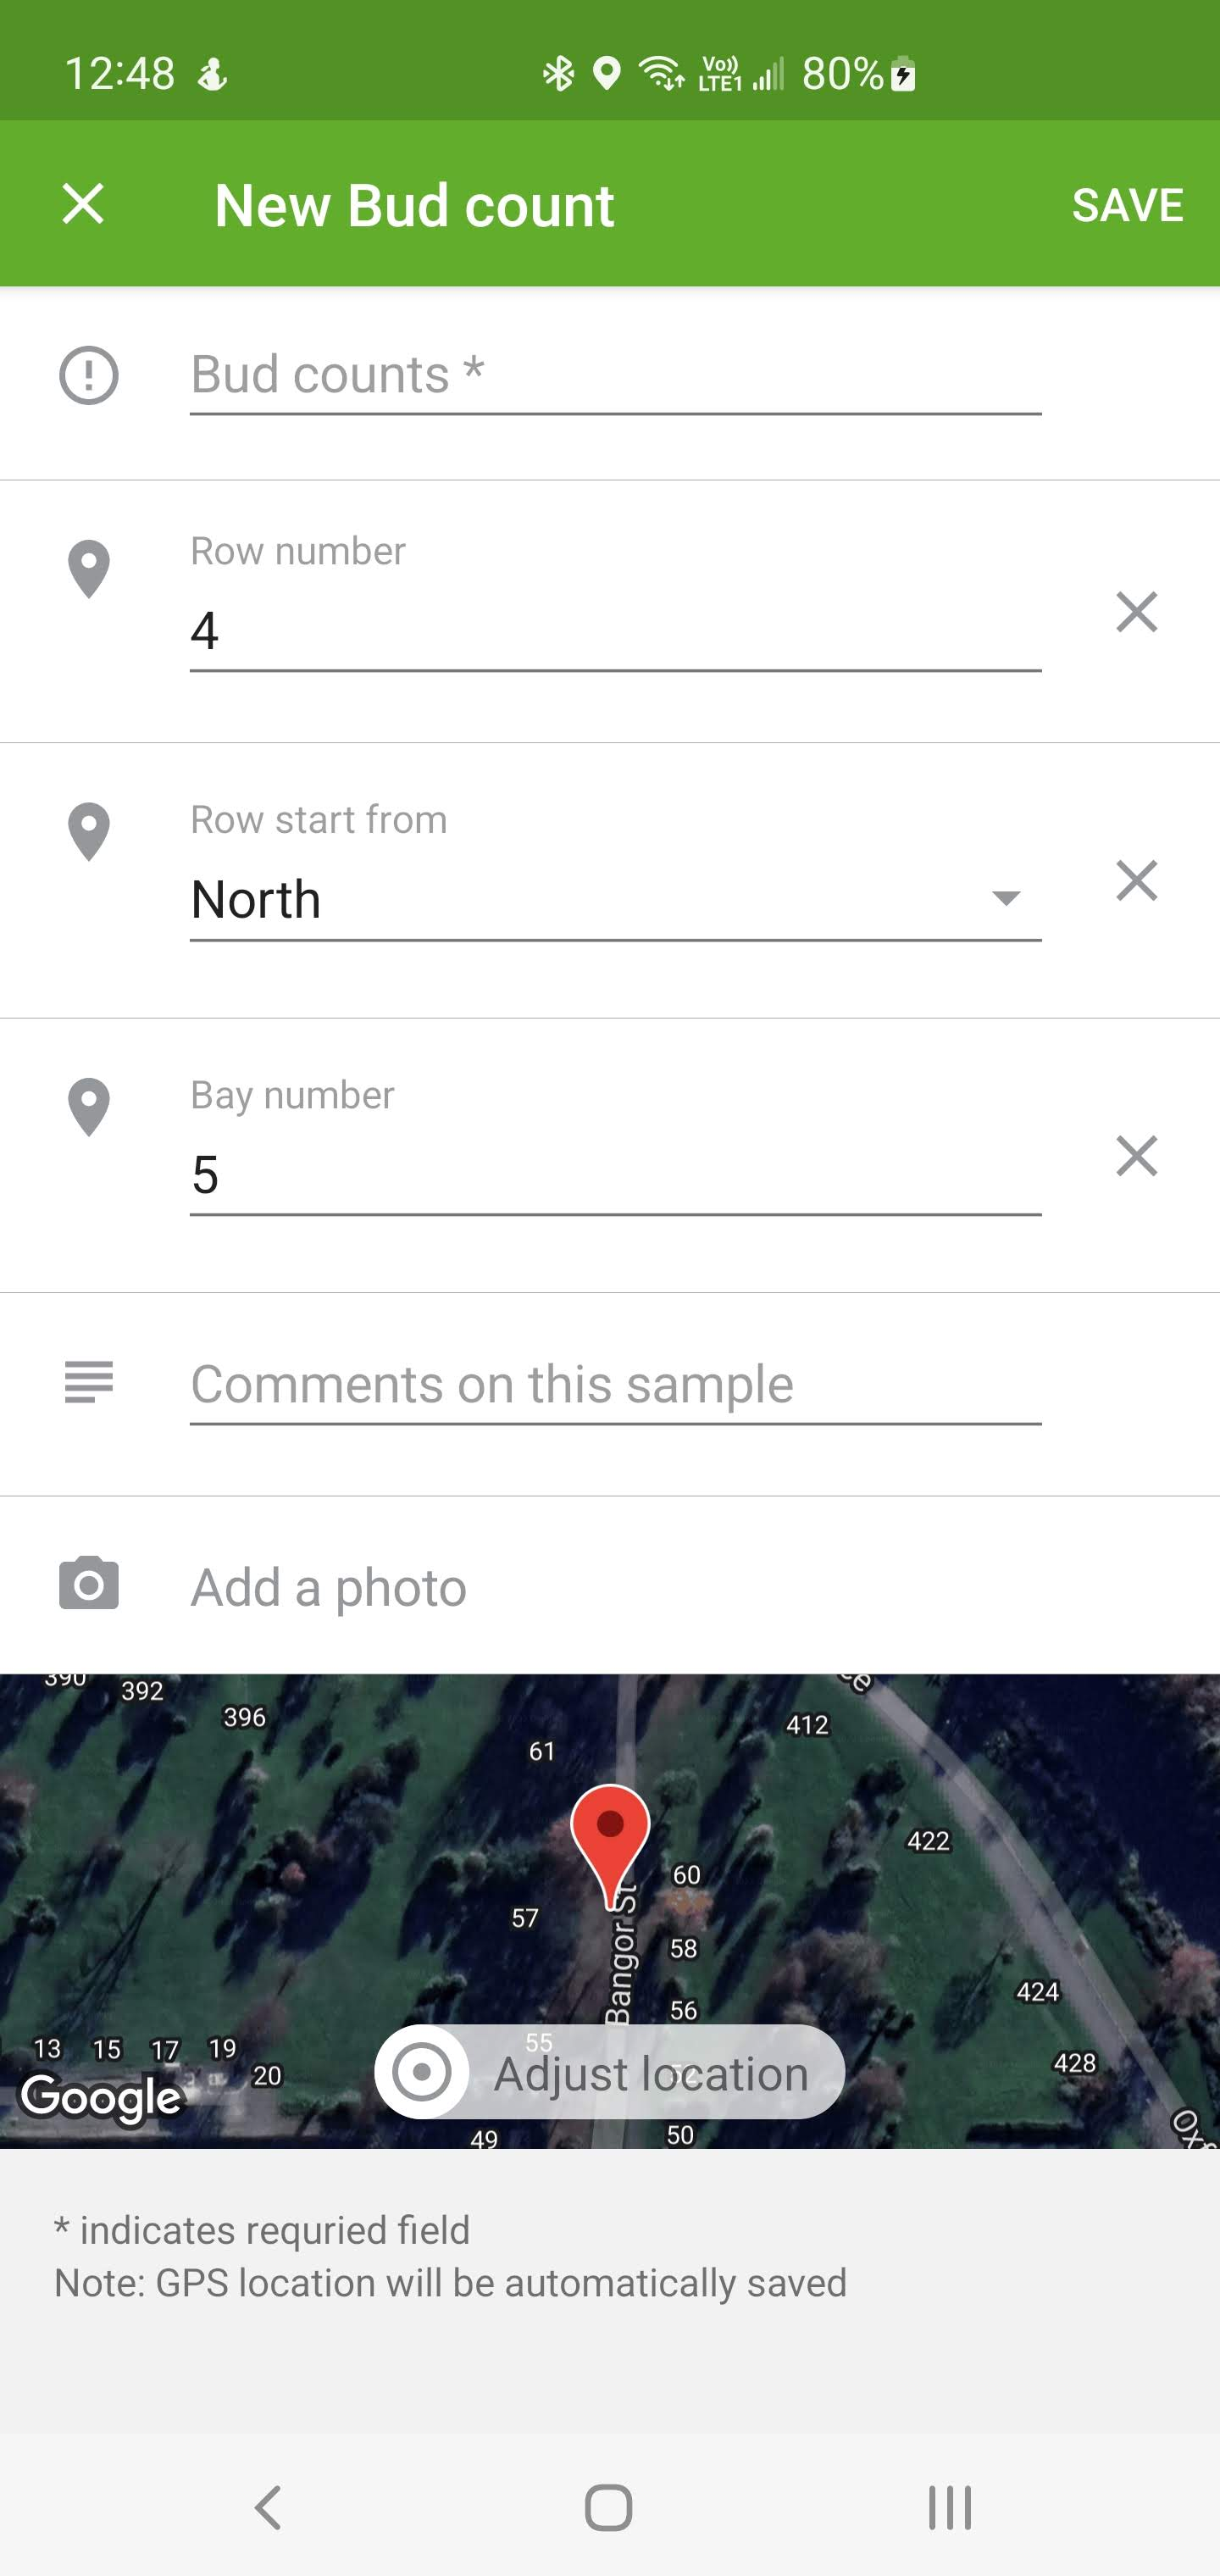
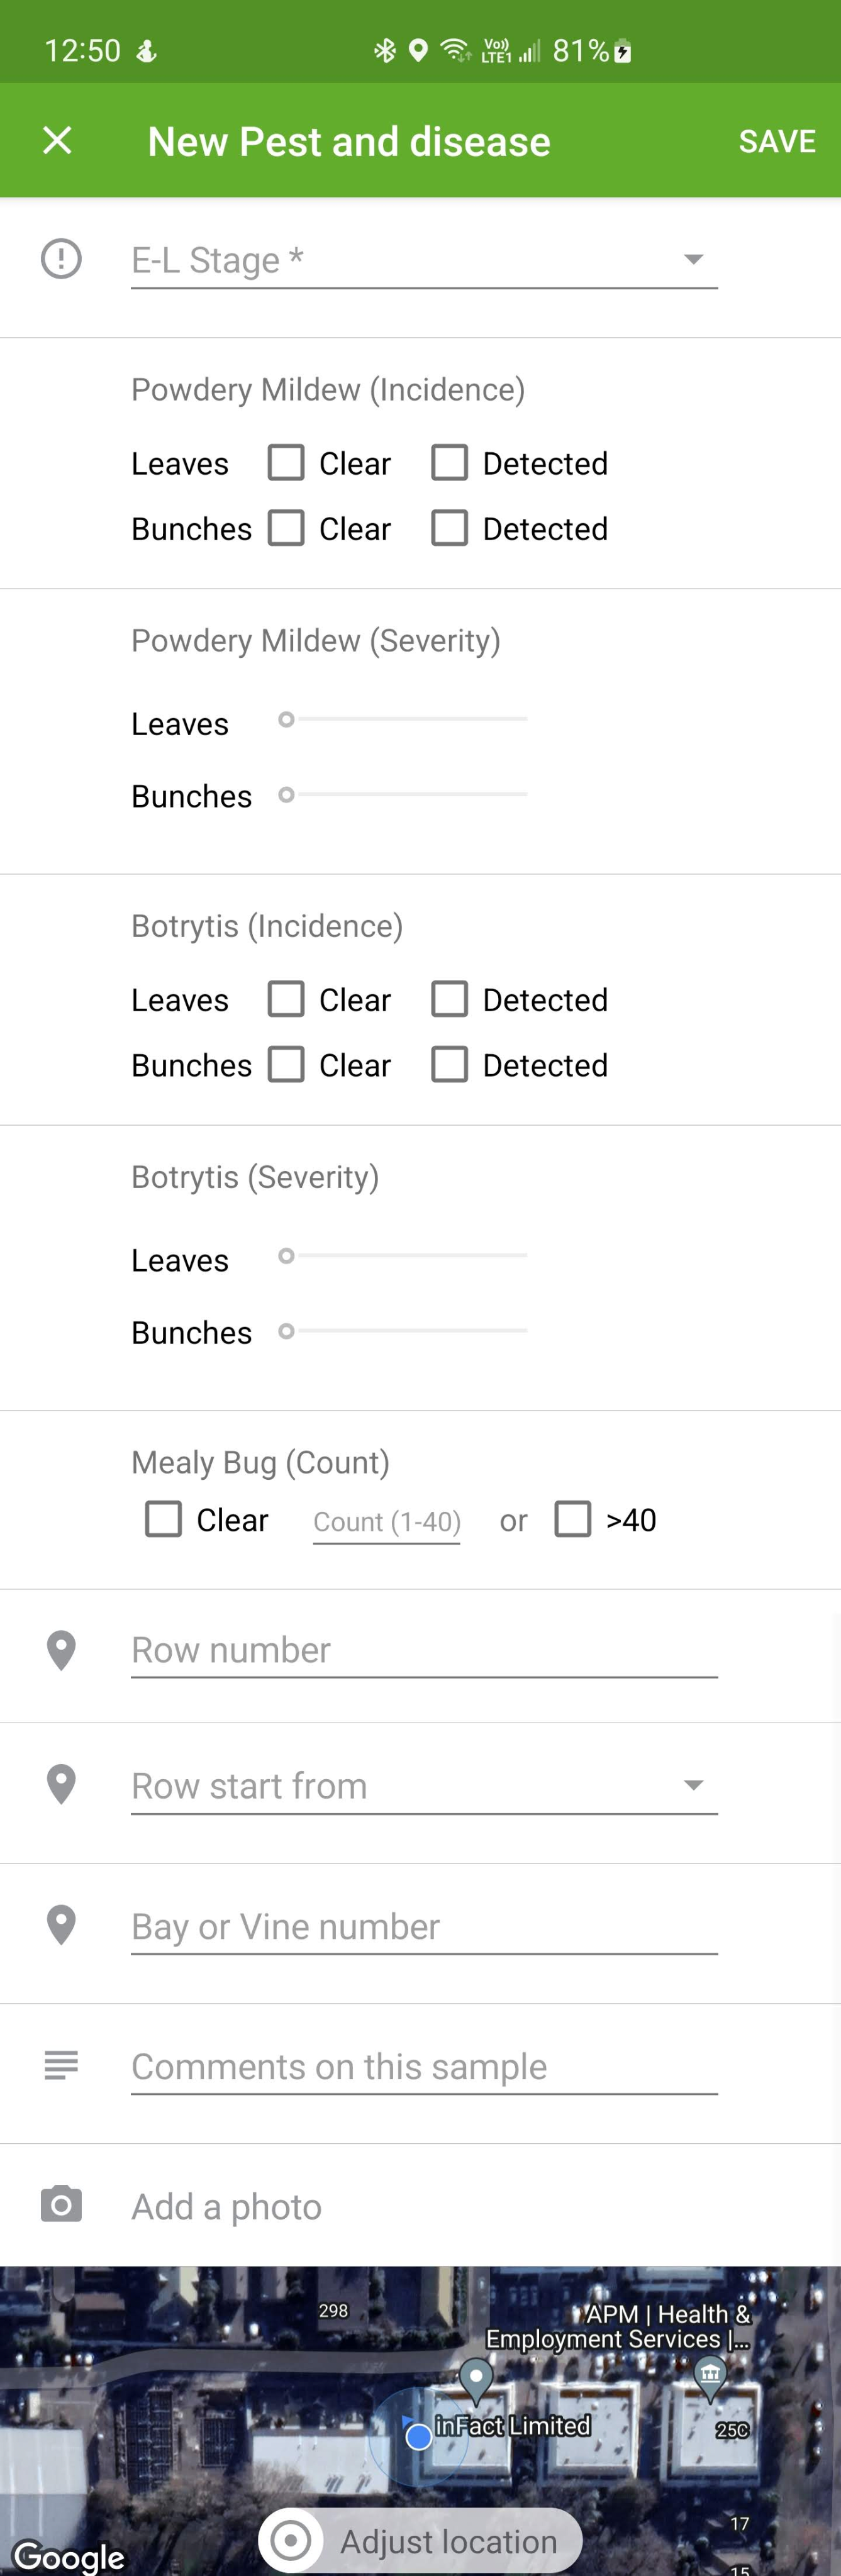
Each of the following sample run types collects data a 'block level' and doesn't have individual sample points associated with them.

Pre-Veraison Yield Estimate

Pre-Harvest Maturity Sampling

Downloading Sample Data

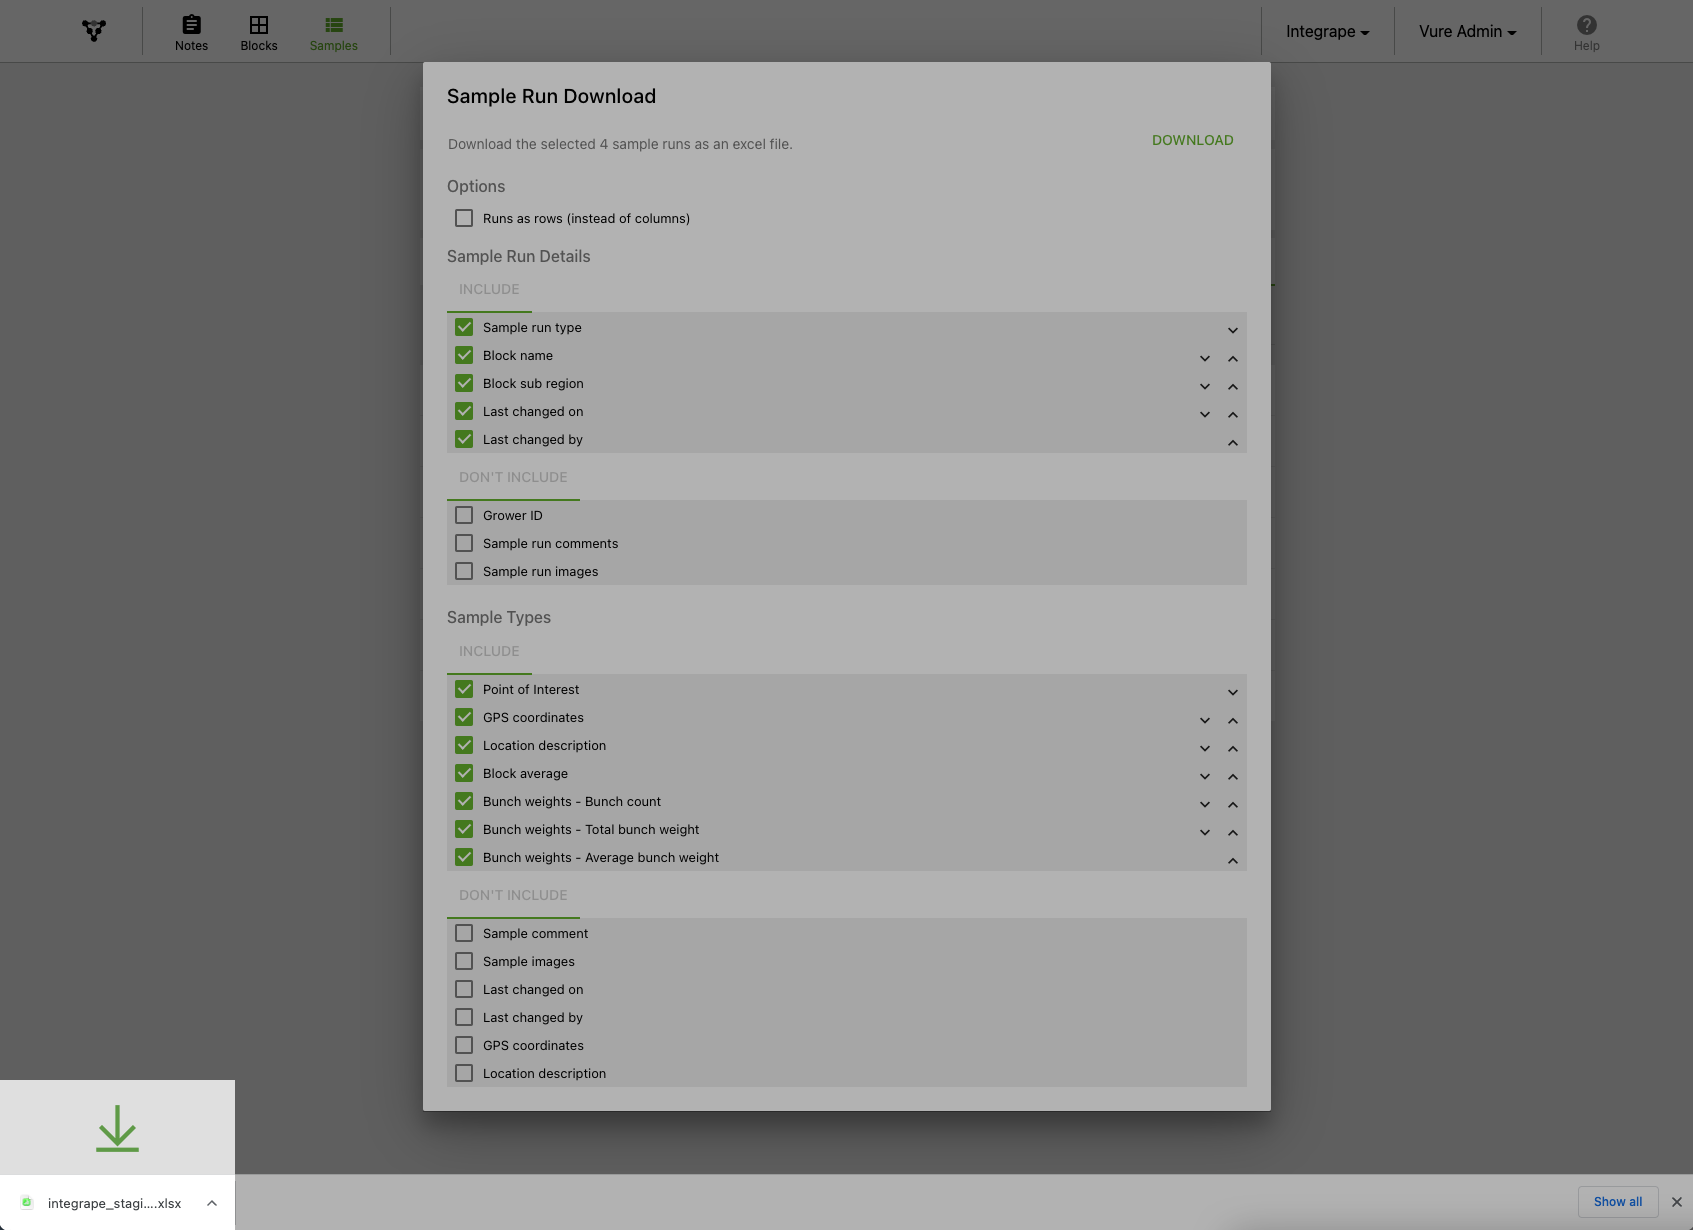
In this section we'll walk through how to access and download sample data which has been collected by samplers via the Vure Android and iOS apps.

Click on Samples in top level menu

Click on 'COMPLETE' tab

(Optional) - Filter by sample run type

(Optional) - Filter by sample date periods

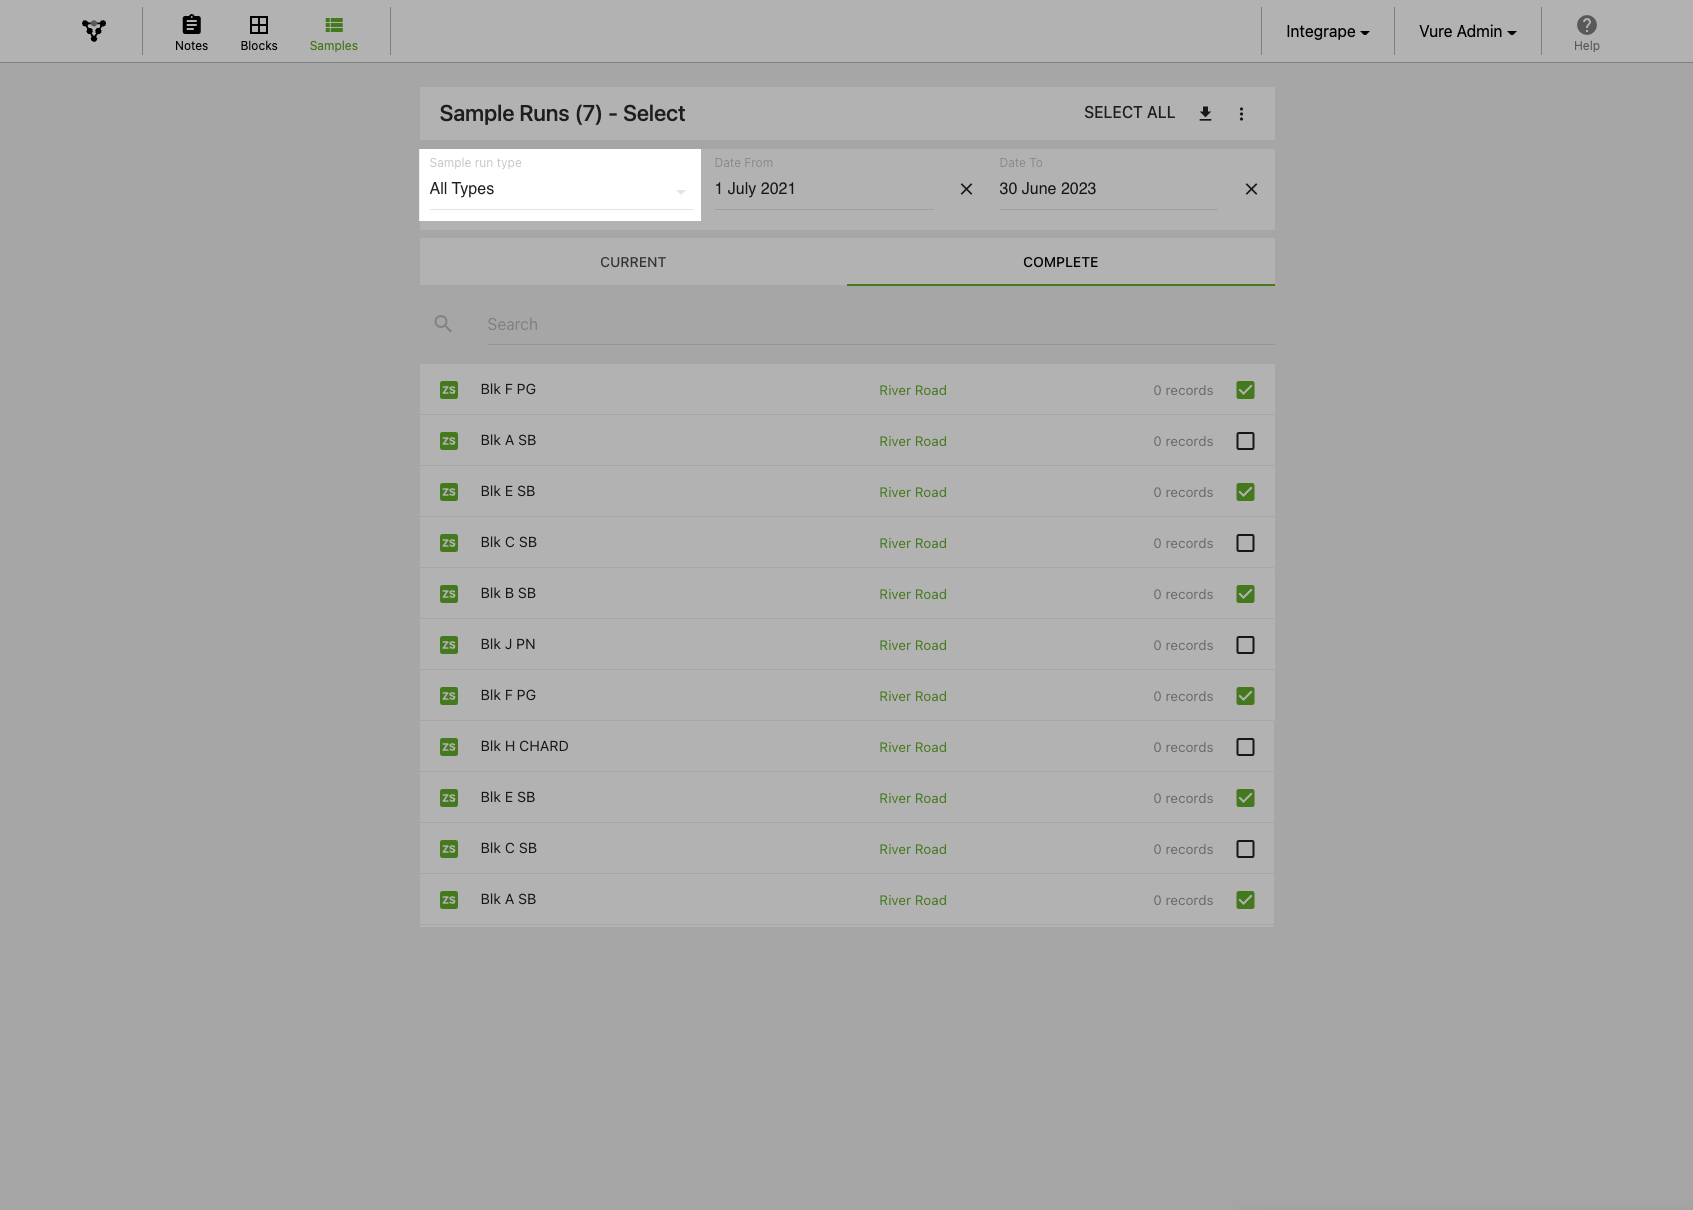
Note that the default displayed date range resets every July to signify the start of a new season.

(Optional) - Search for a specific block name

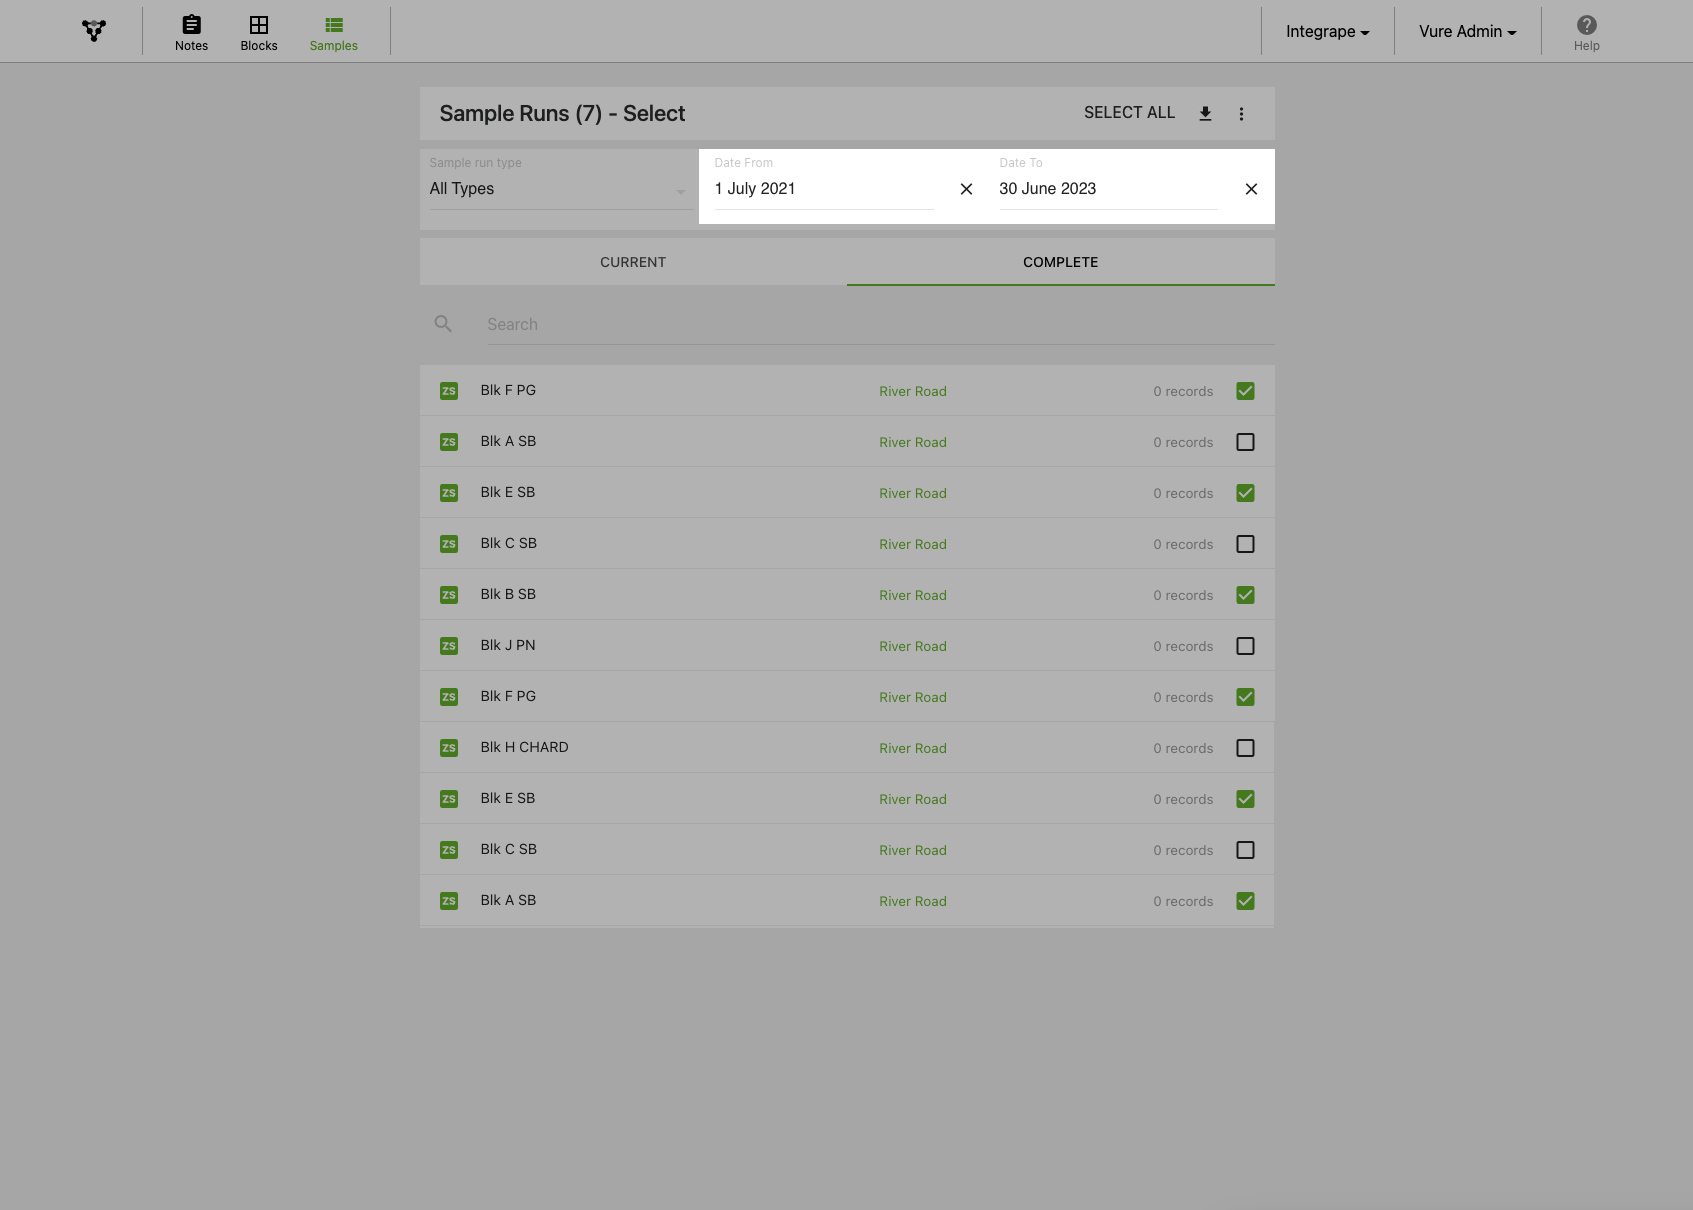
Search will only return sample runs that fall within the nominated date range.

Select the sample runs you want to download

(Optional) - Choose 'Select All' to download all displayed sample runs

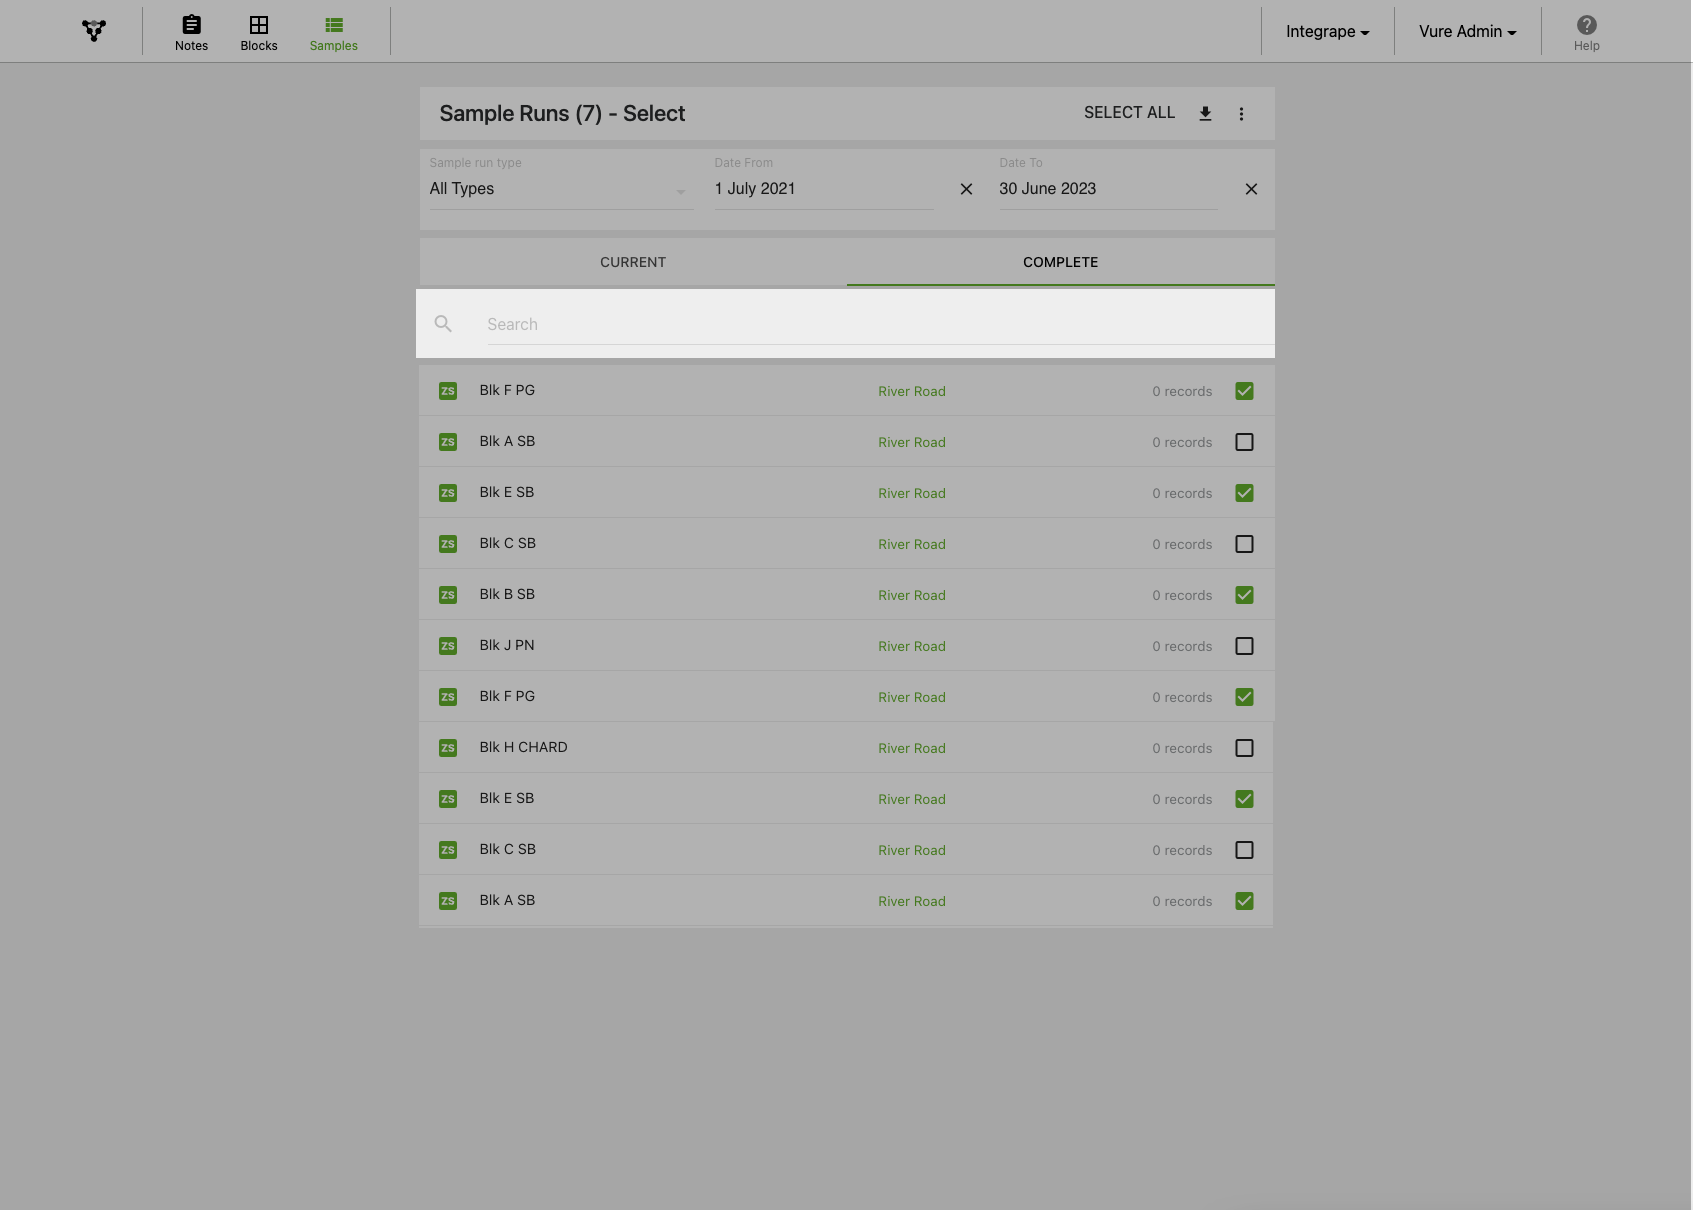
Note that only the first 2,000 sample runs are loaded initially. If you have more than 2,000, simply scroll to the bottom of the page and the next 2,000 will load automatically.

Click on the download icon

Select the data points you would like to download

(Optional) Reorder the data point groups with the vertical carets

Click 'DOWNLOAD'

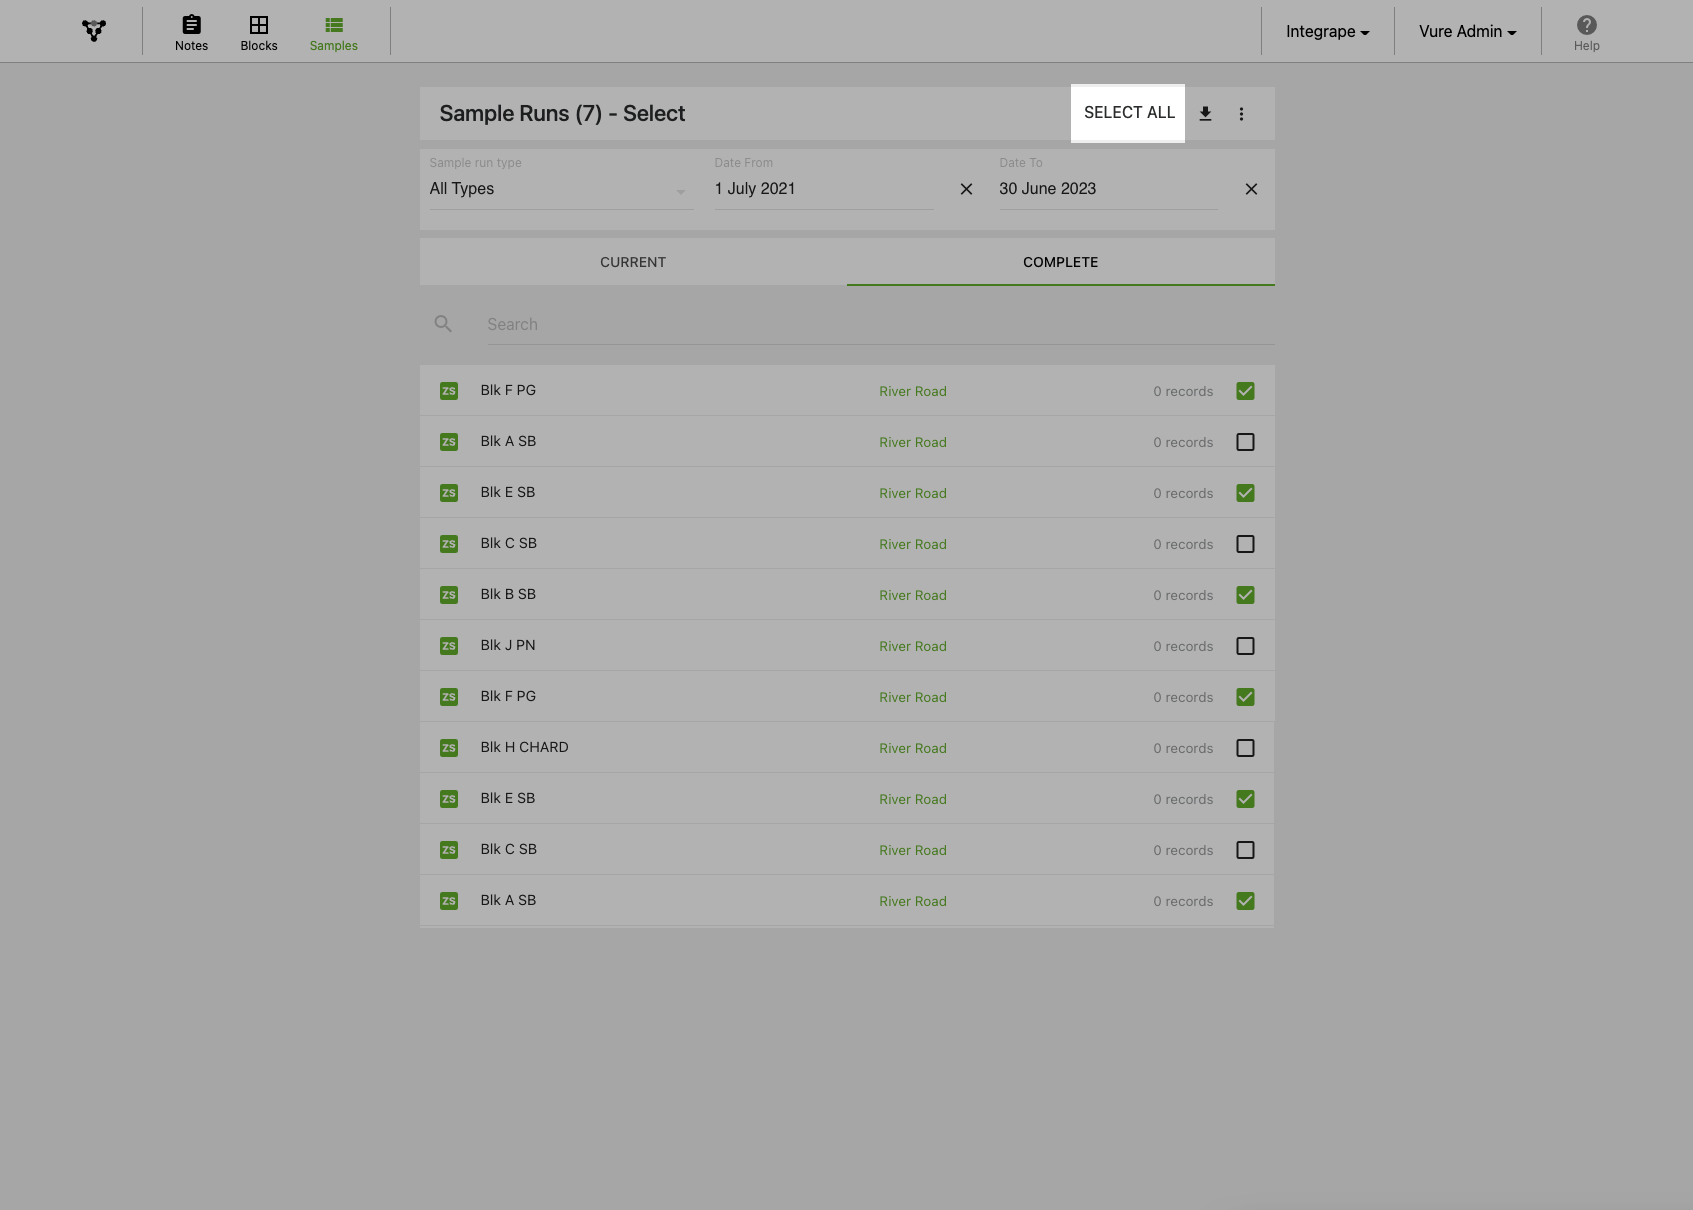
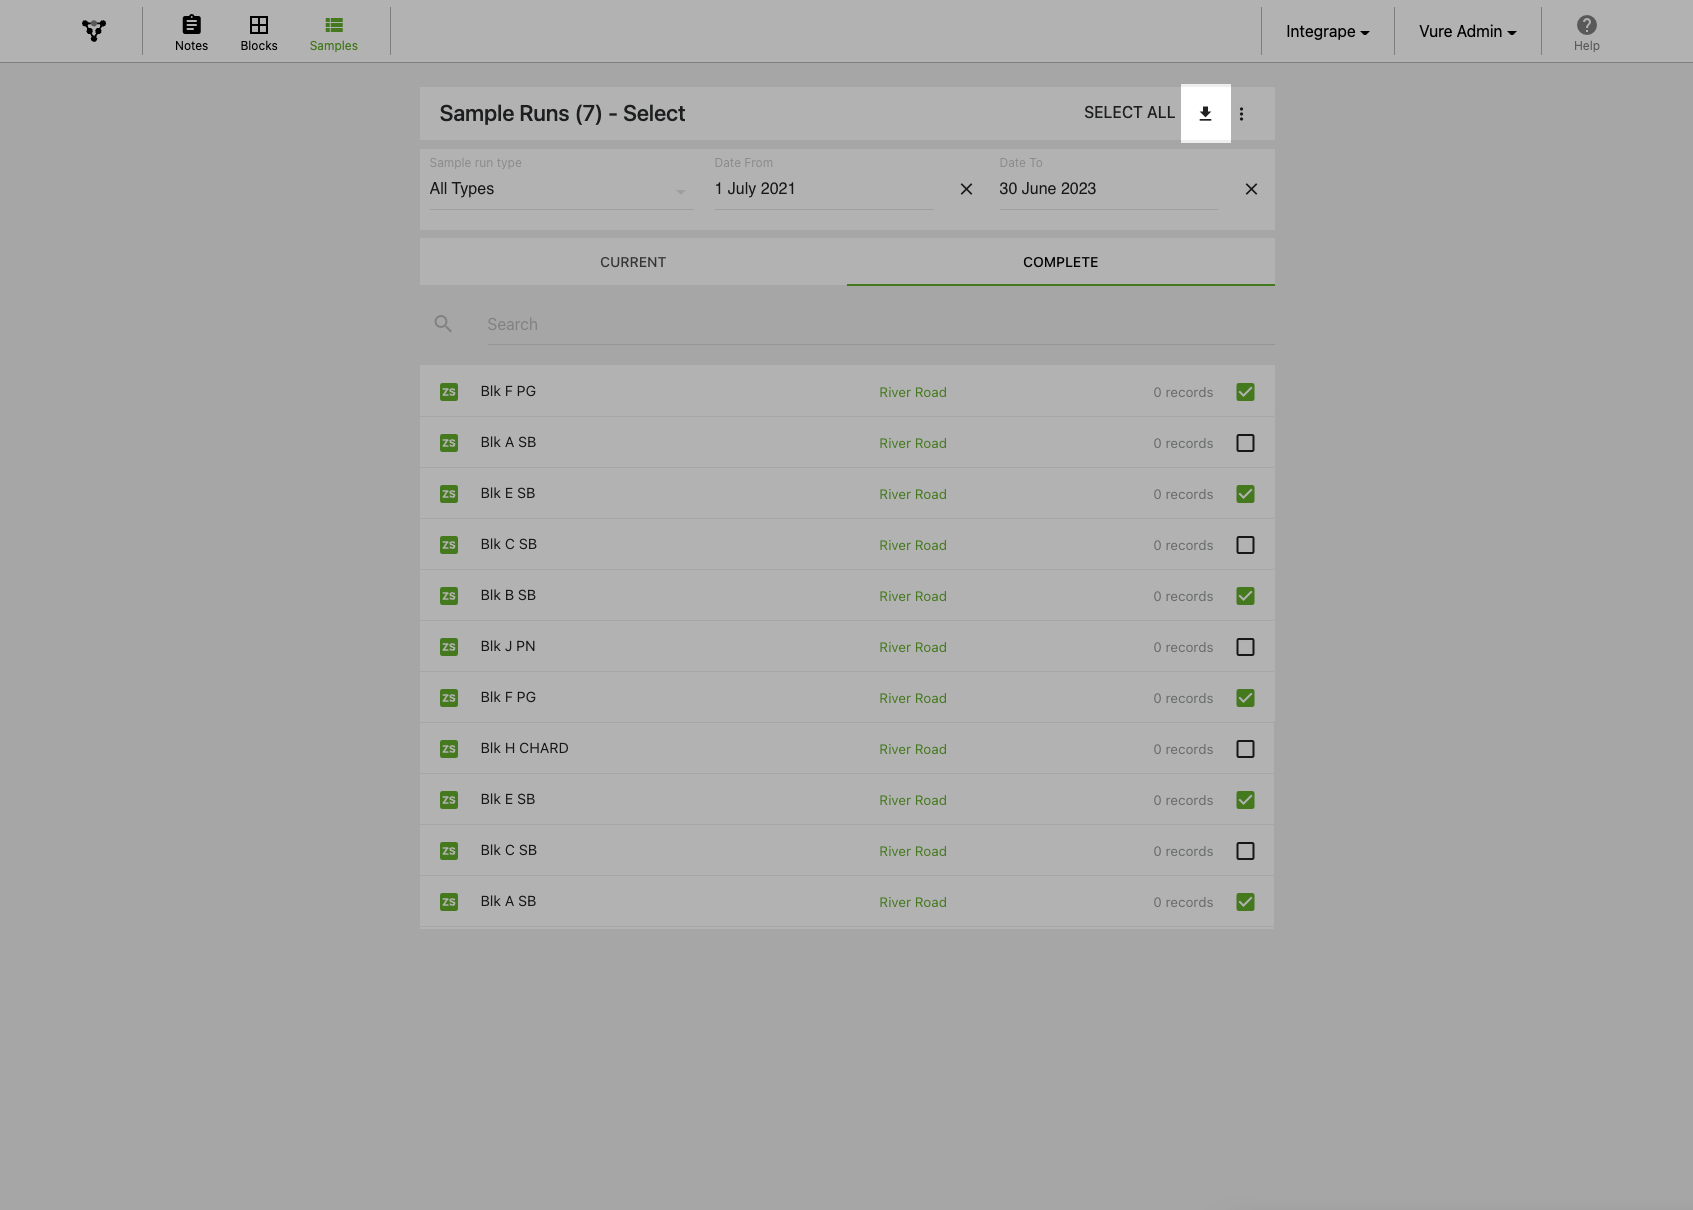
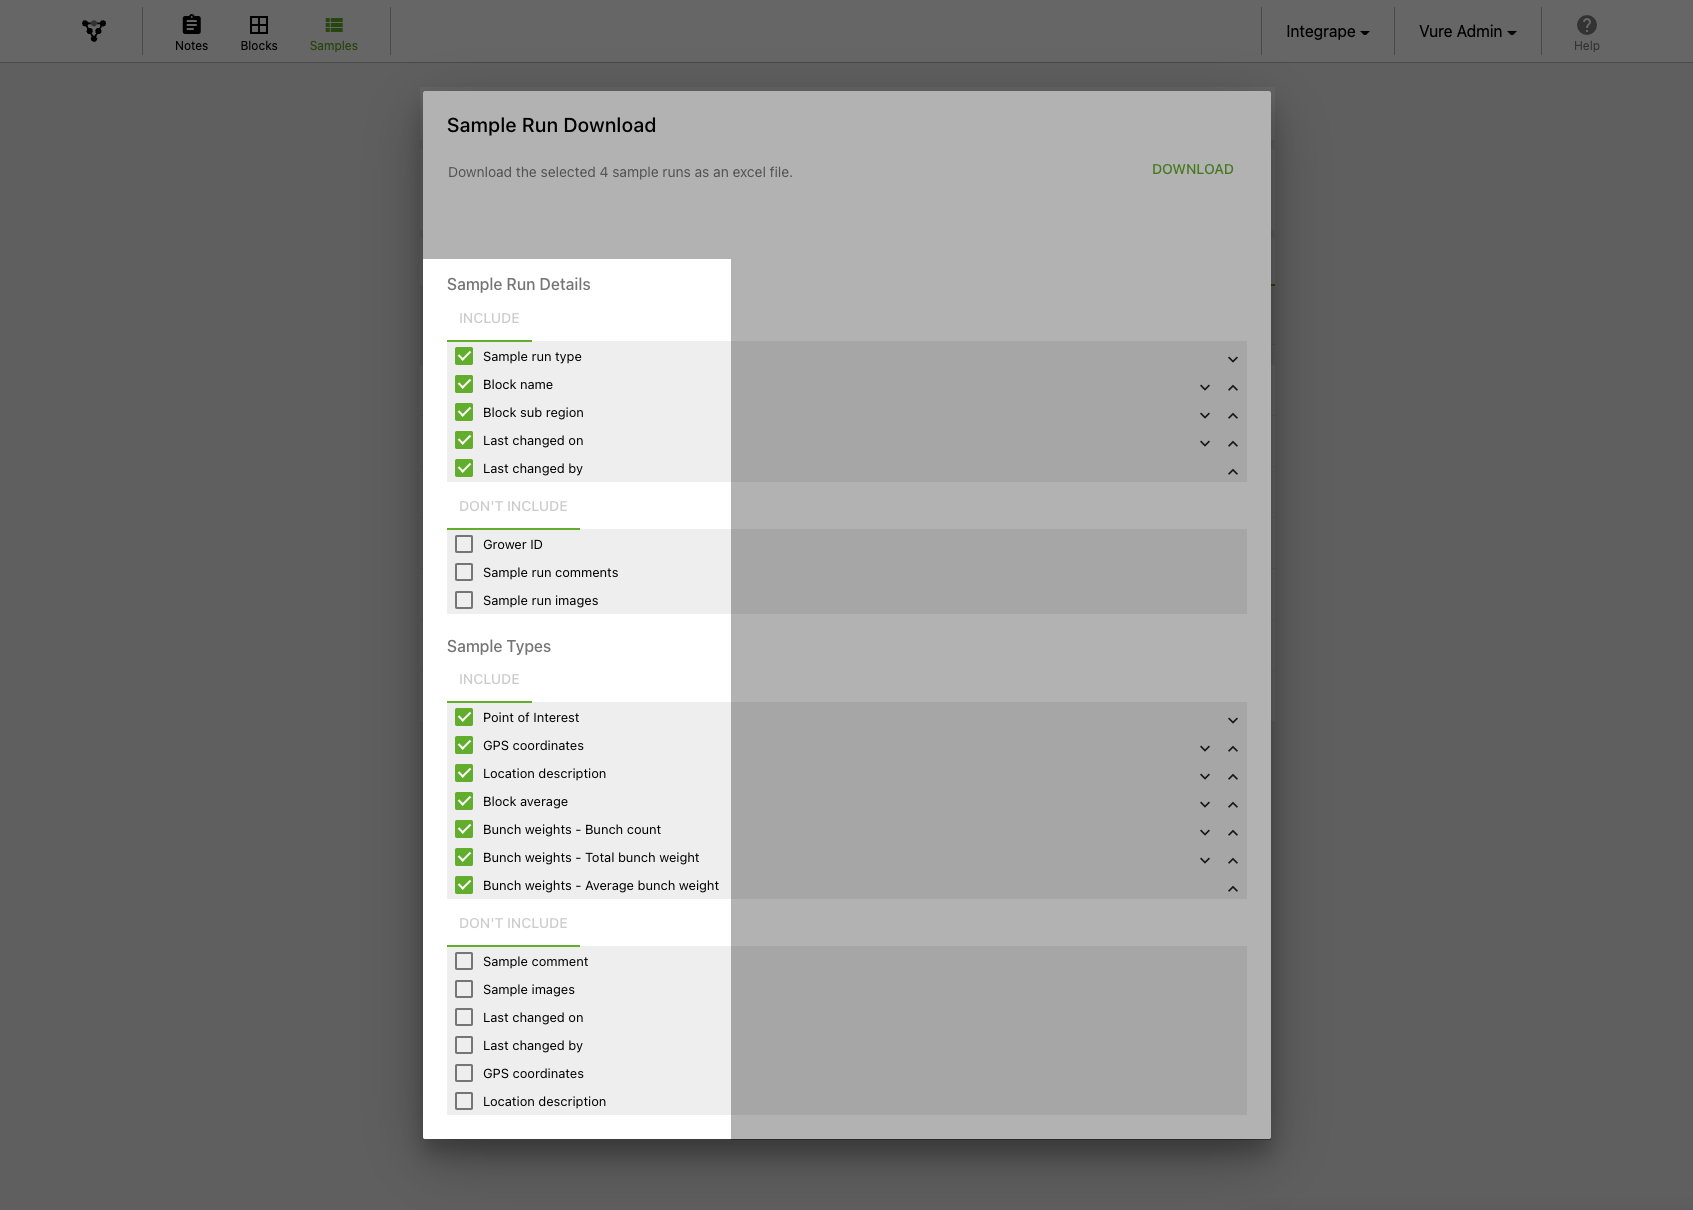
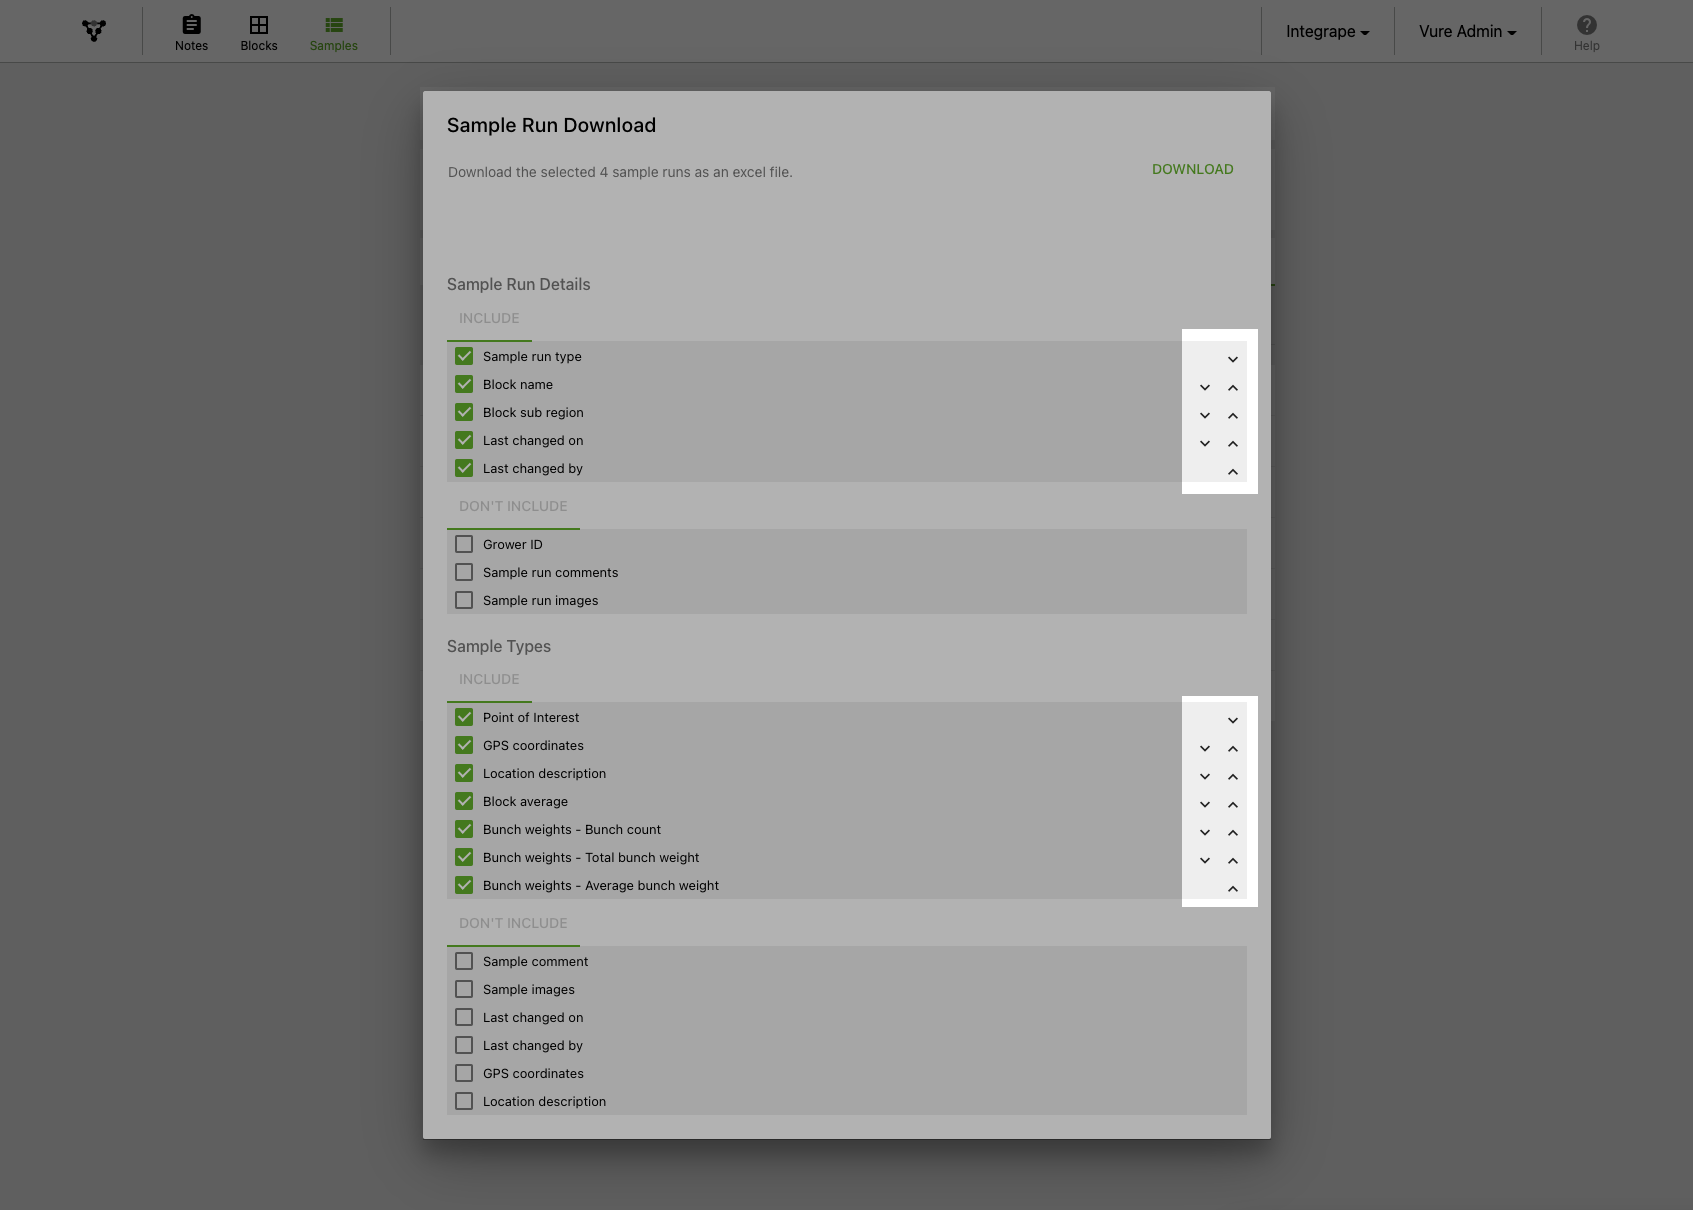
The system will generate a new Excel file for you and automatically start the download when it's ready. Depending on the number of sample runs and data points being exported, this may take up to 30 seconds.

Open the newly downloaded Excel file

Note Taking

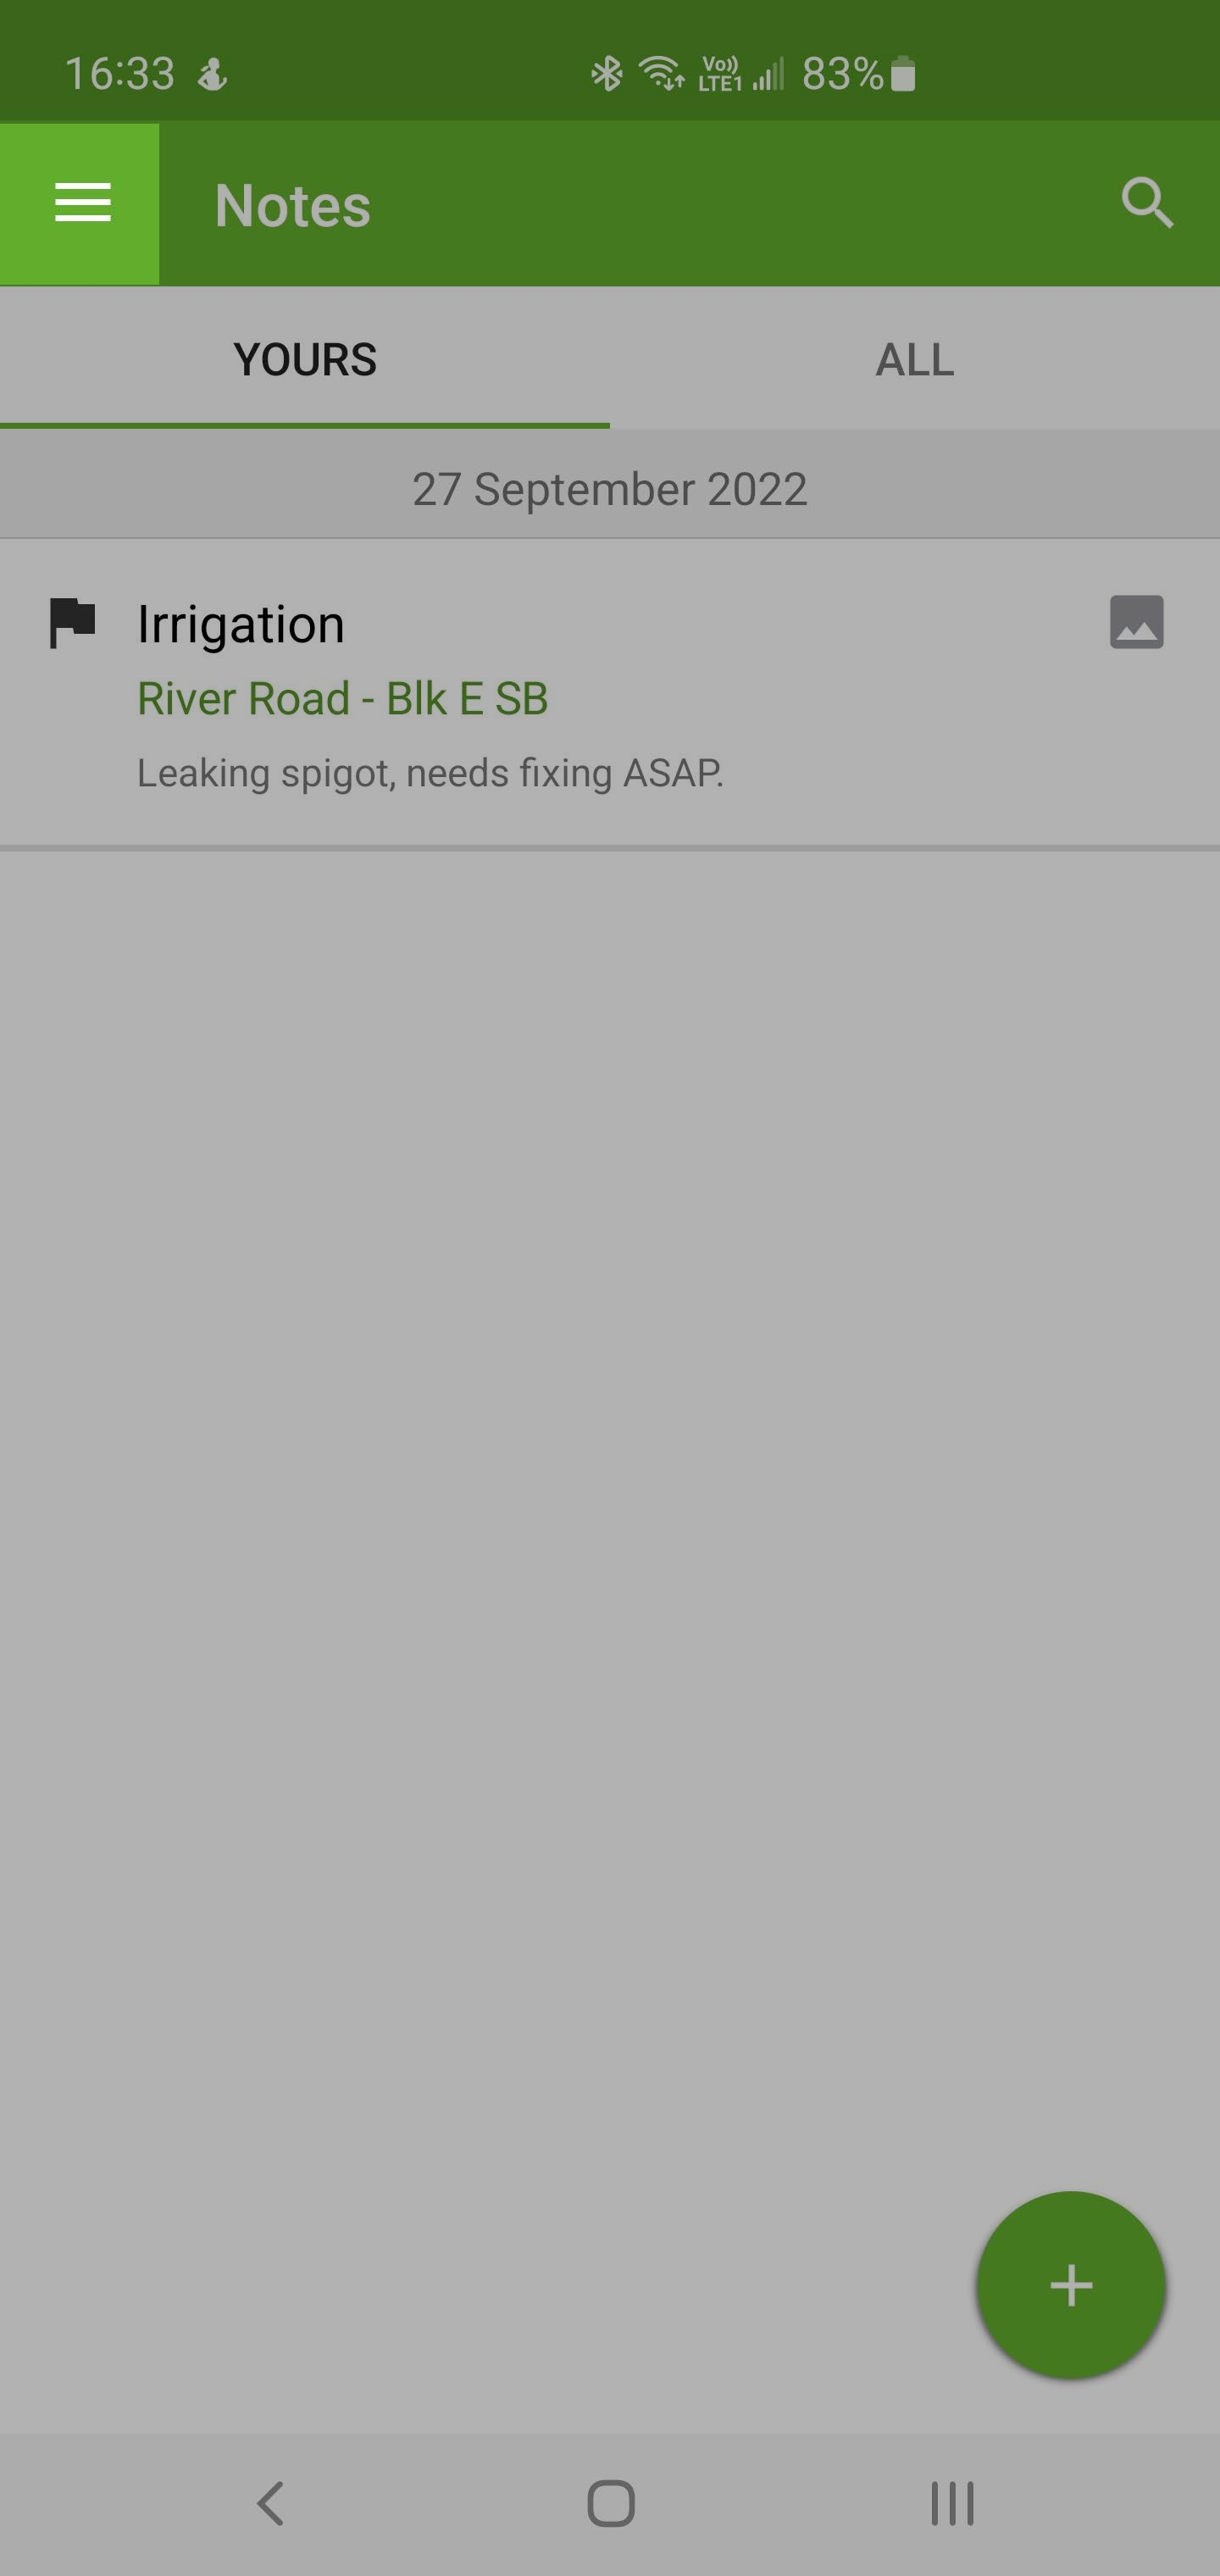
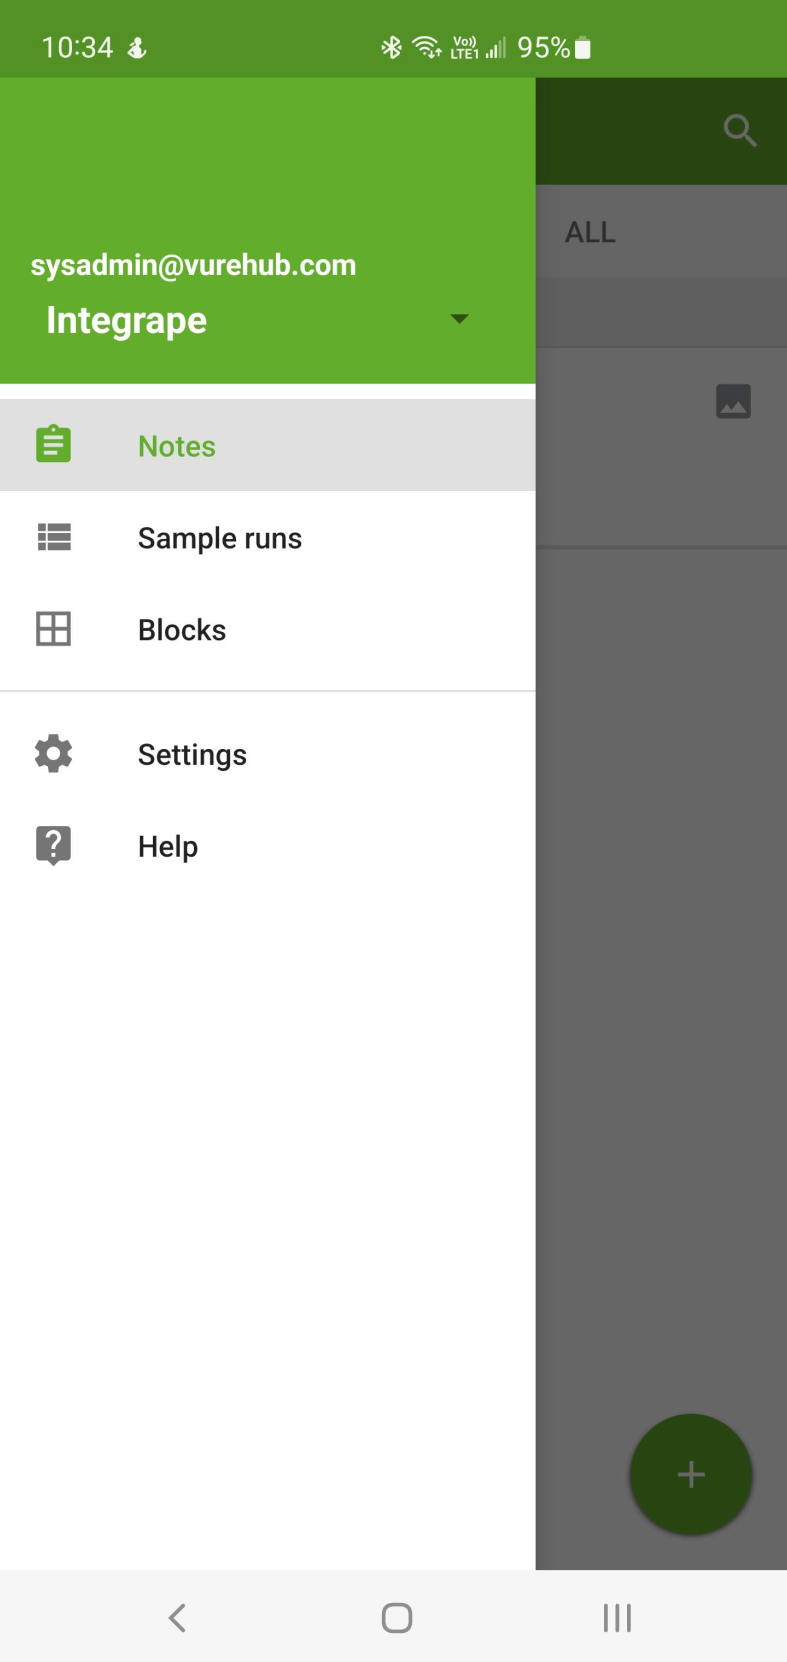
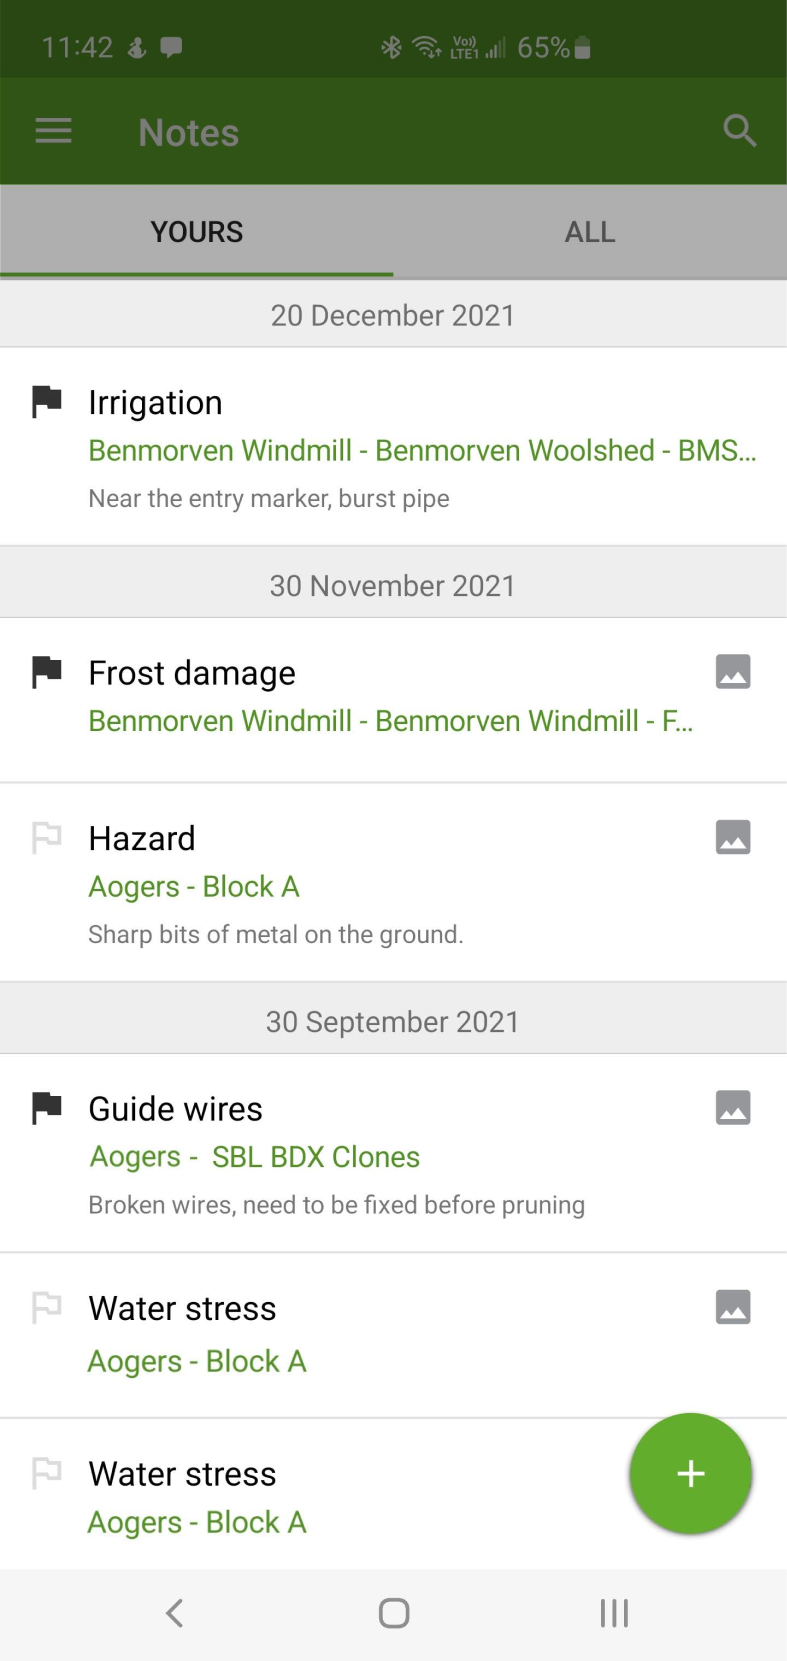
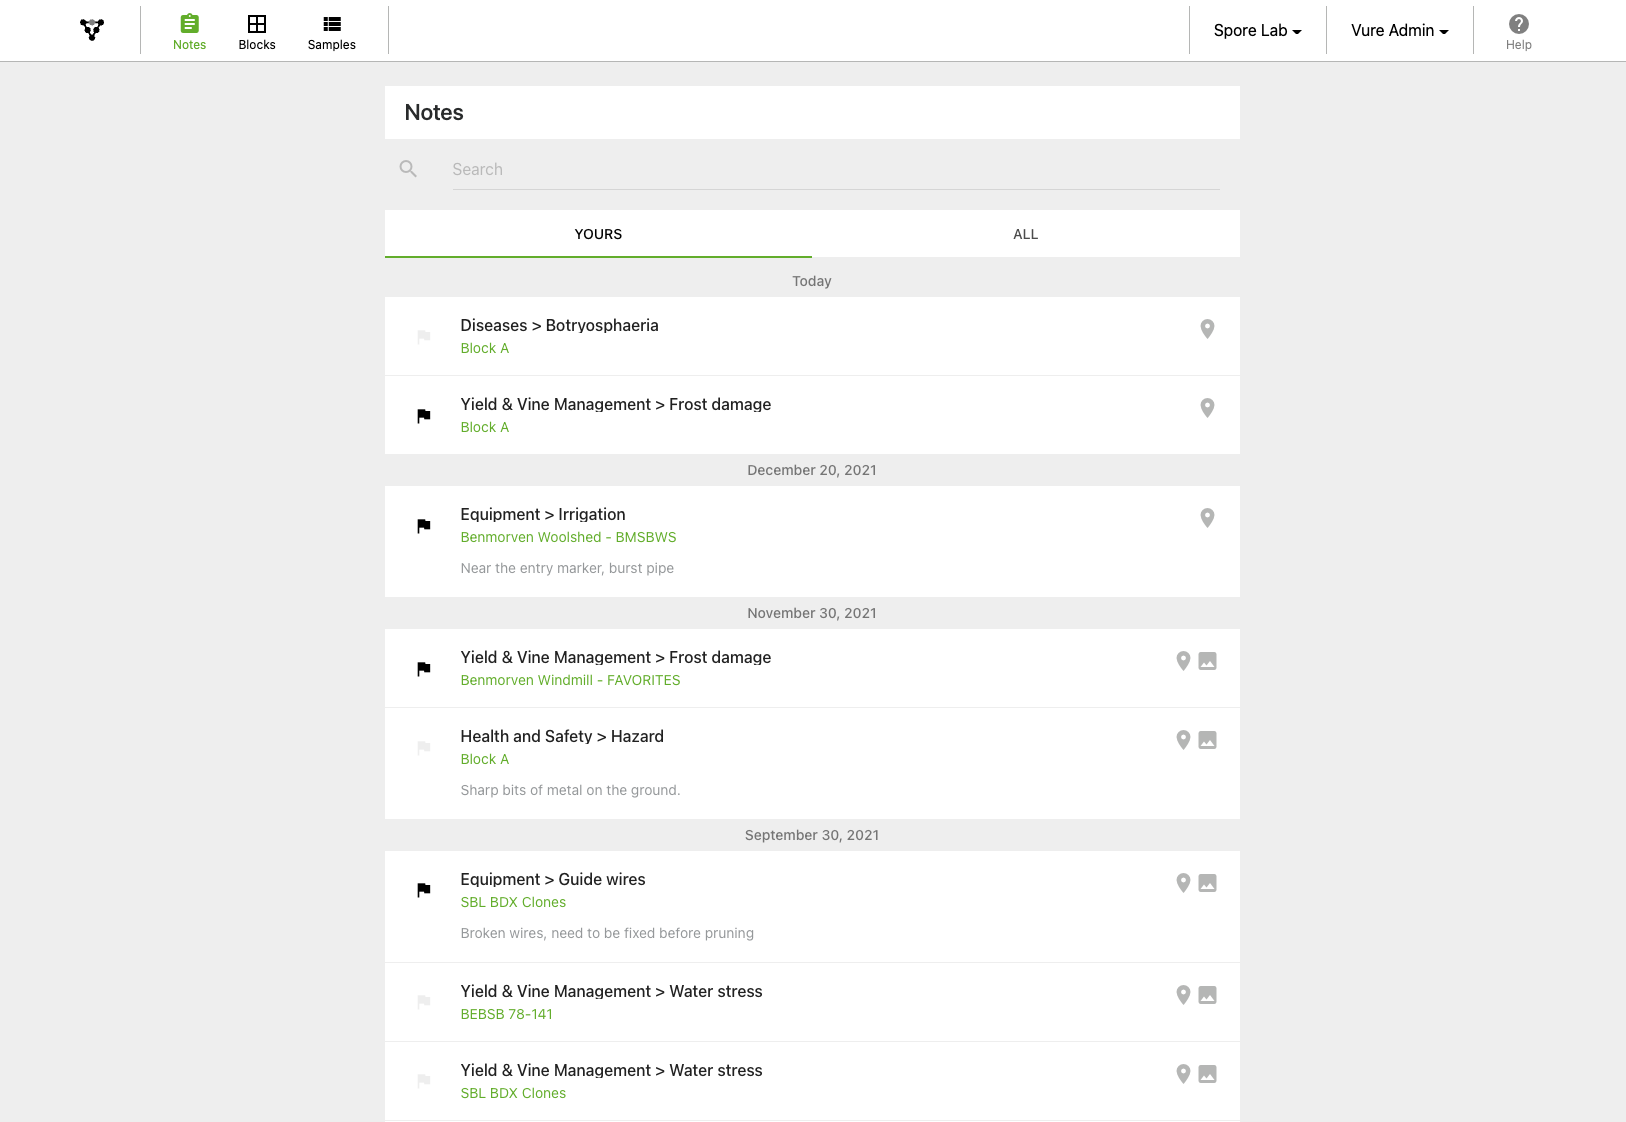
In this section we'll walk through how the note feature works on both the mobile apps as well as web app.

Viewing Notes

Notes are accessible via the top level mobile app menu

Here you can access notes that you've been tagged into 'YOURS', or all notes that are part of your organisation 'ALL'

Notes are accessible via the web app top menu

Creating a New Note

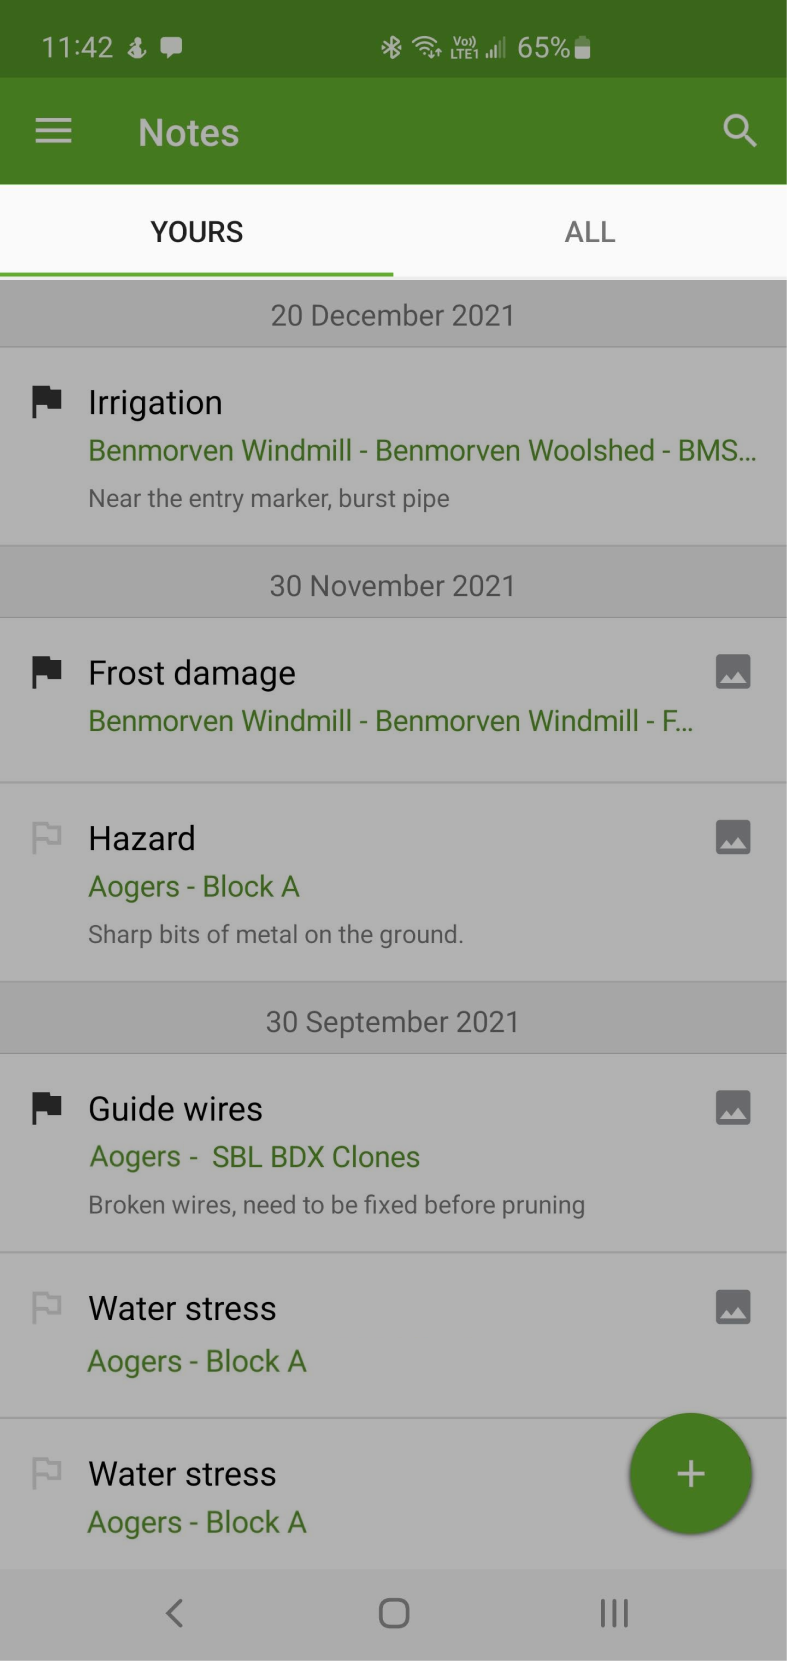
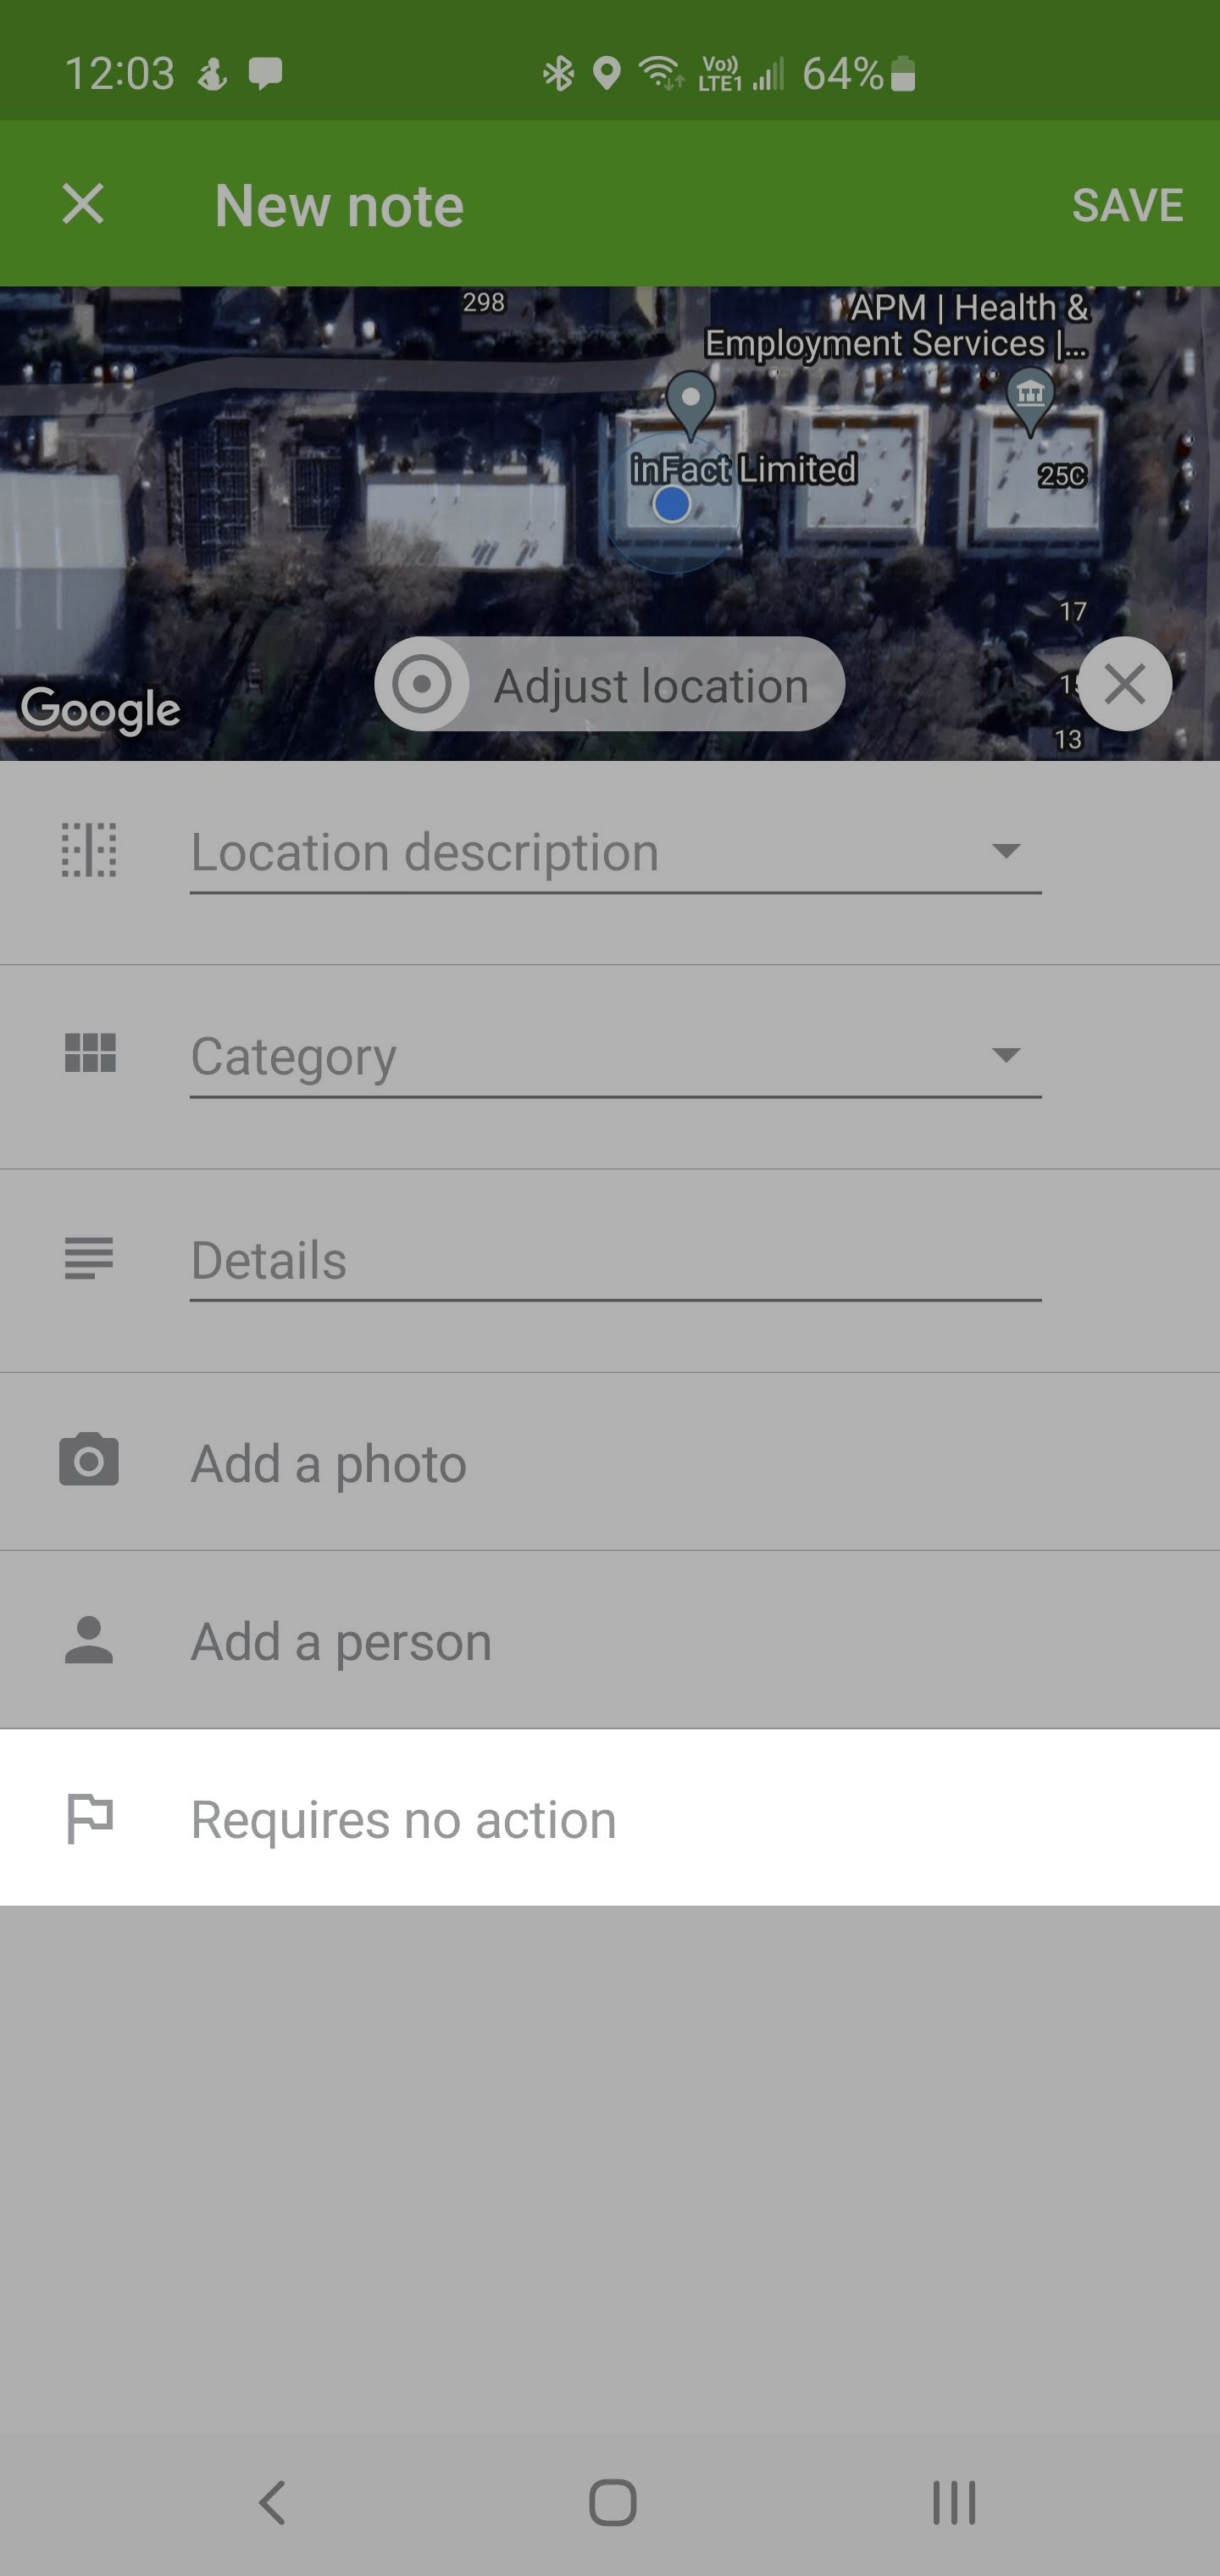
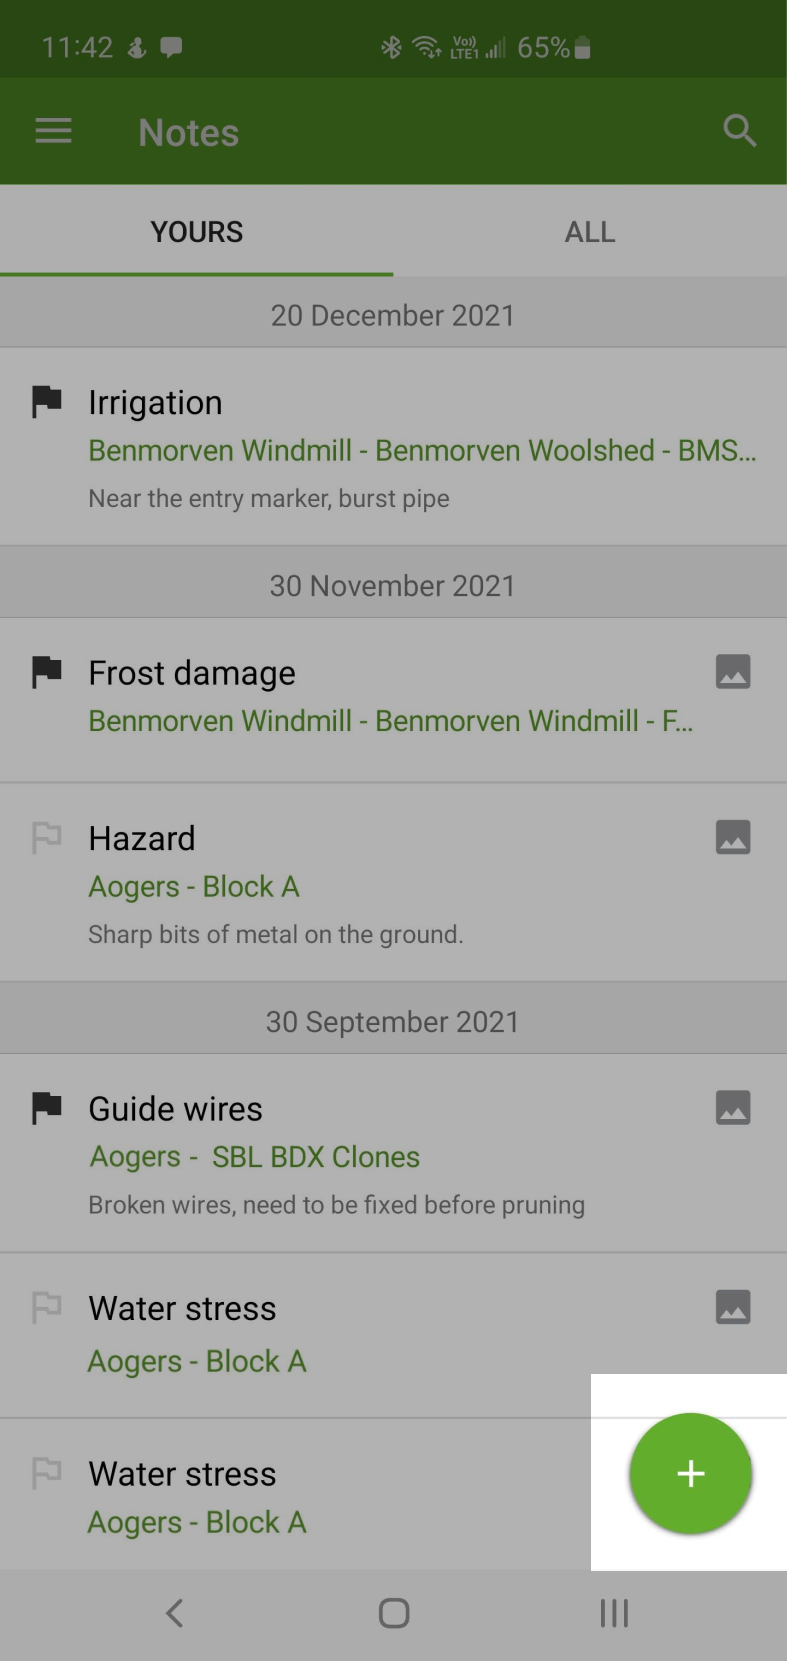
Note taking in Vure is intended to be incredibly free form, with little restrictions on what information you need to enter. Enter as much or as little as you want to help you get the job done.

Click on the green (+) button

(Optional) Enter Location Information

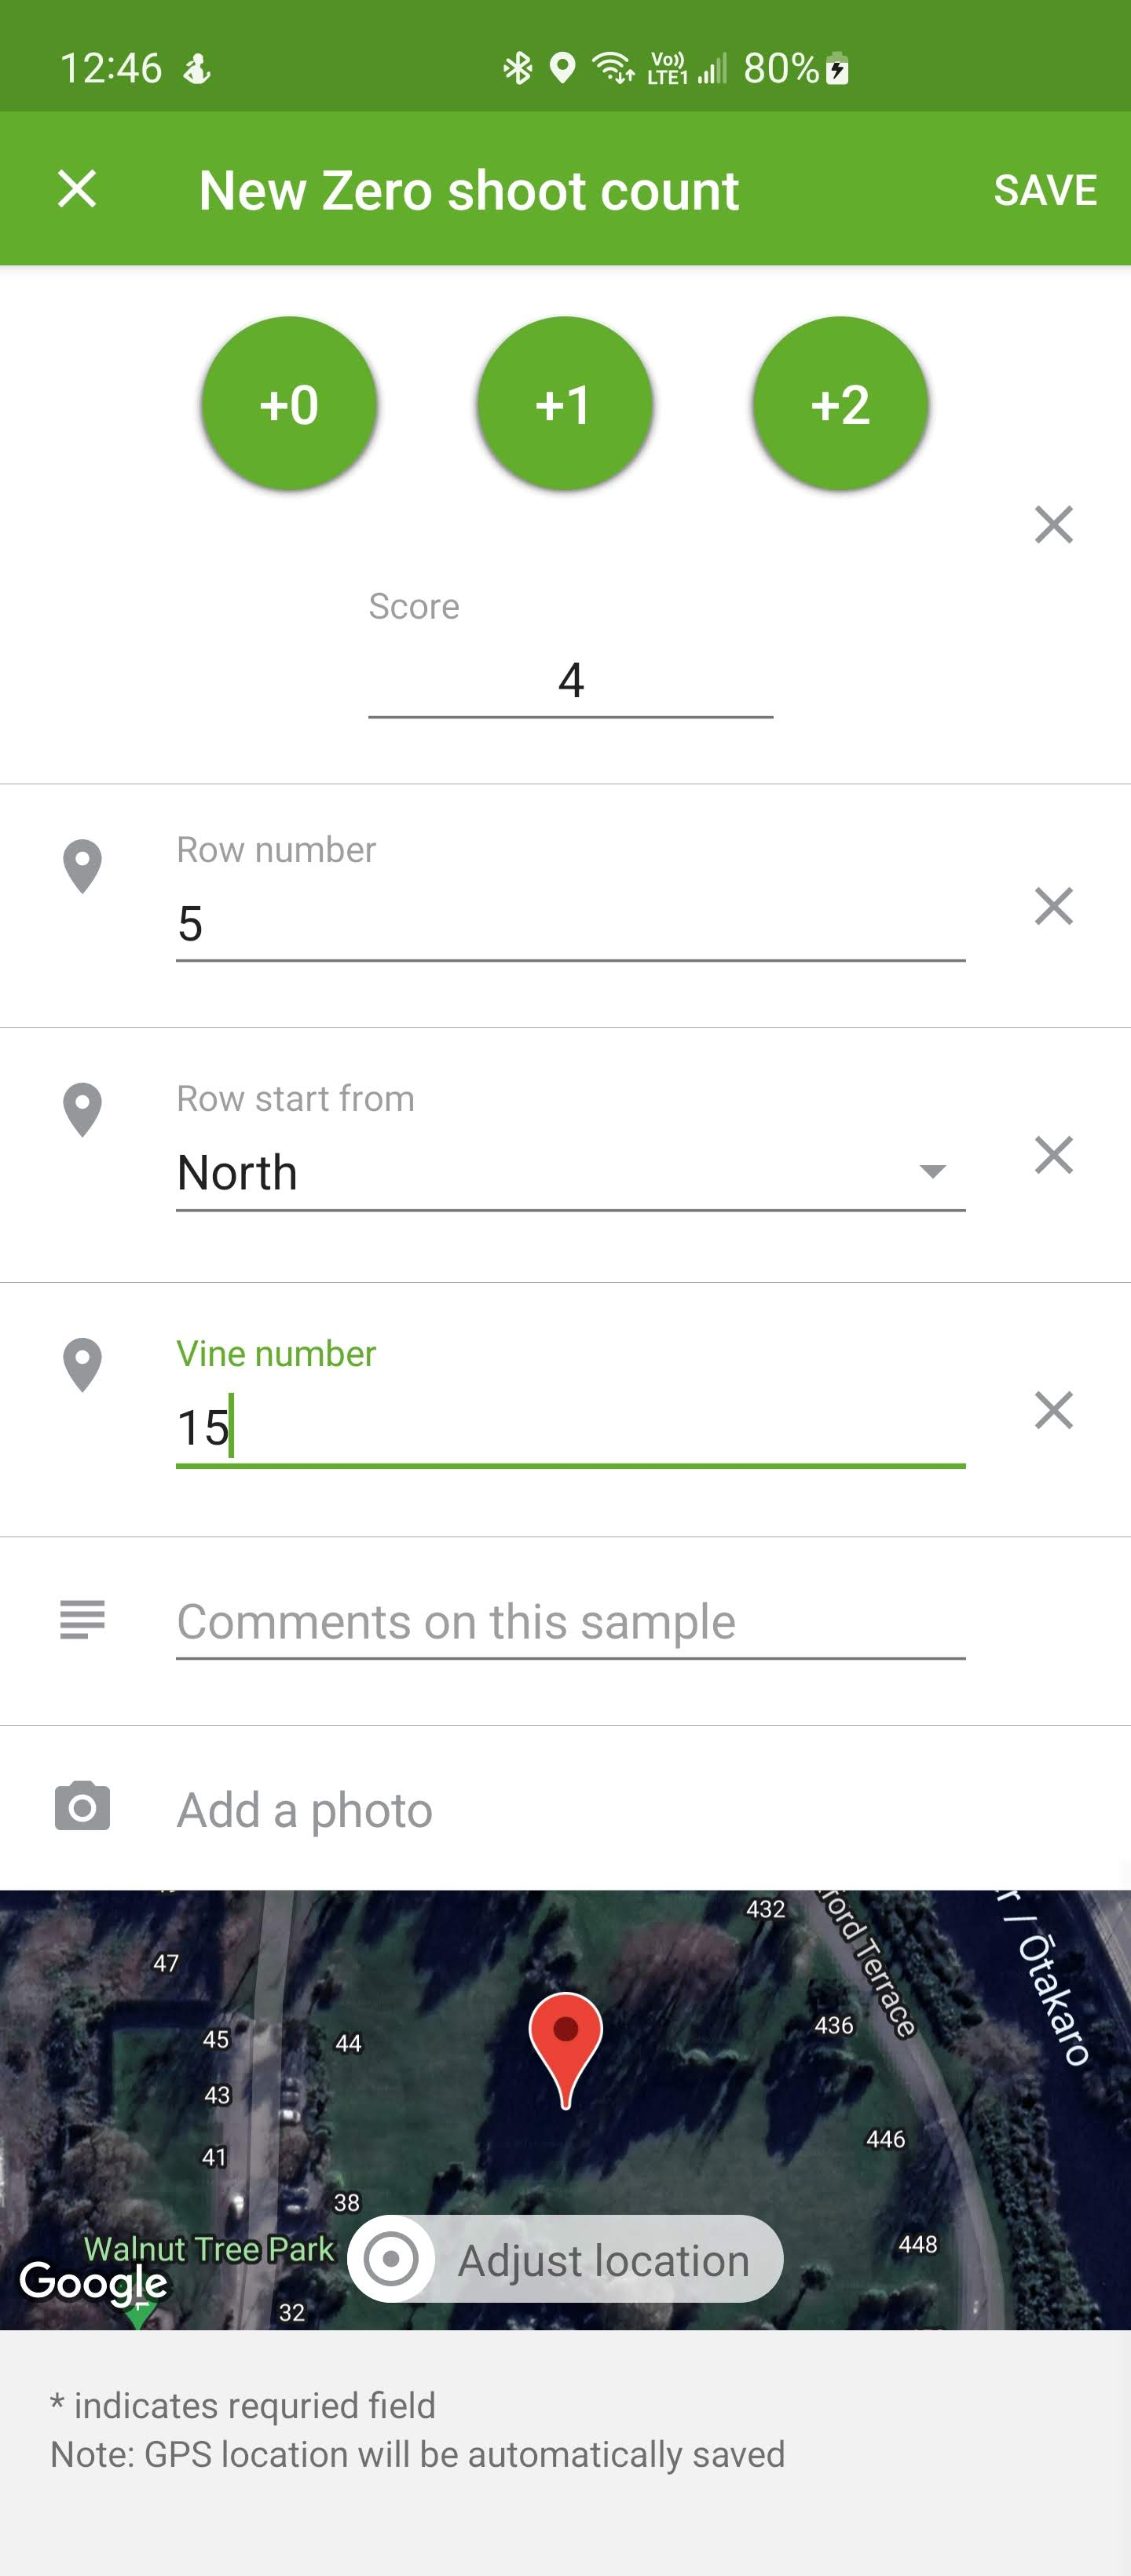
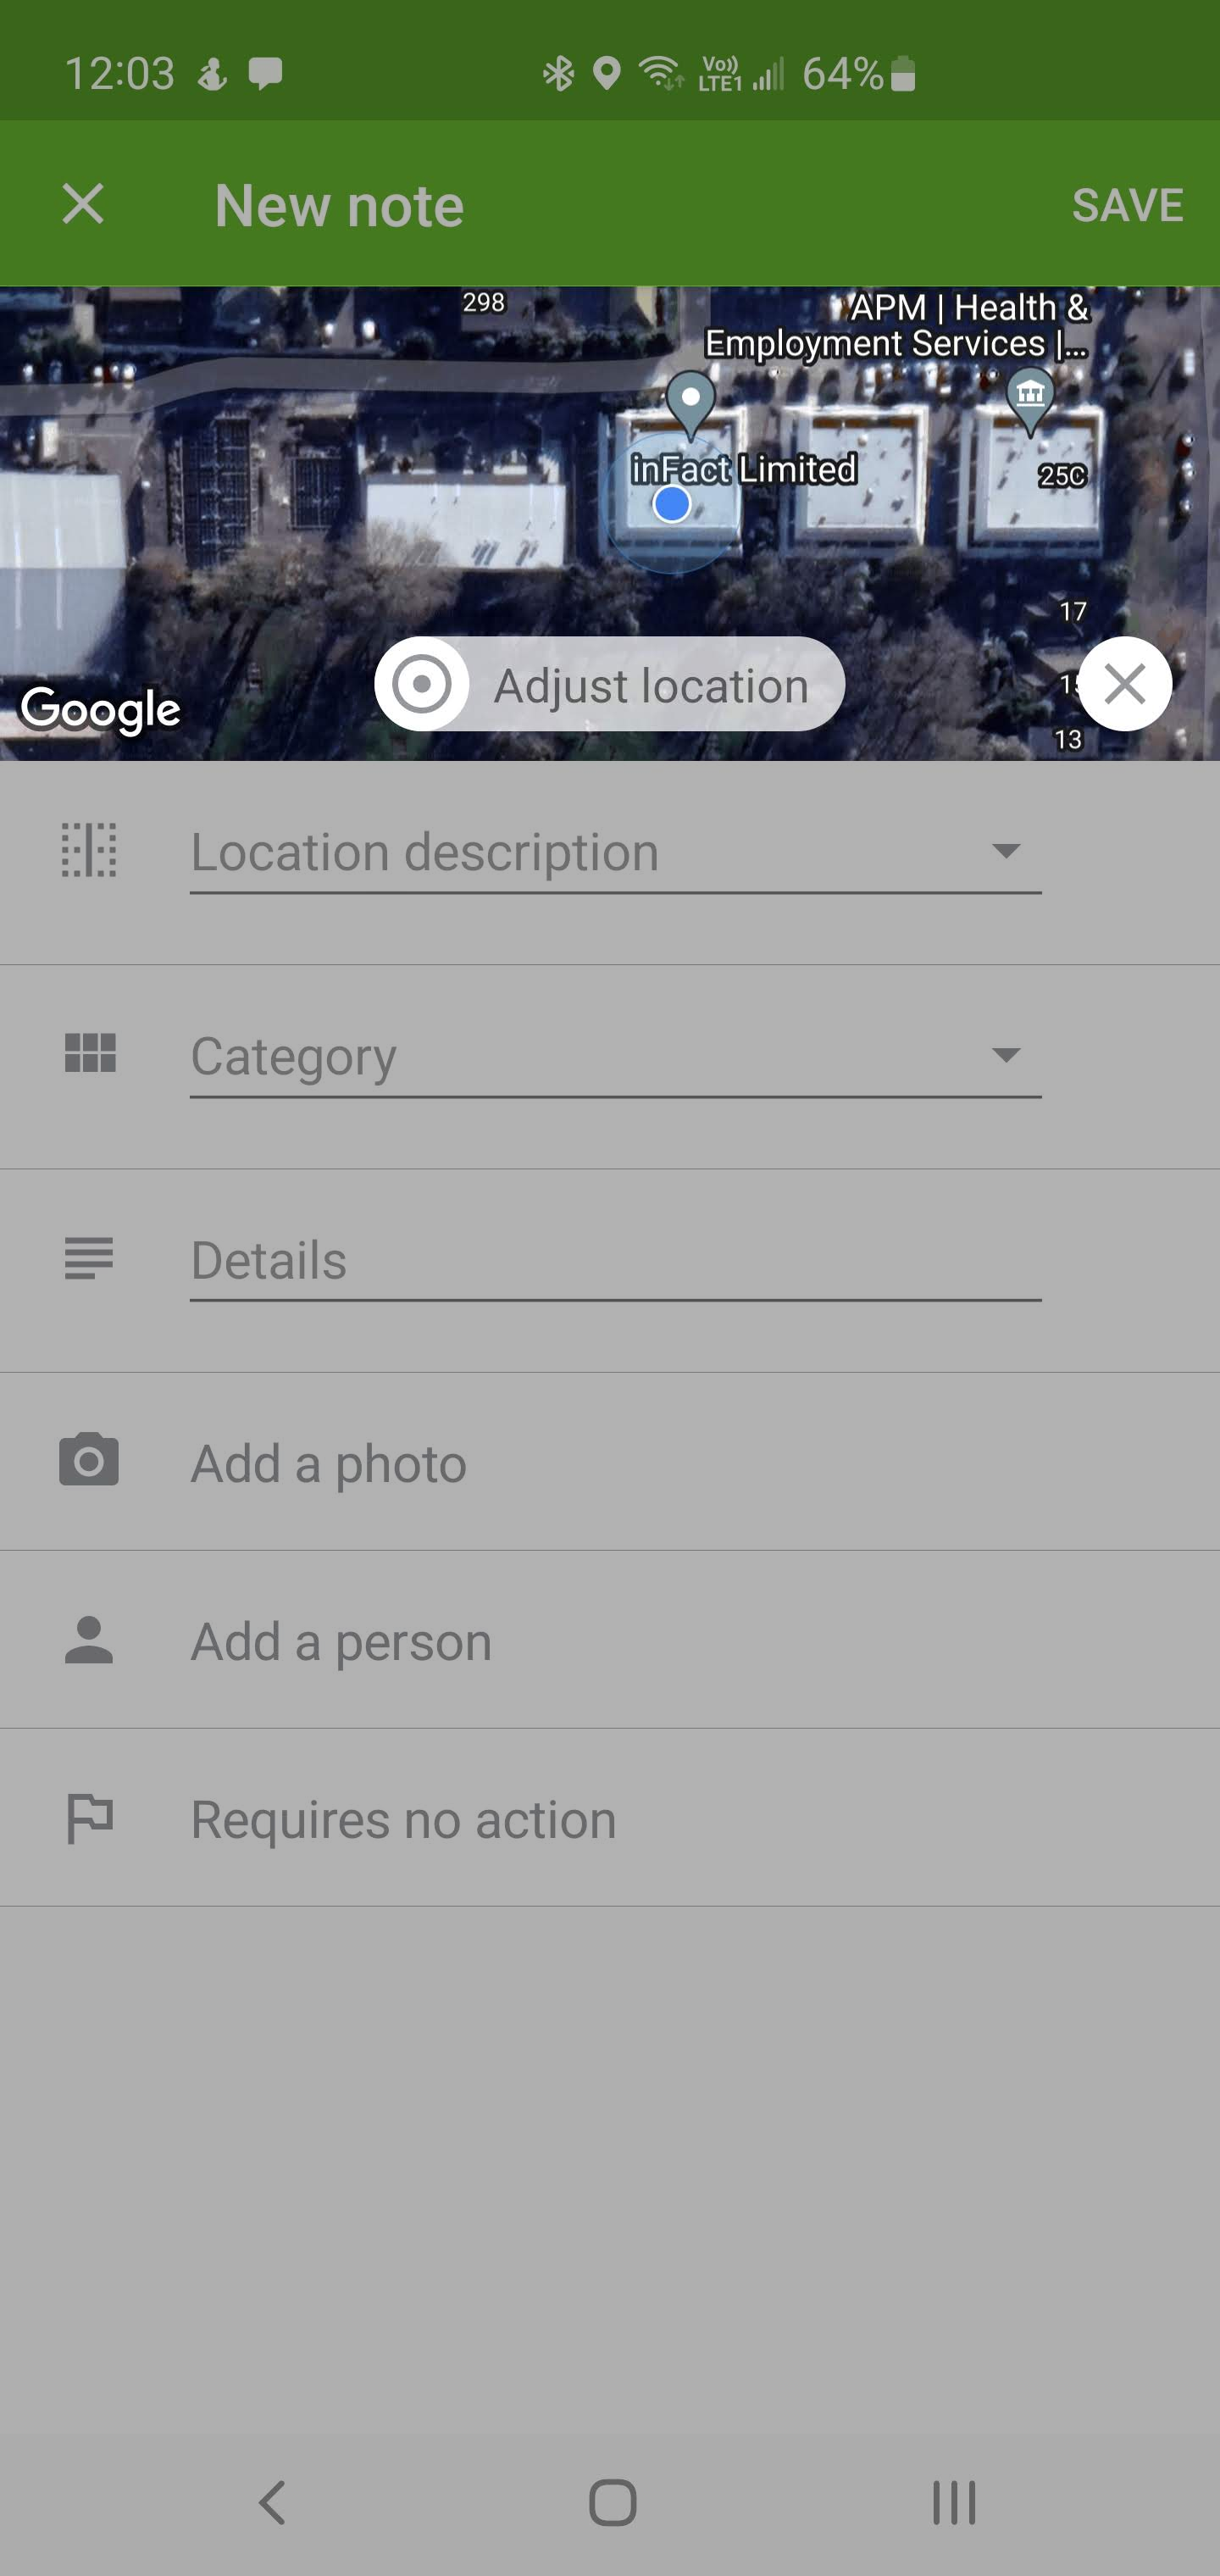
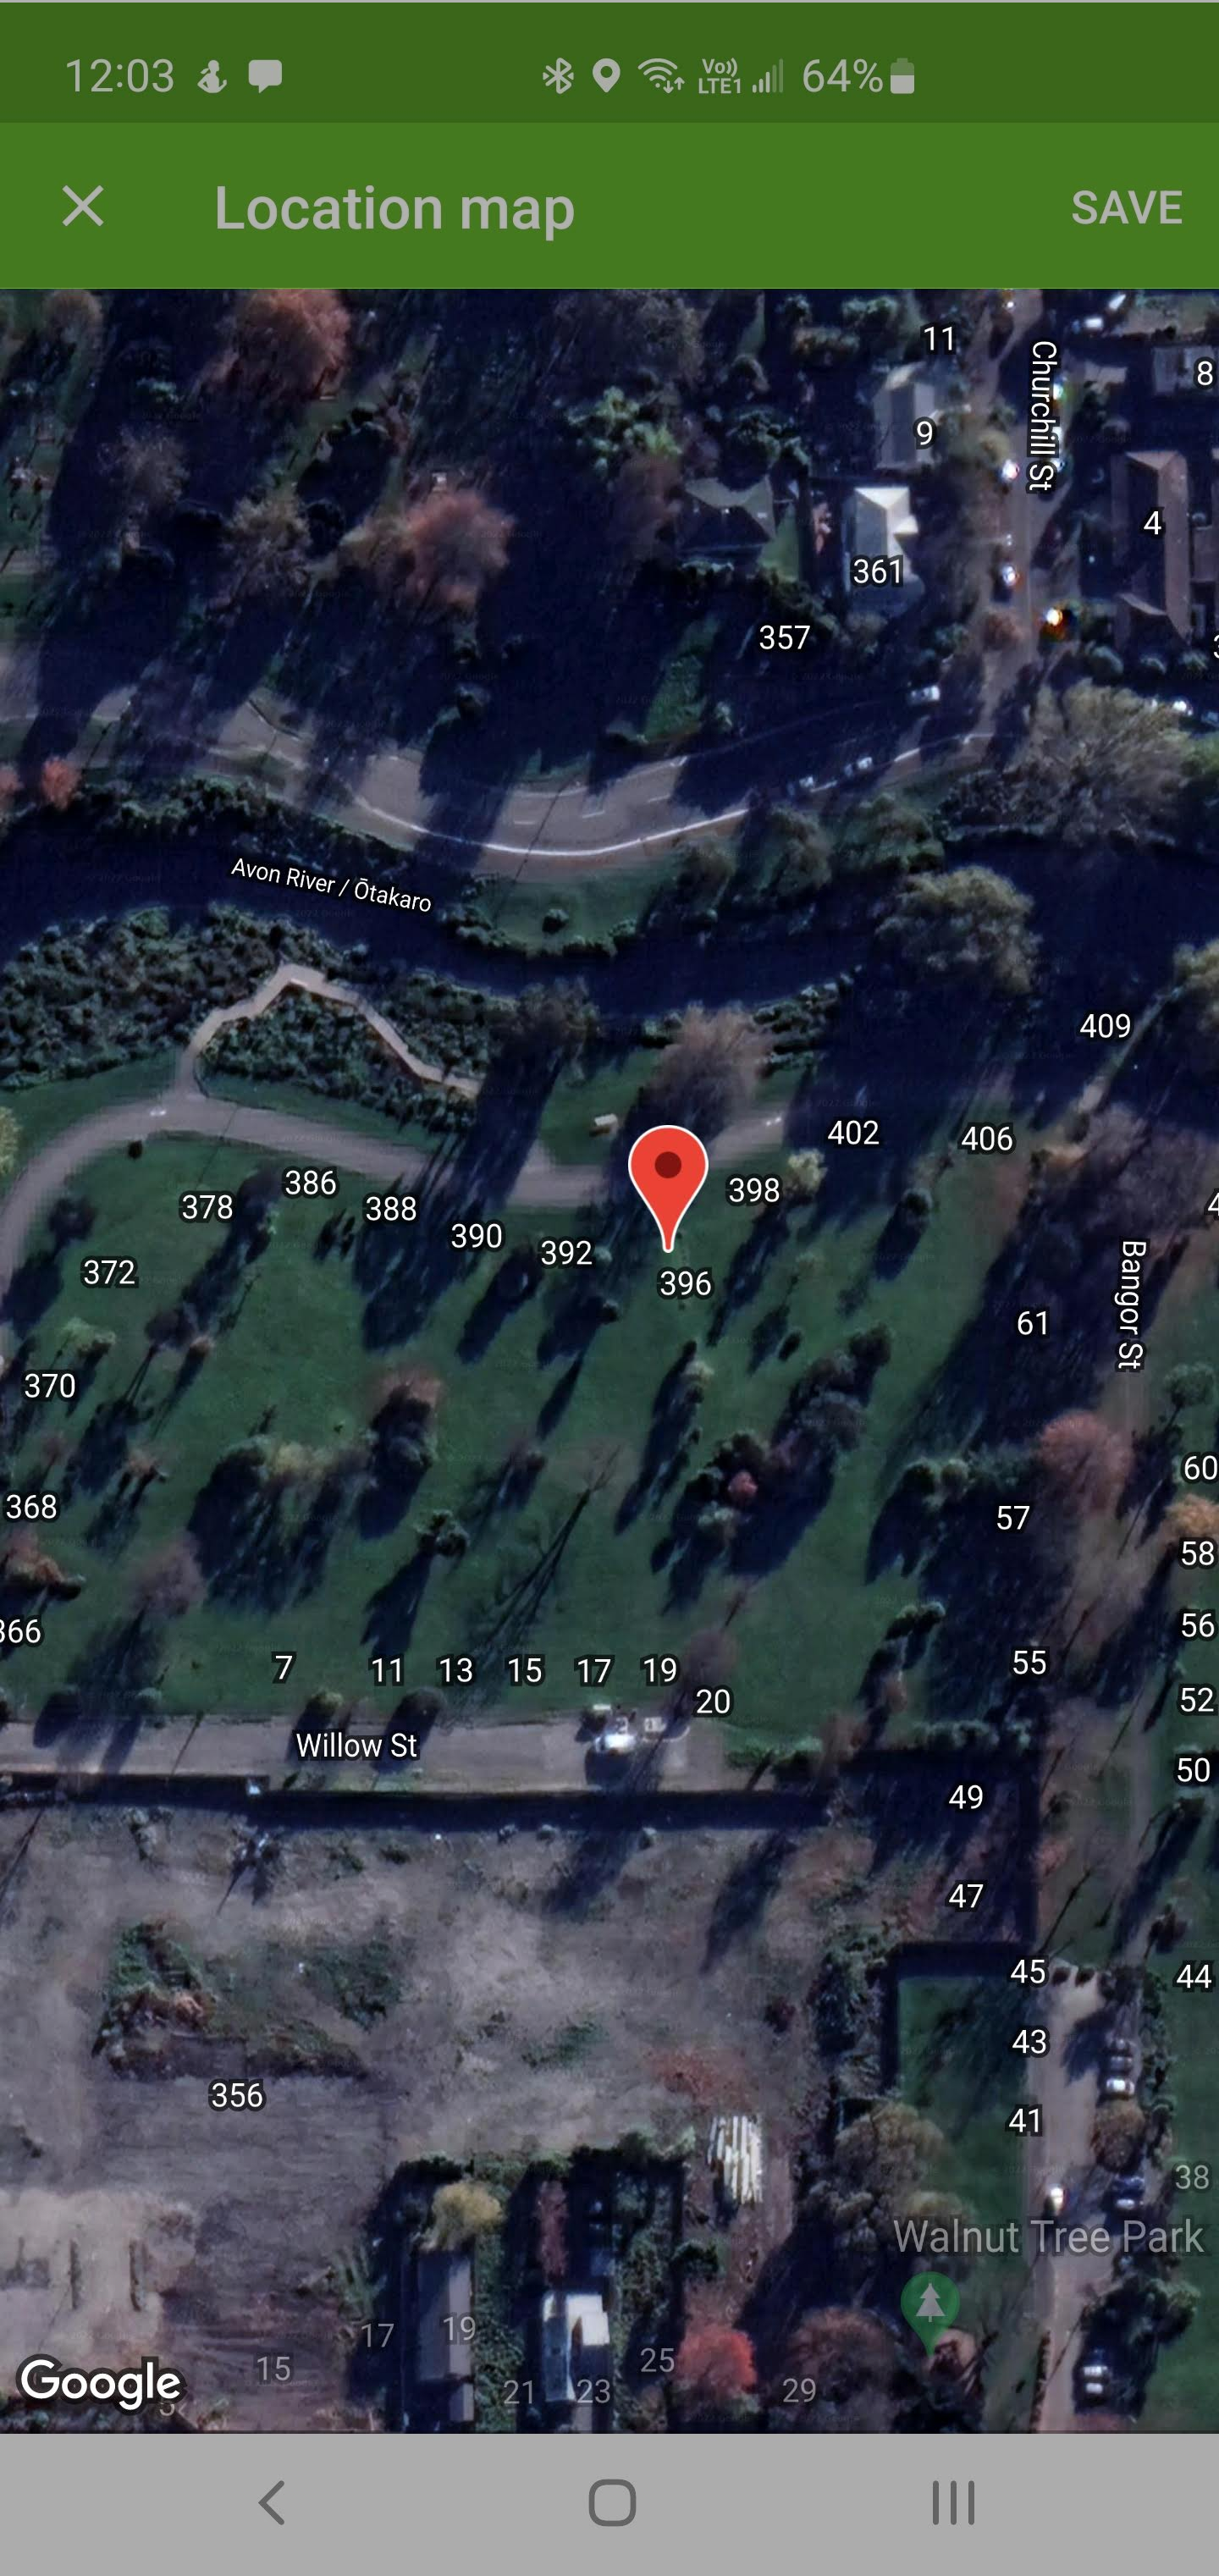
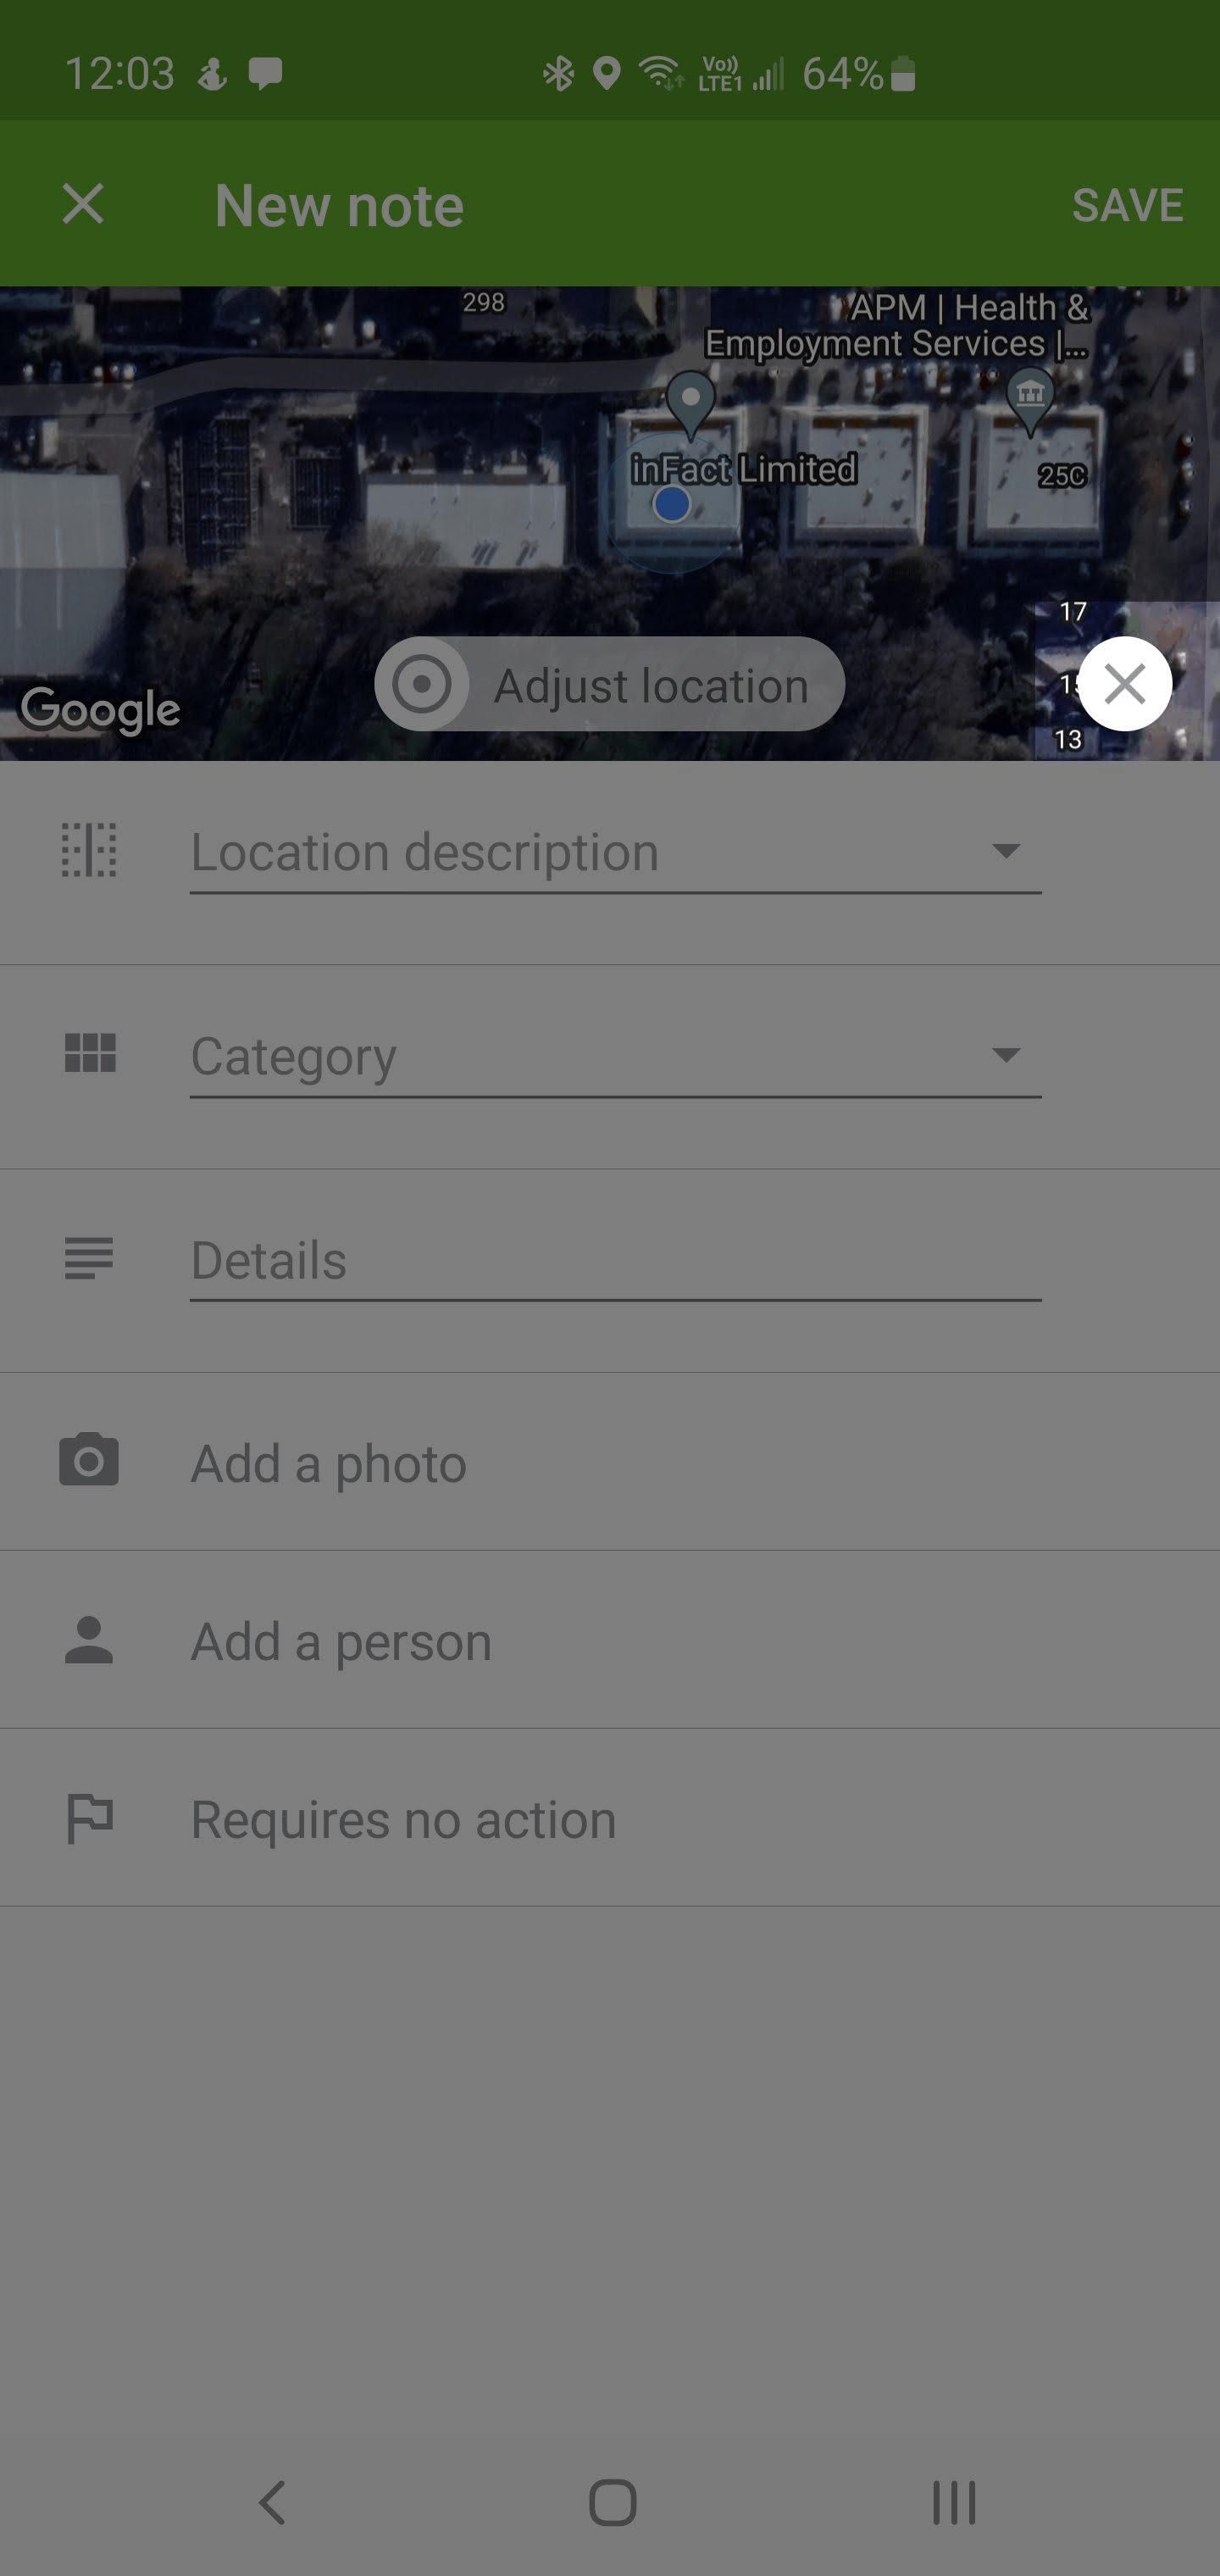
When GPS is enabled, Vure will automatically detect which block you are in and record your GPS coordinates. Your current location is shown by the blue dot - if it seems to be slightly off, then you can click on 'Adjust Location' and click and drag the pin on the map:

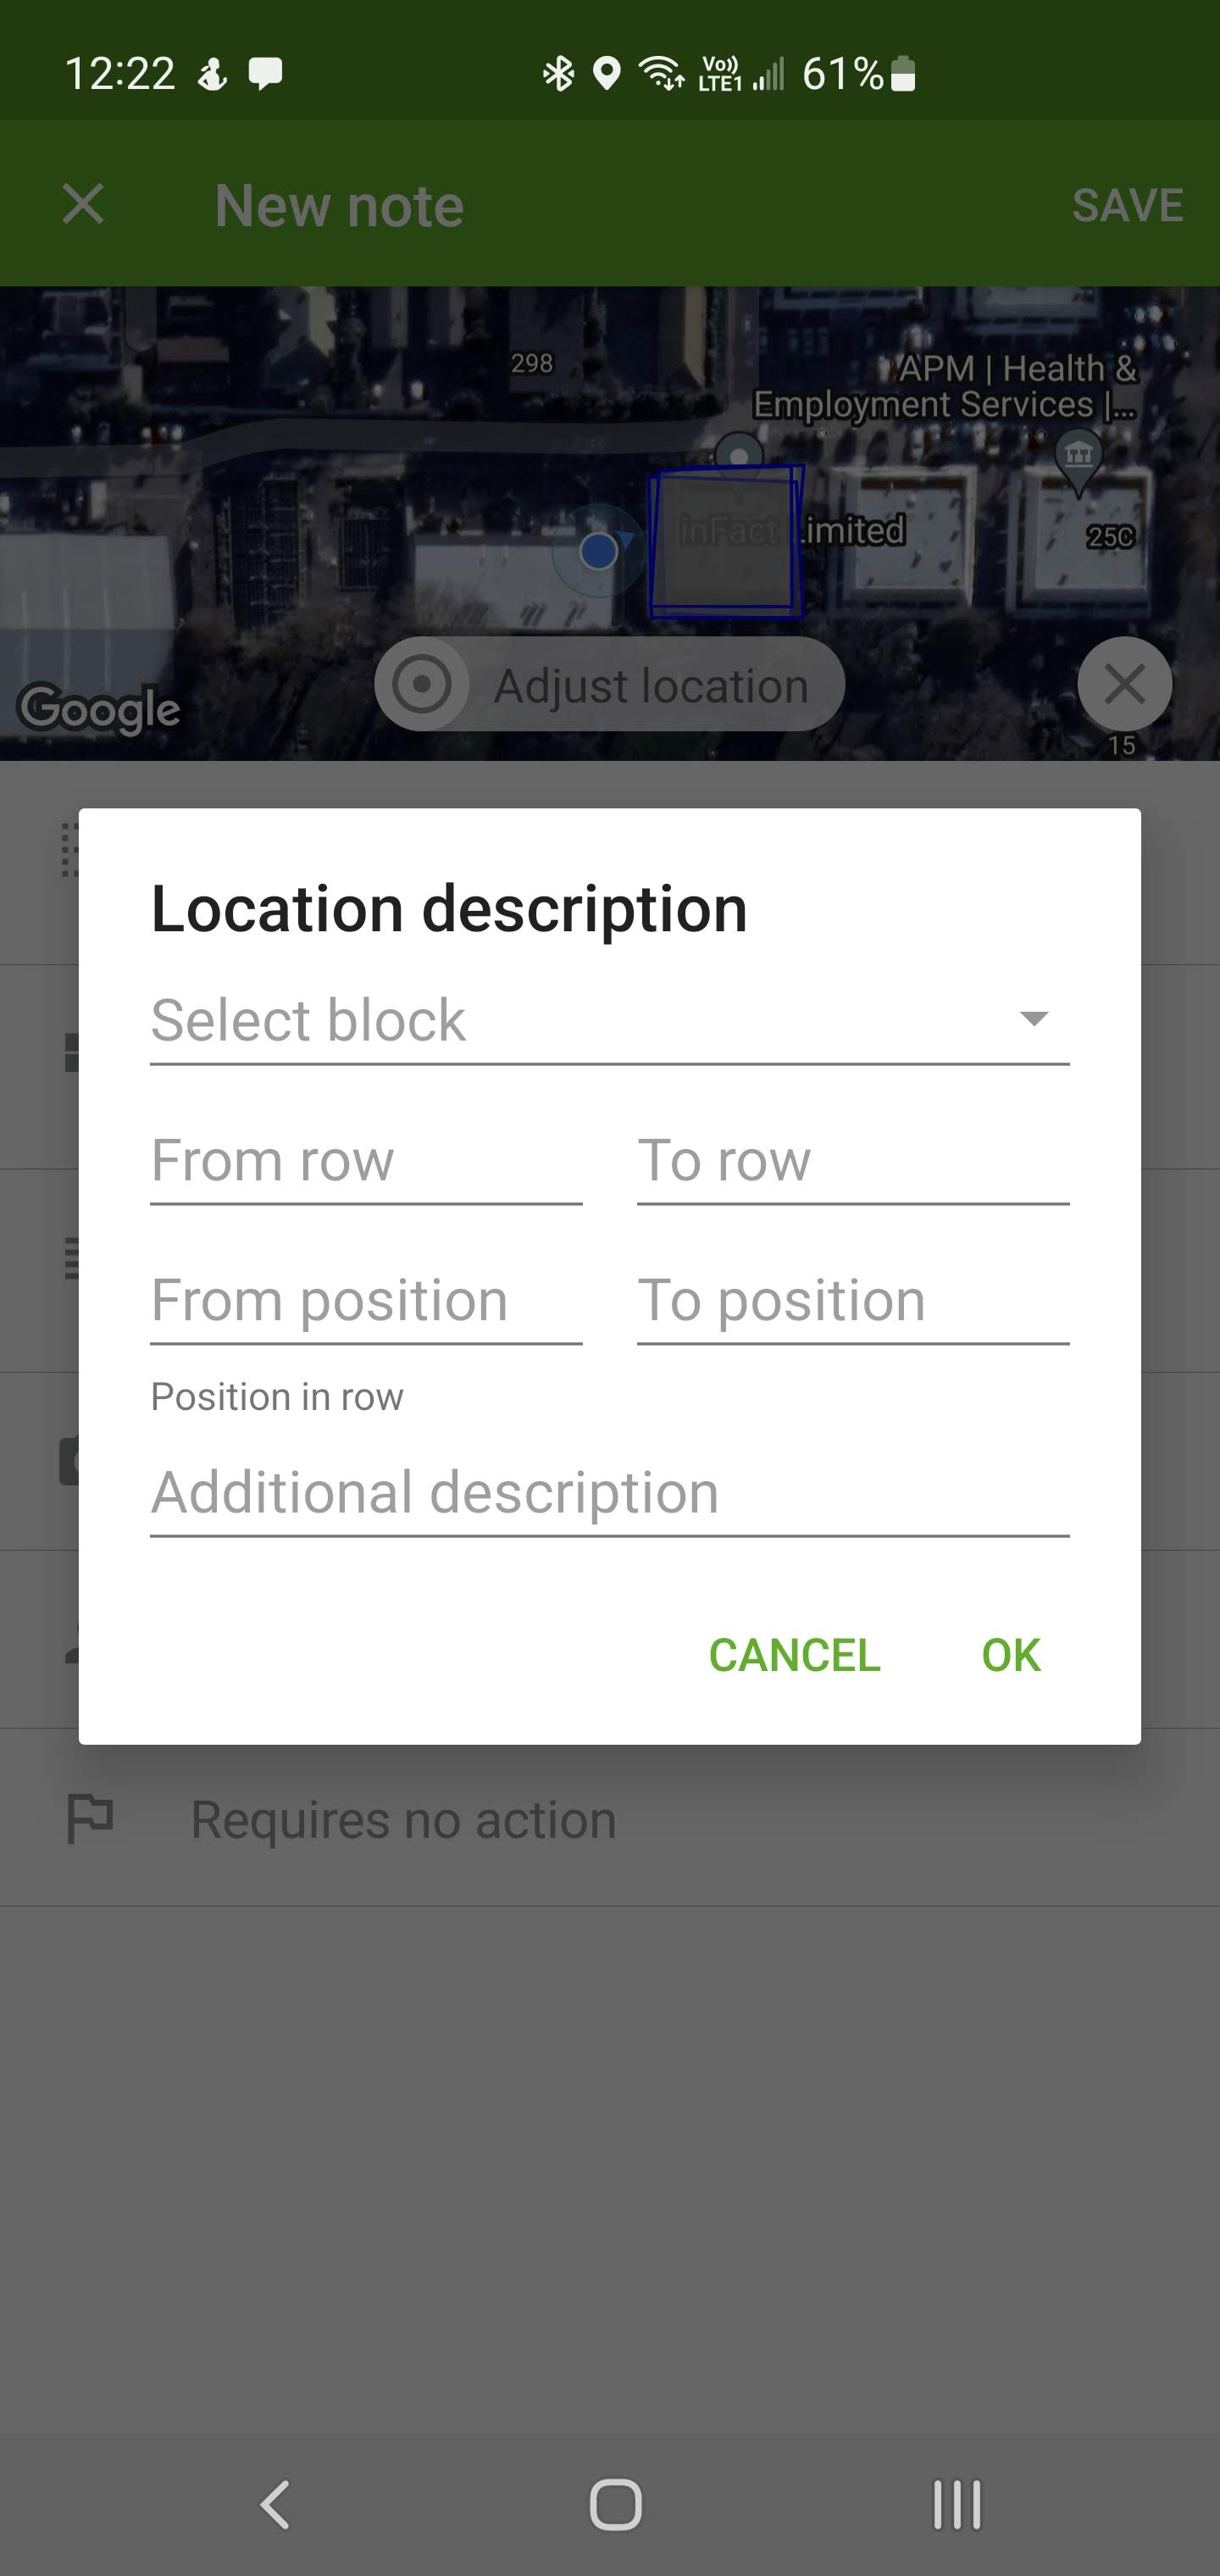
You can also enter more human readable coordinates, to help others navigate back to the same location:

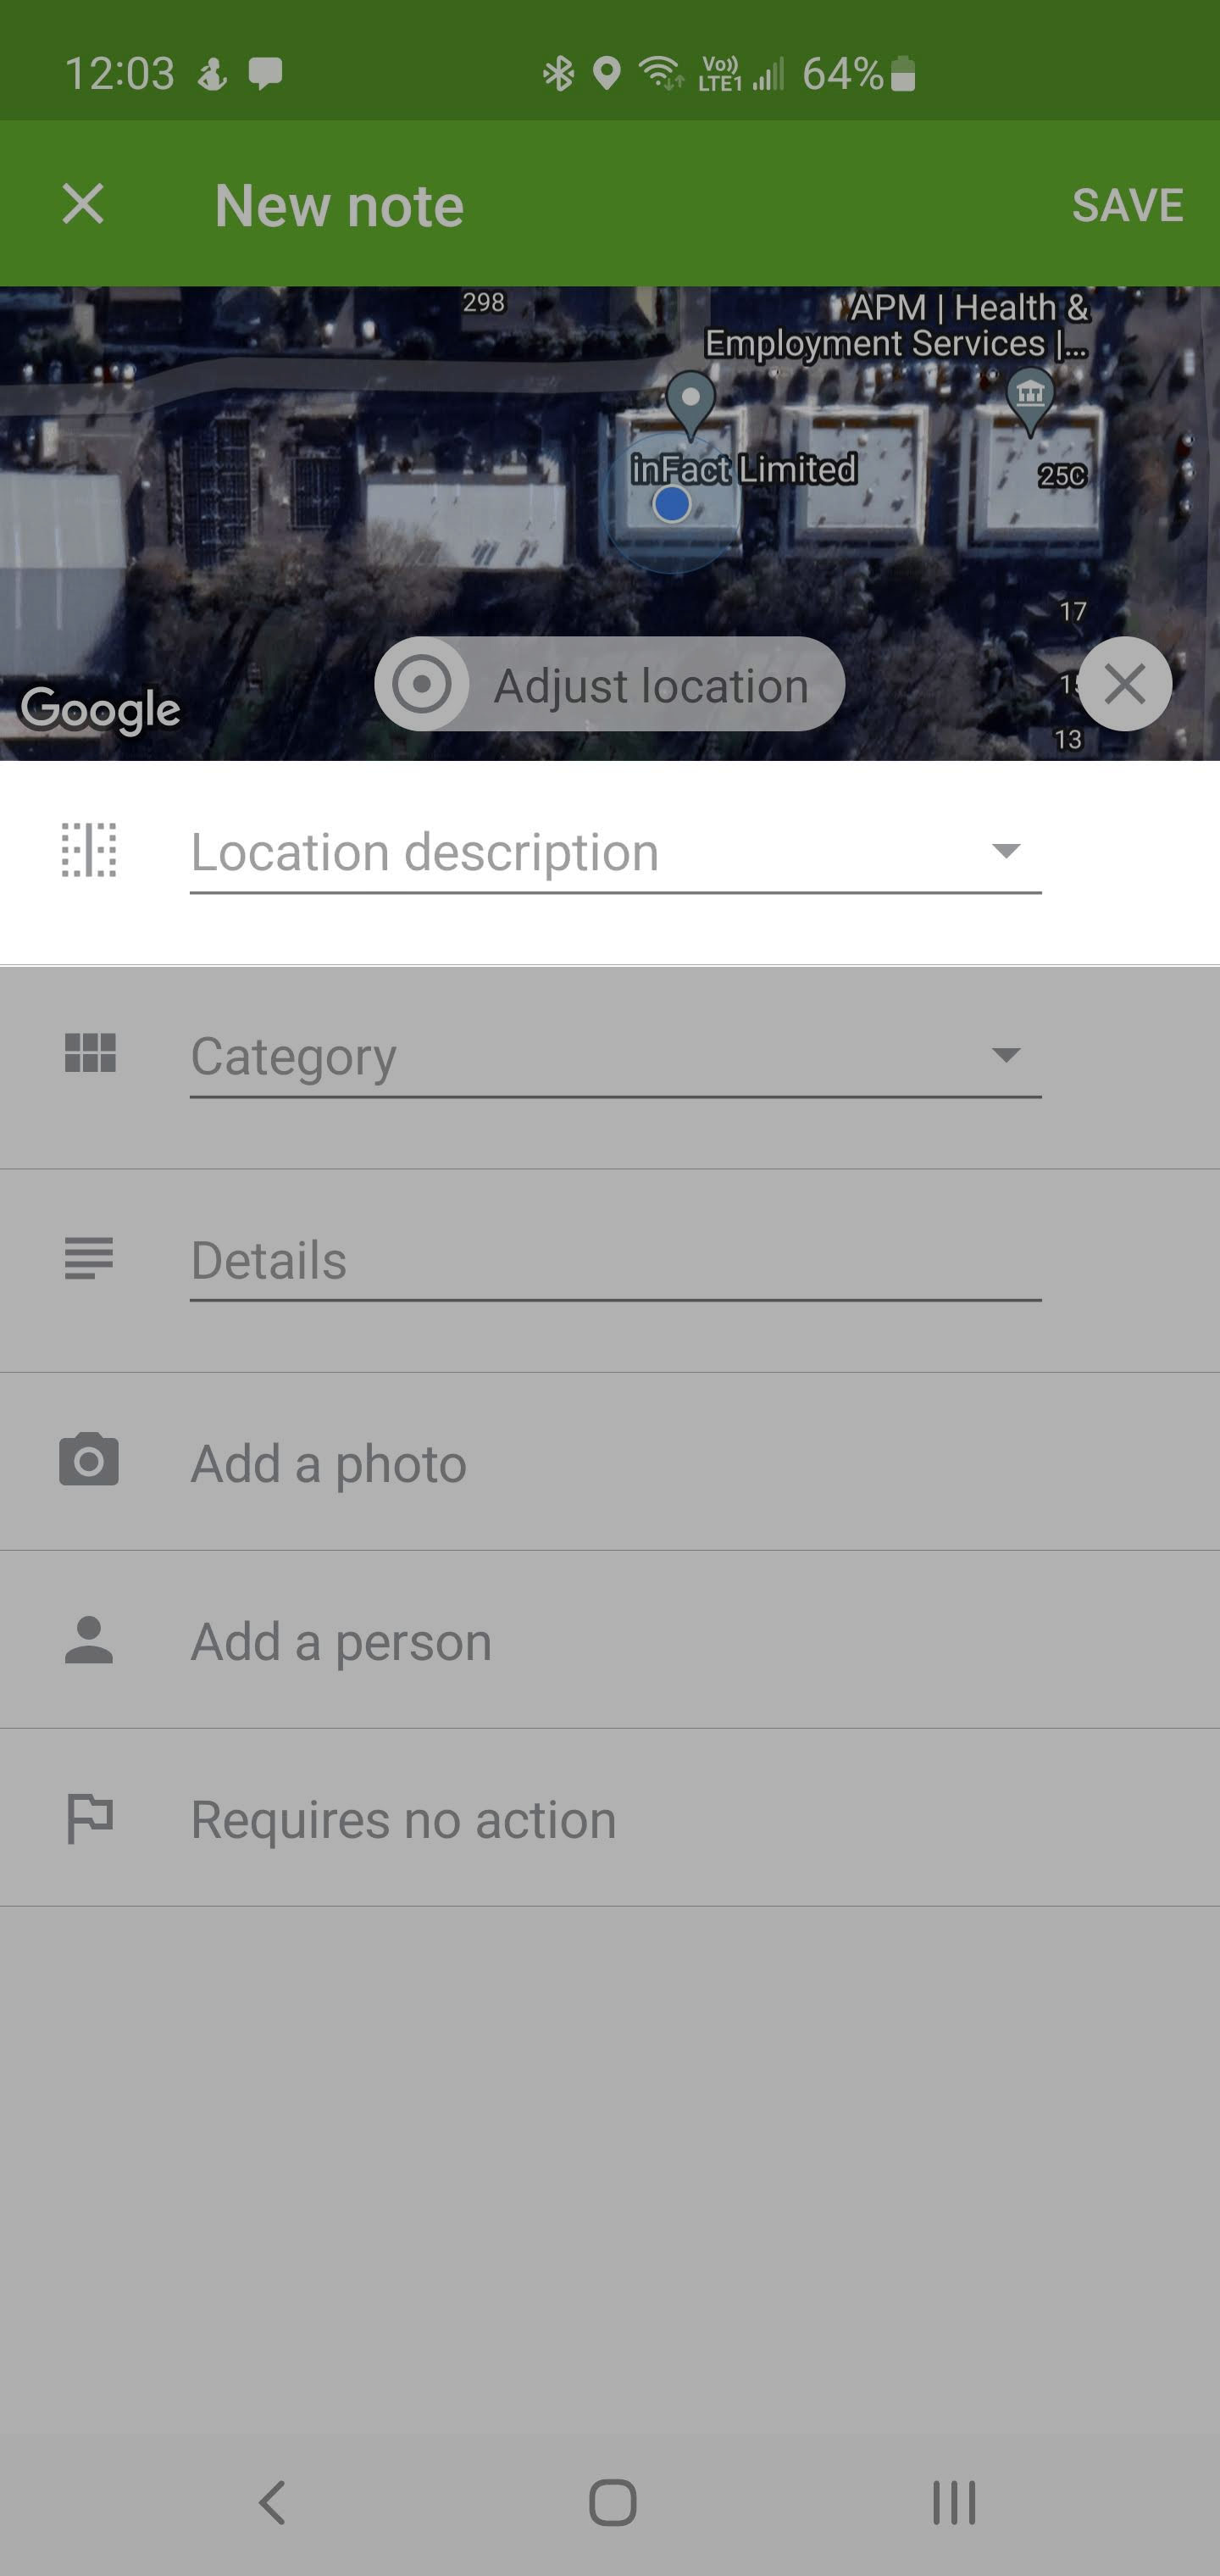
If you wish to not save any geolocation information, you can tap the X button in the lower right of the map:

(Optional) Select a category & sub-category

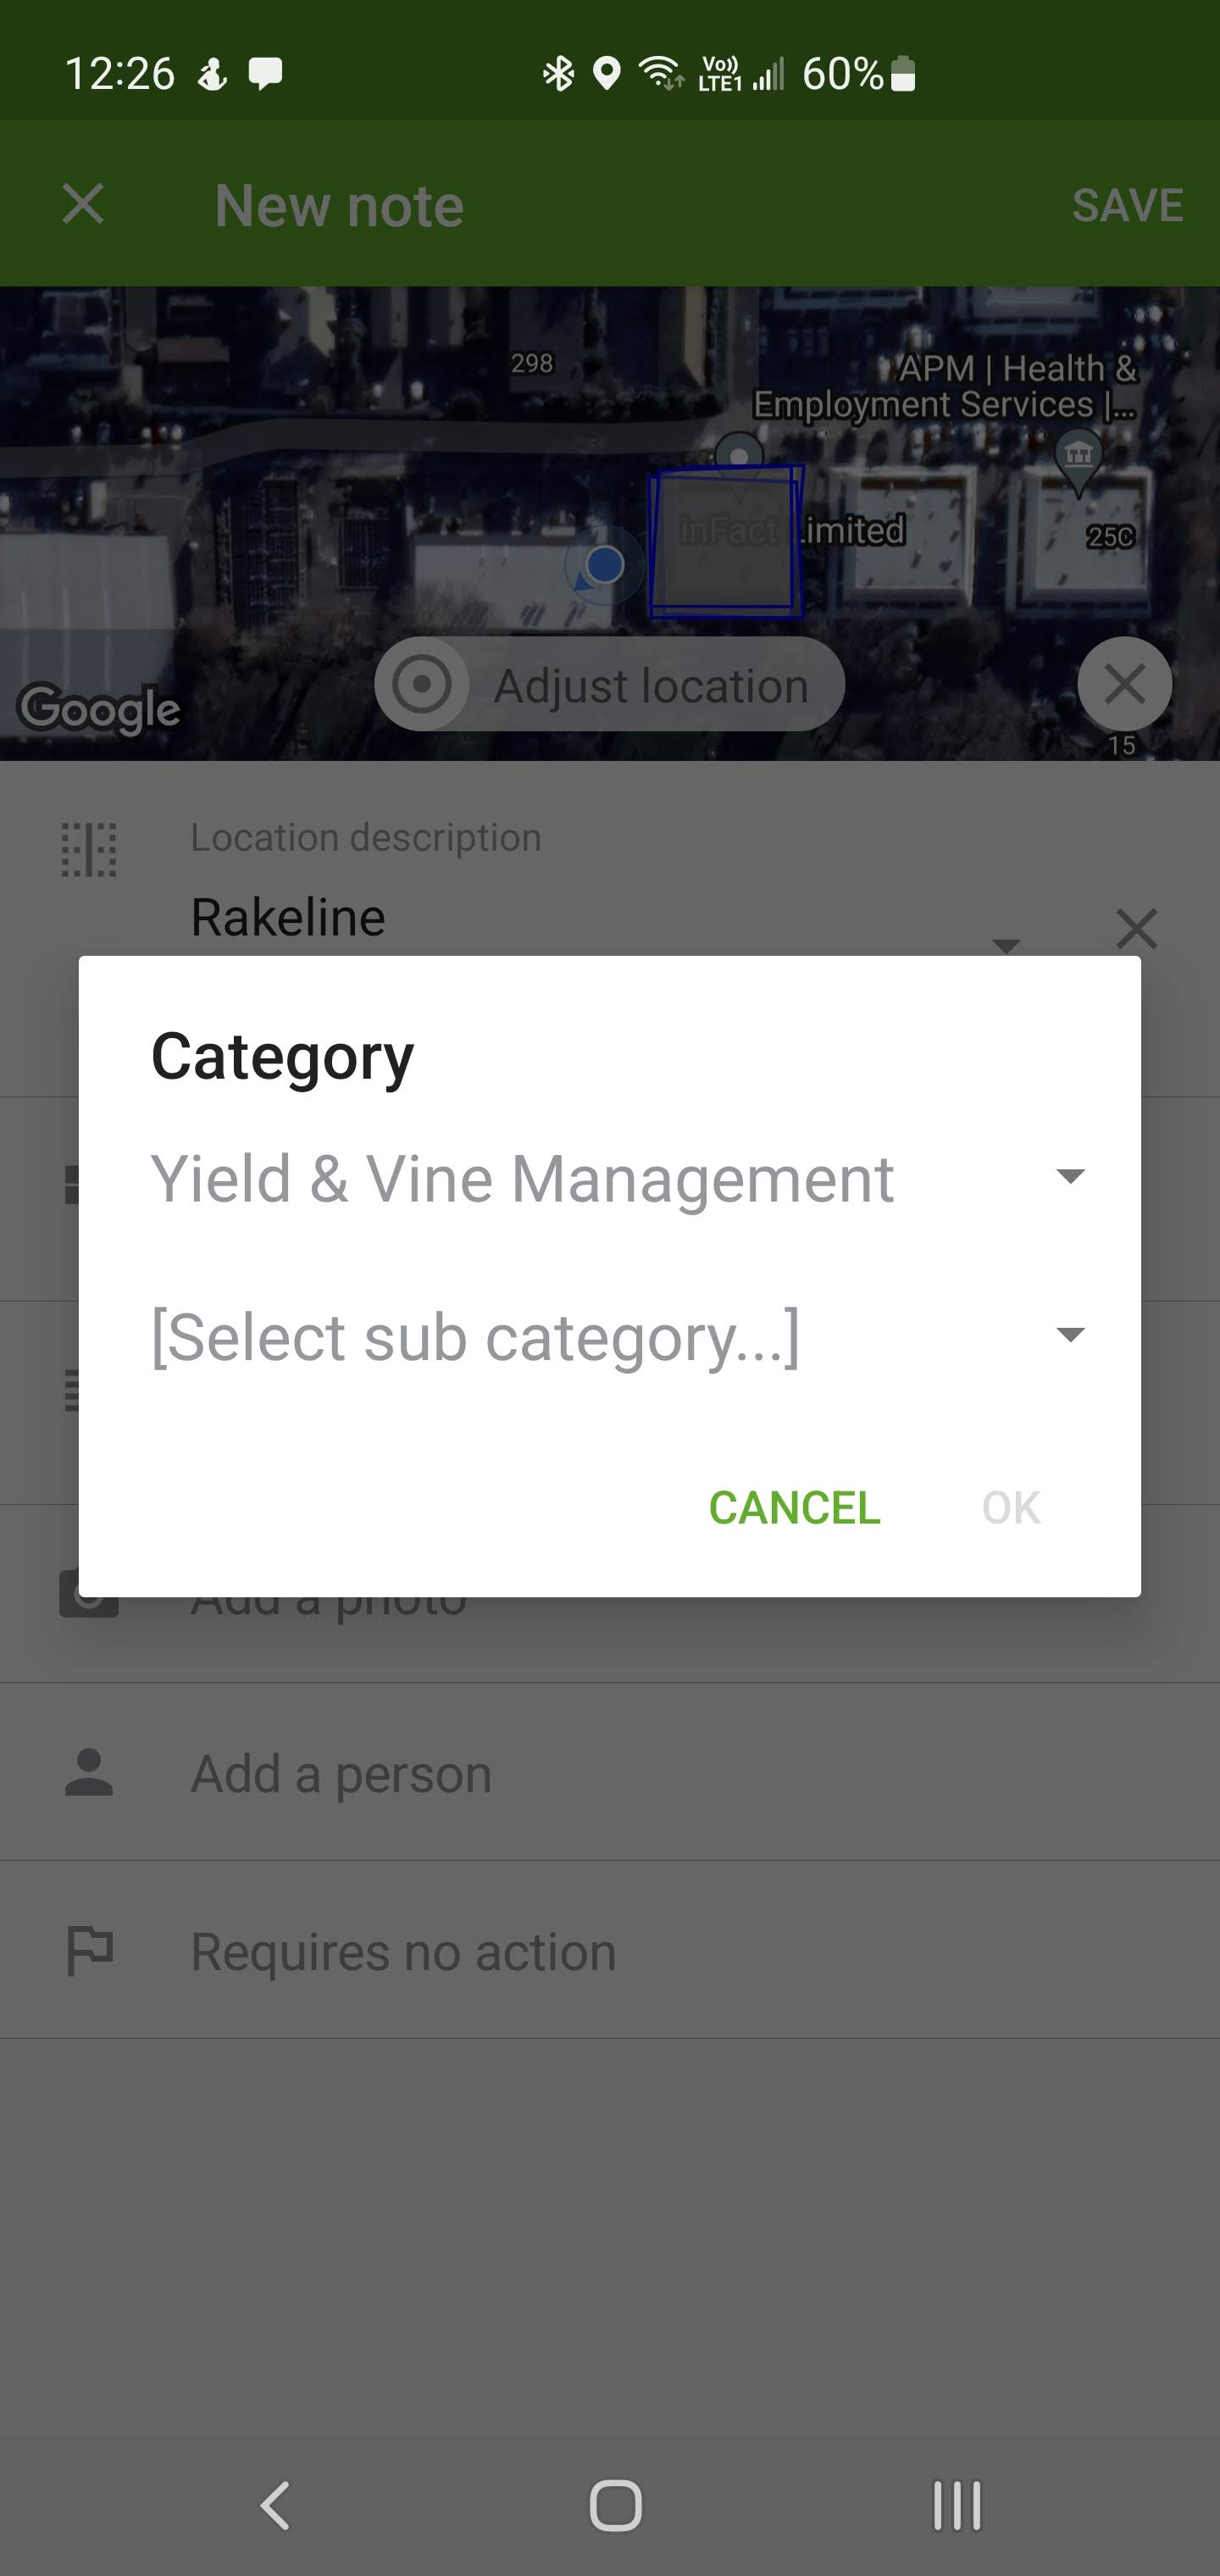
This helps provide 'at a glance' information to anyone reviewing the notes

(Optional) Add extra text details

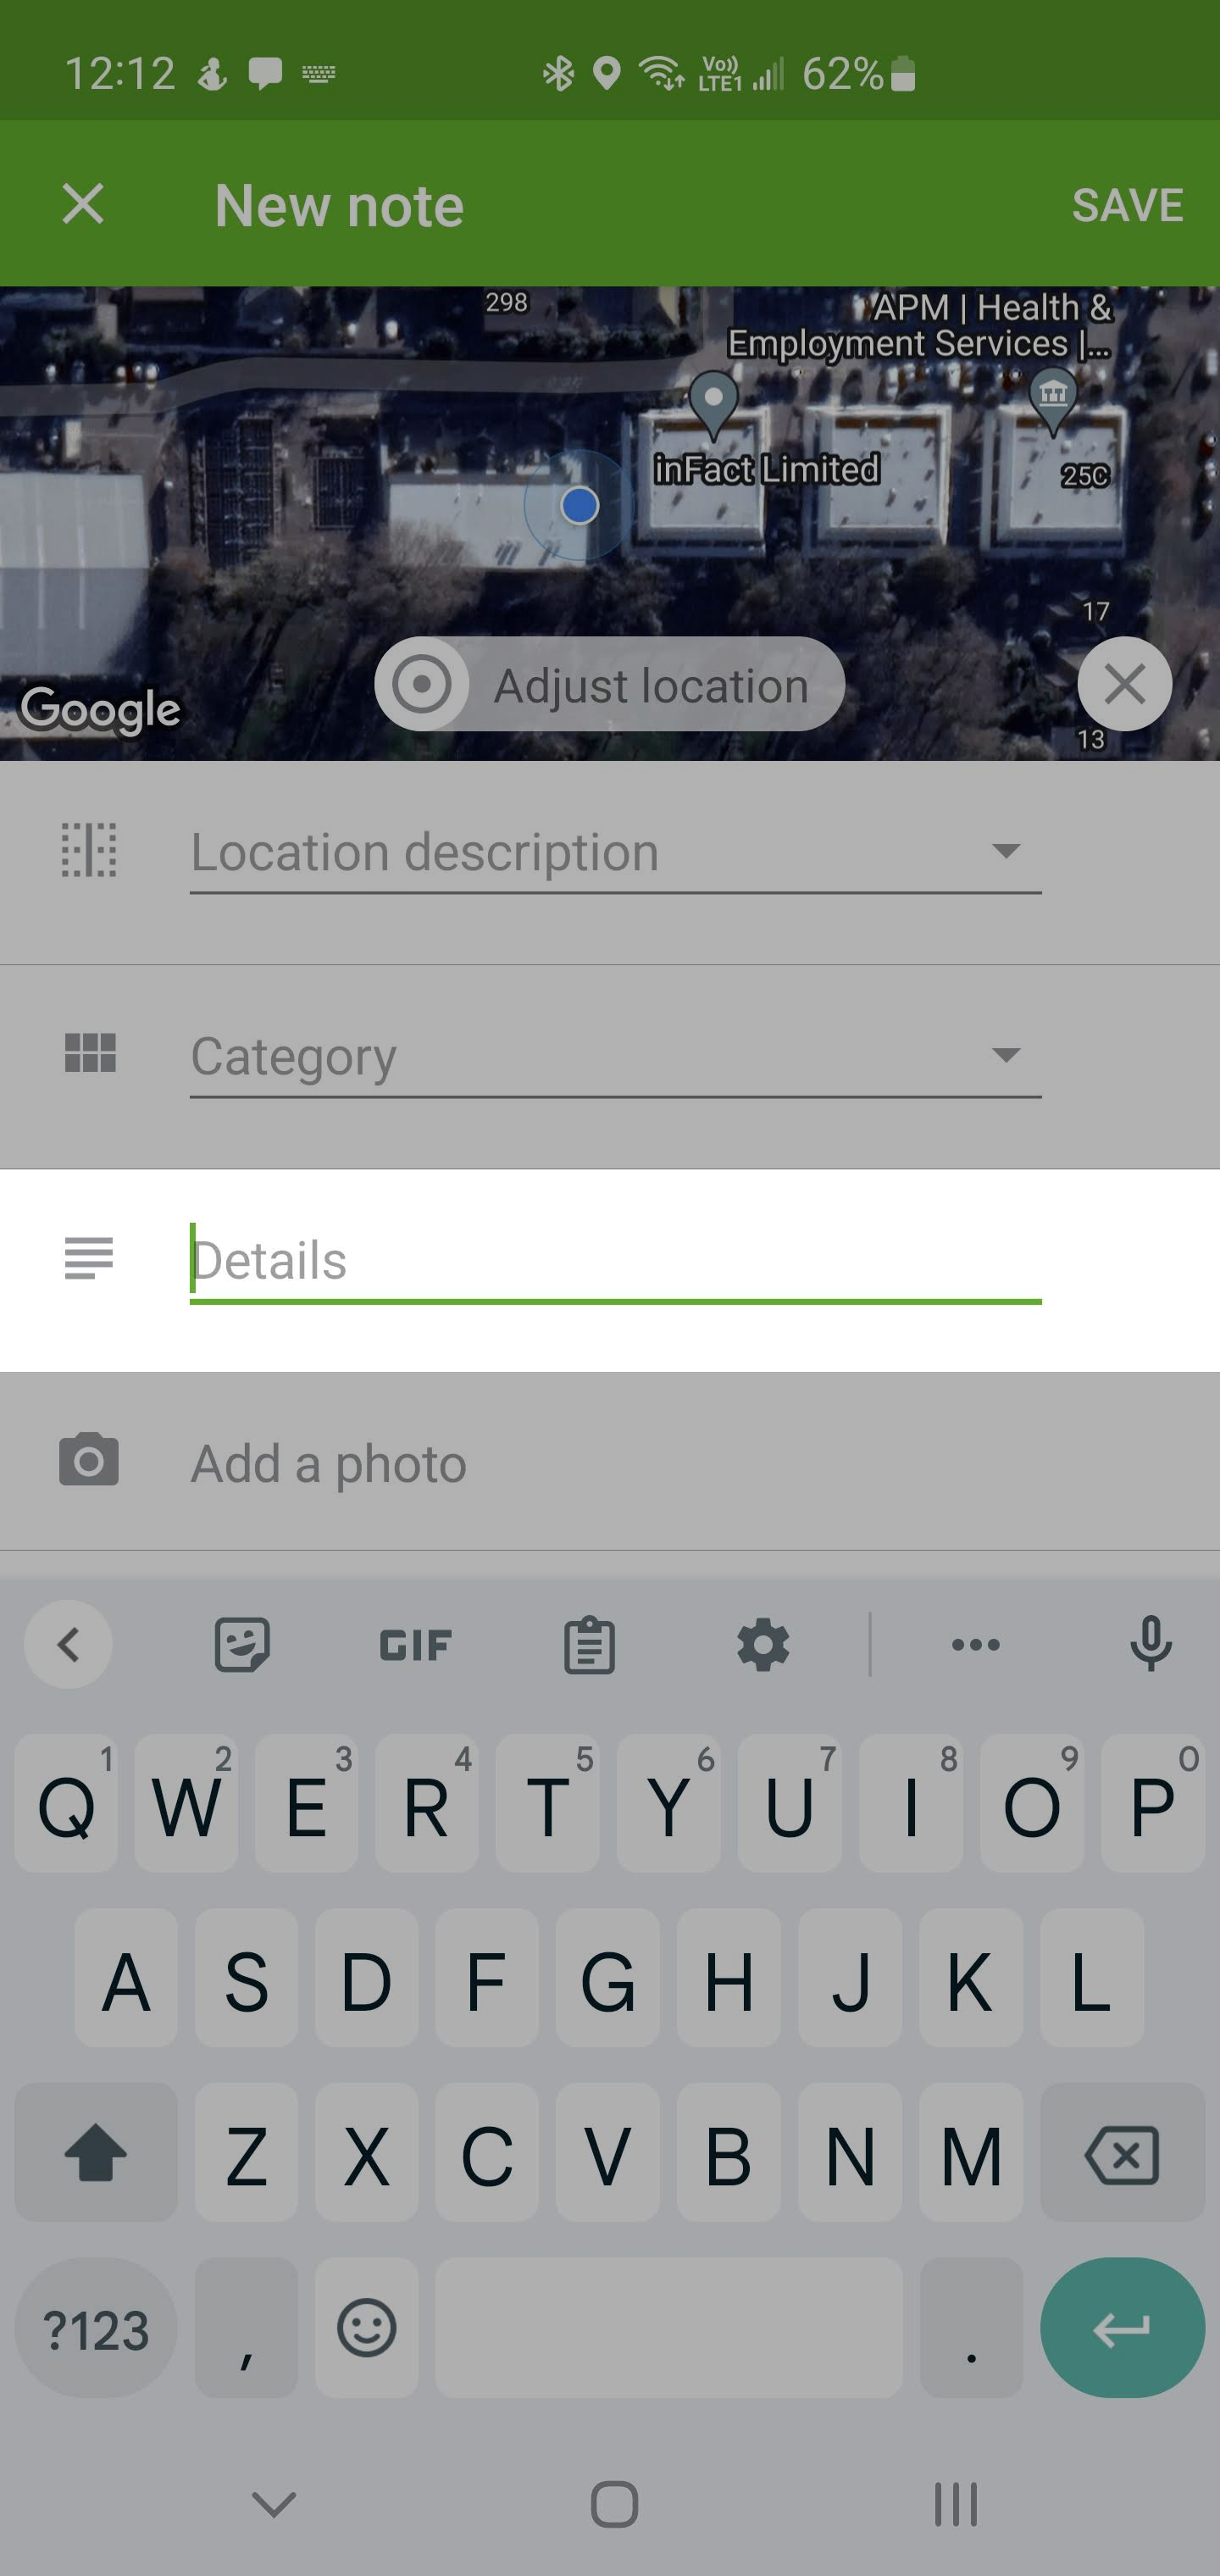
Add further text details and information that will help diagnose the issue or provide useful context.

(Optional) Add an image

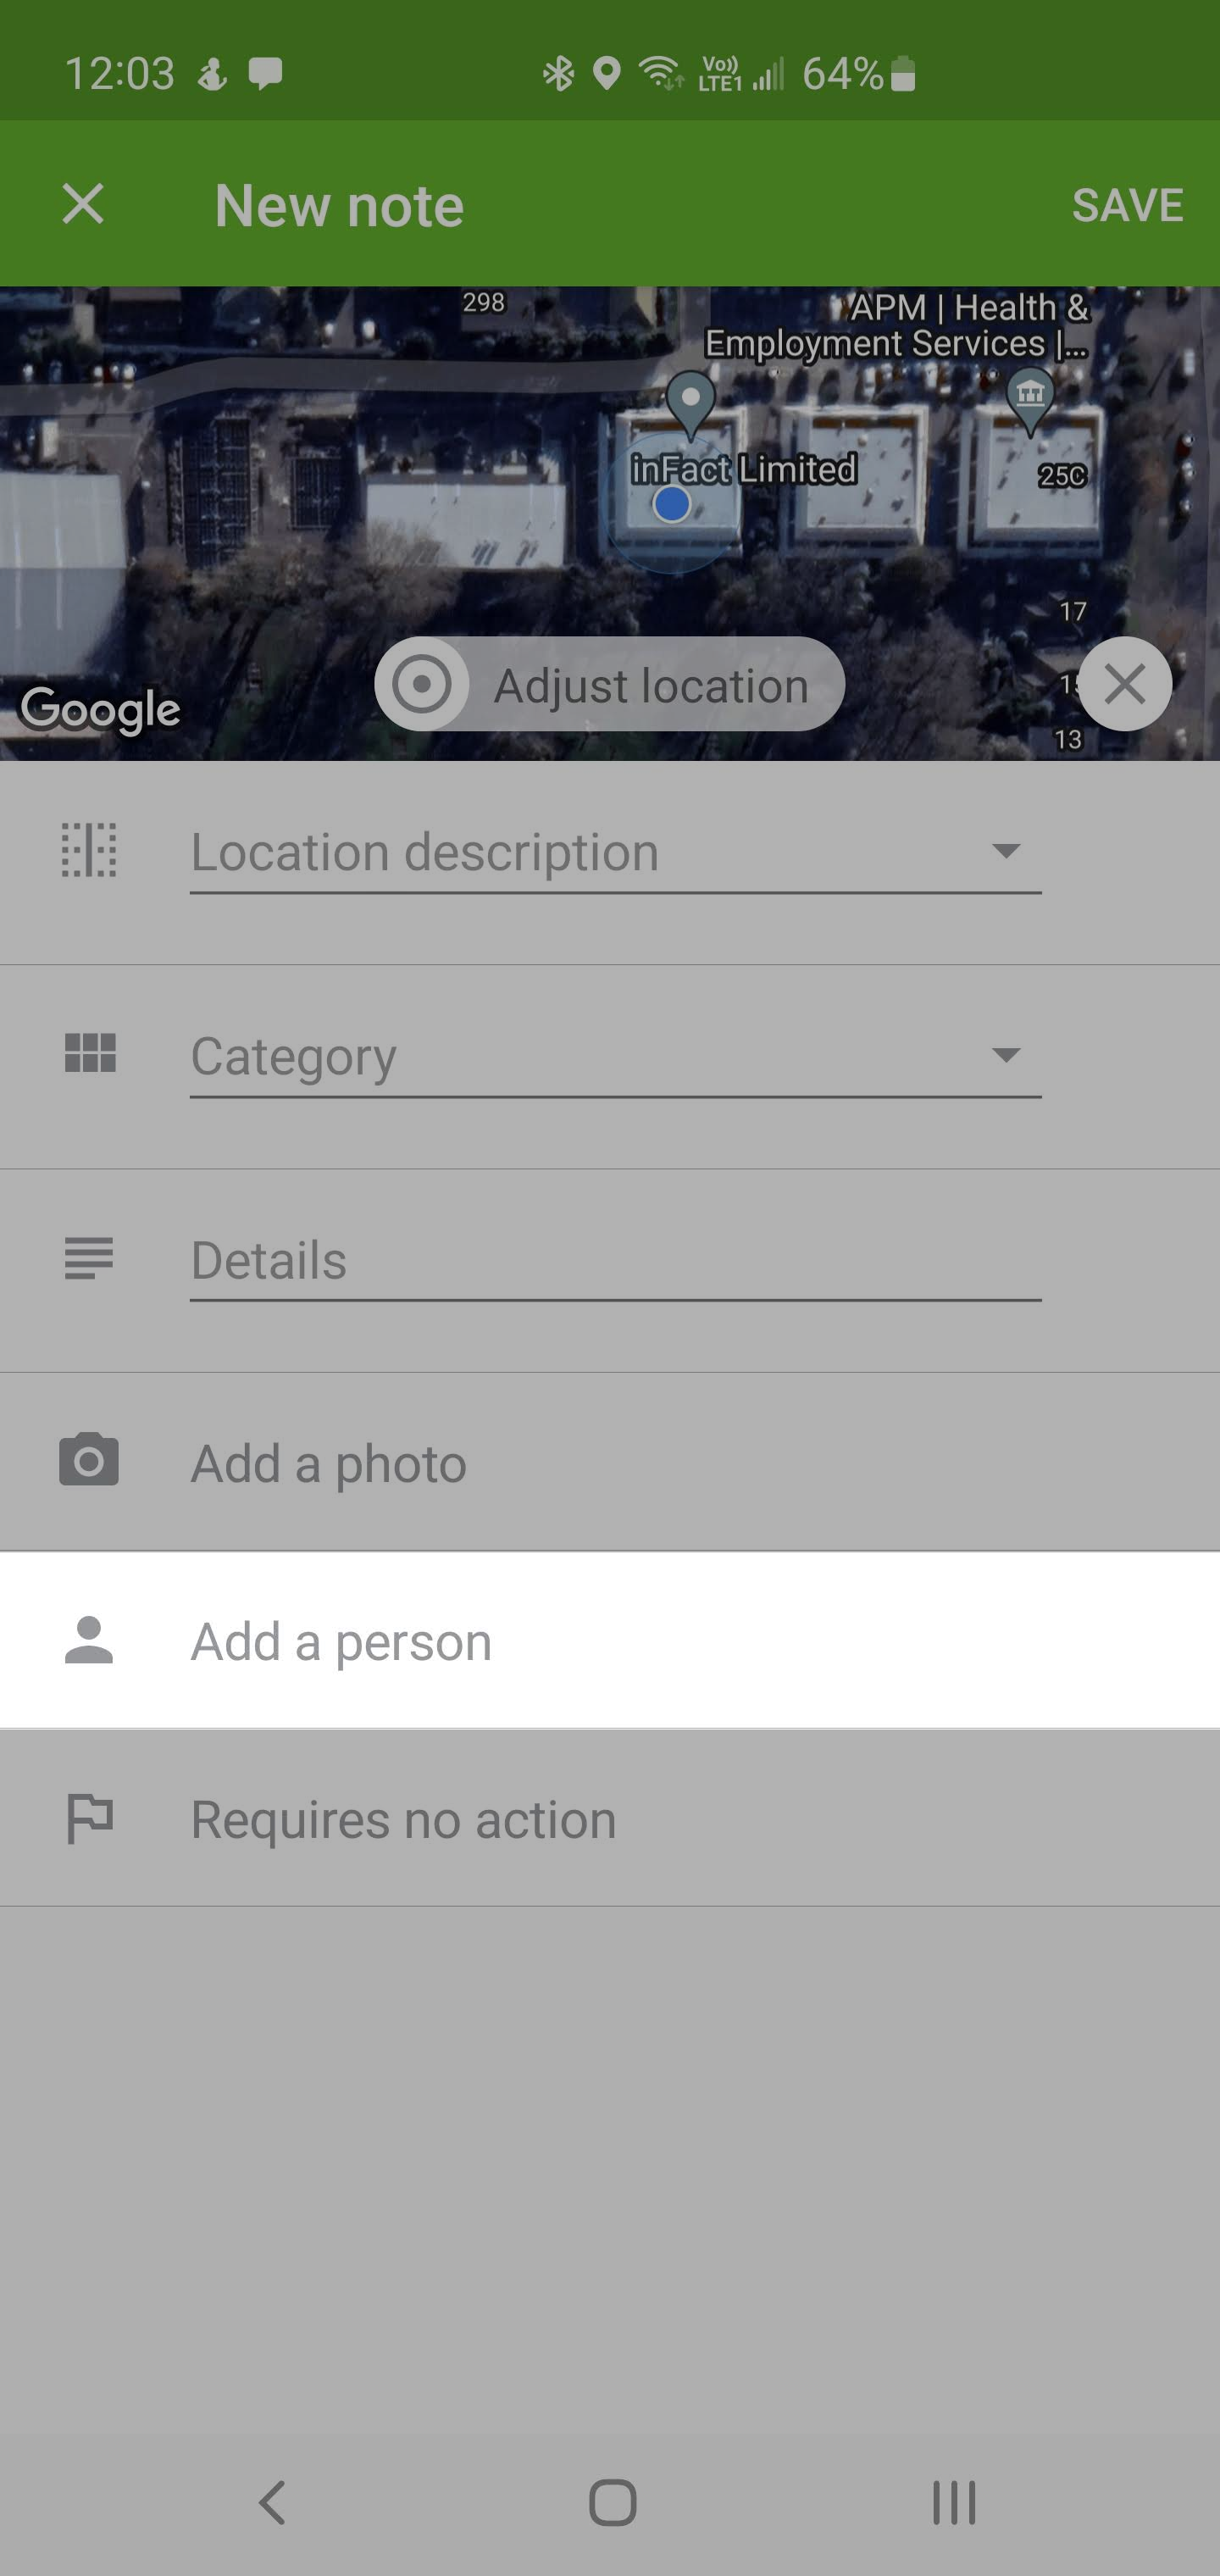
Add an image, which is useful for less experienced staff to quickly share in-field concerns with more experienced members.

(Optional) Add a person

Tagging a person into the note will make the note appear in their 'YOURS' list.

(Optional) Tag 'Requires Action' flag

Selecting this flag will notify all users that have also been tagged into the note (above) about this item to make it easier for them to follow up. It will also highlight the note in their mobile app 'YOURS' list, as well as on the web app.